News

ZHIYUN Crane 4E: Redefining Lightweight Stability

Dec 04, 2024
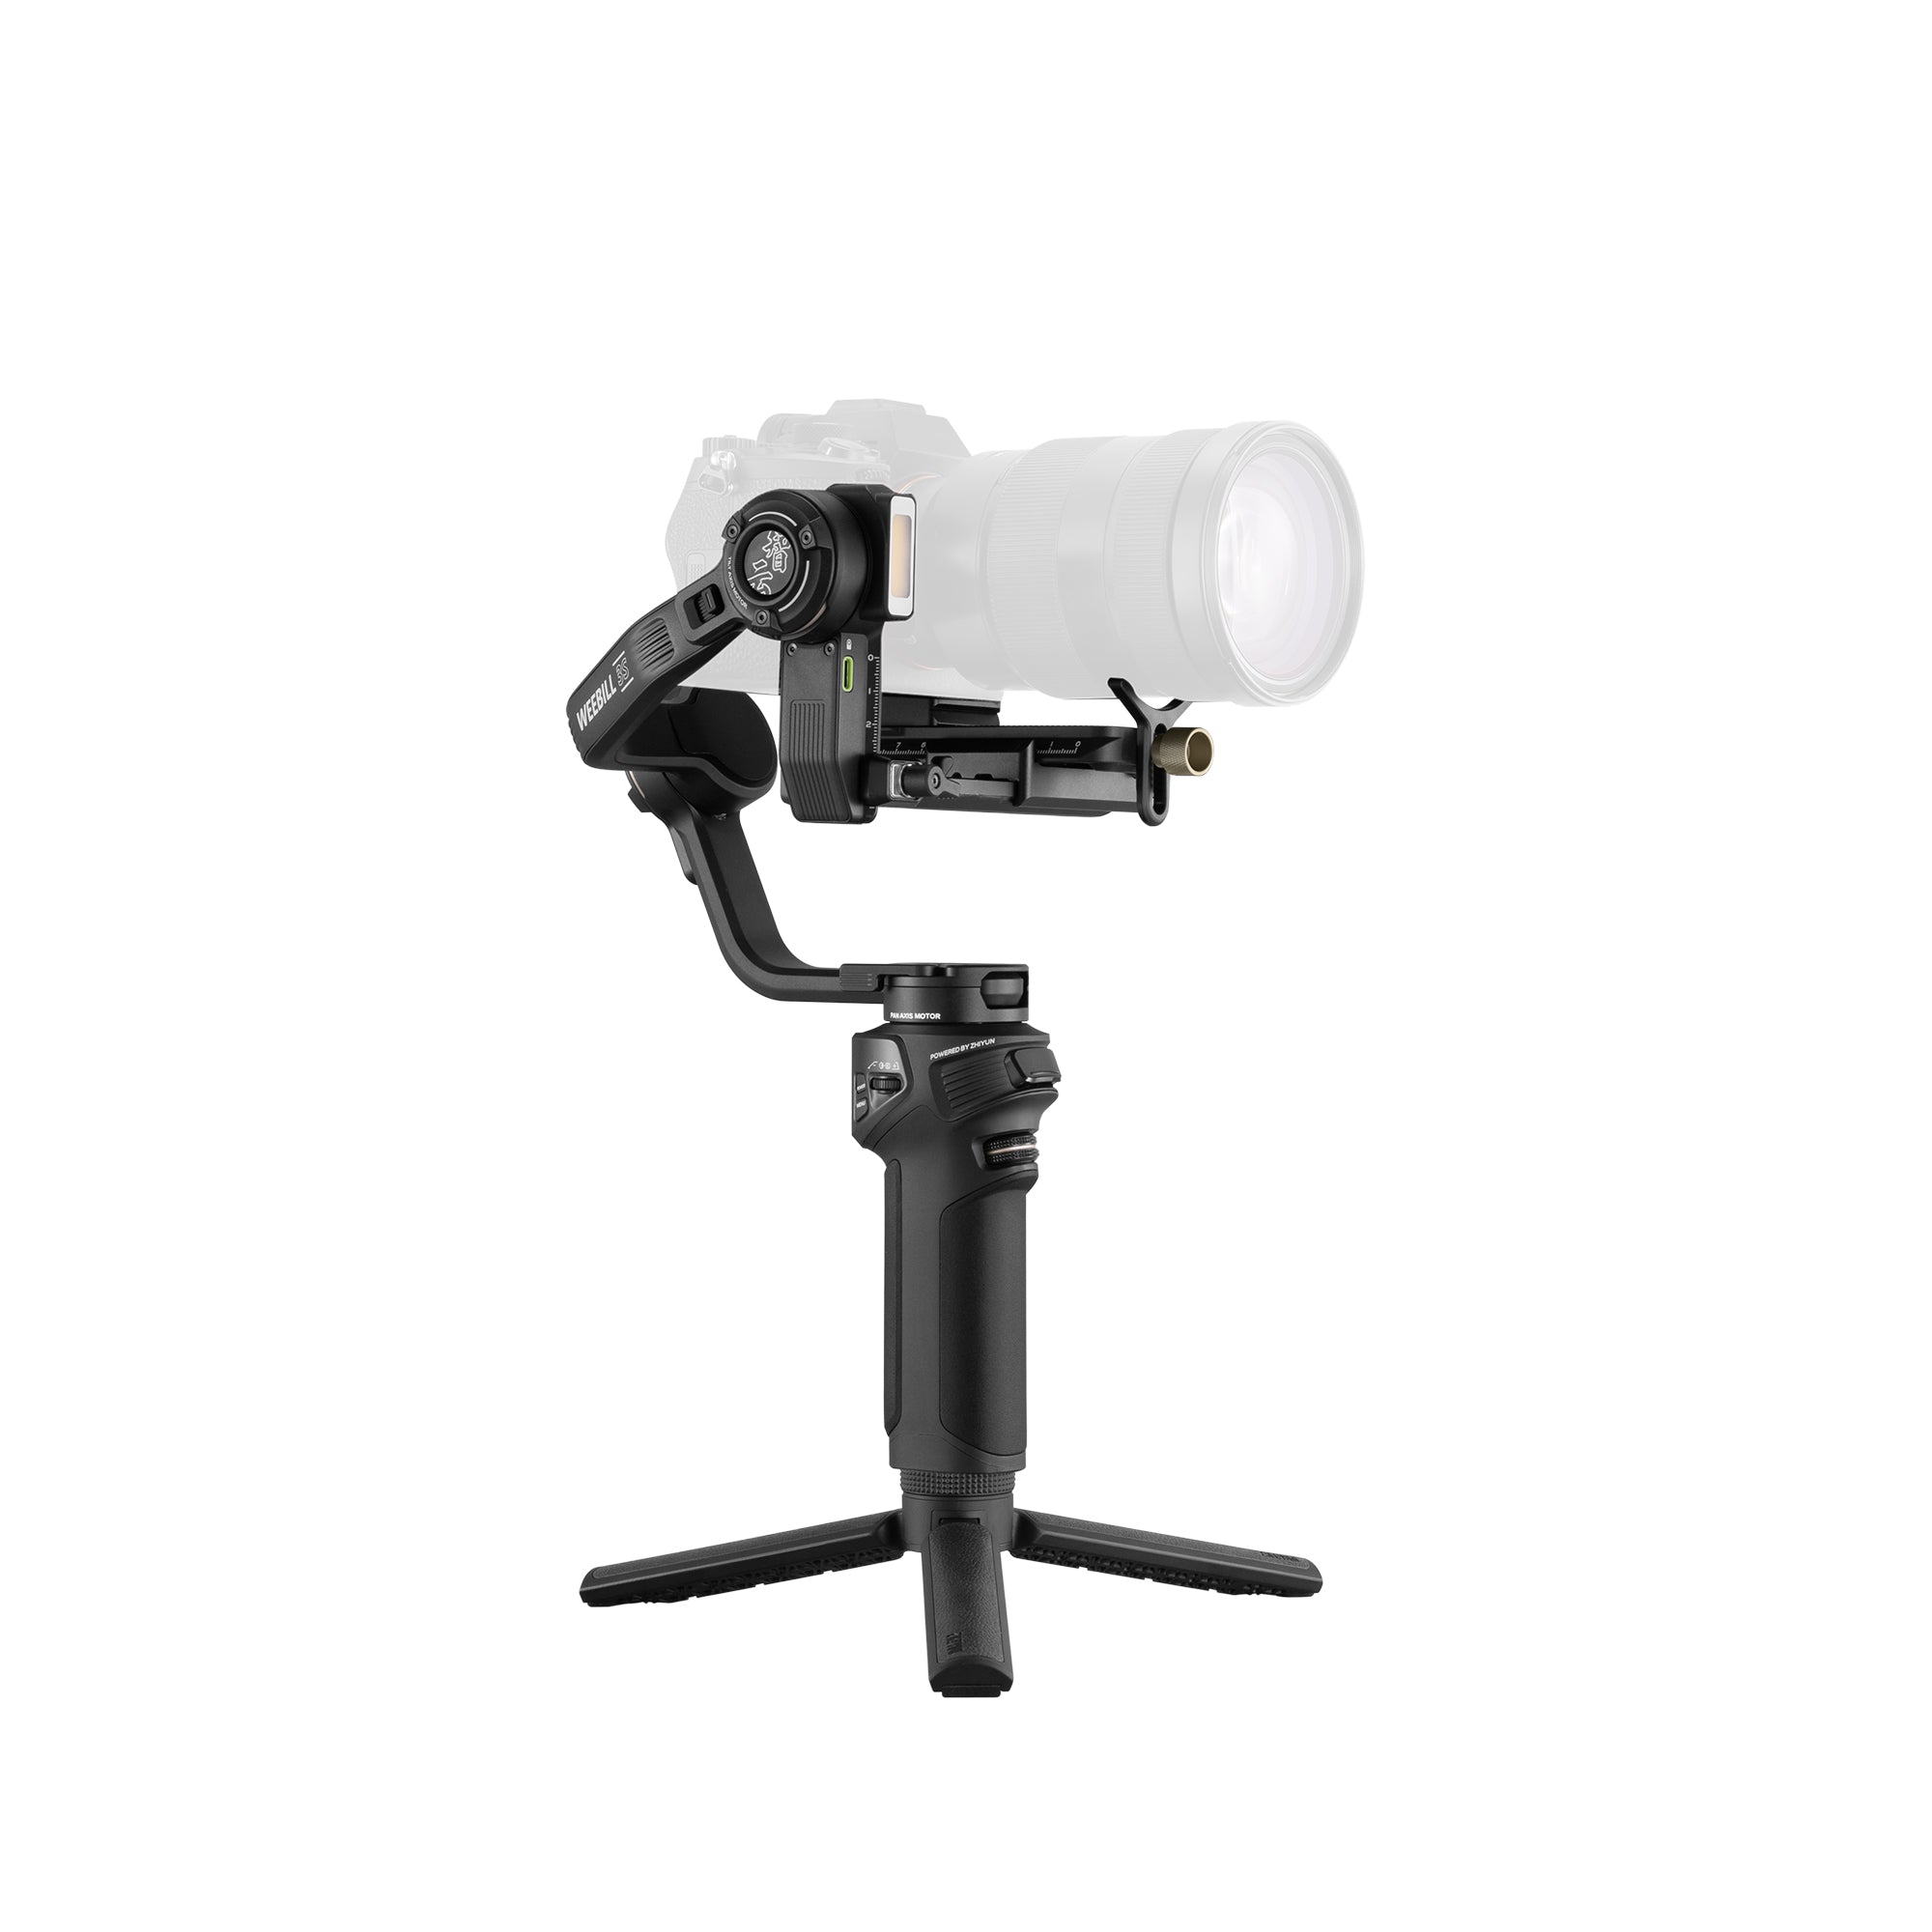
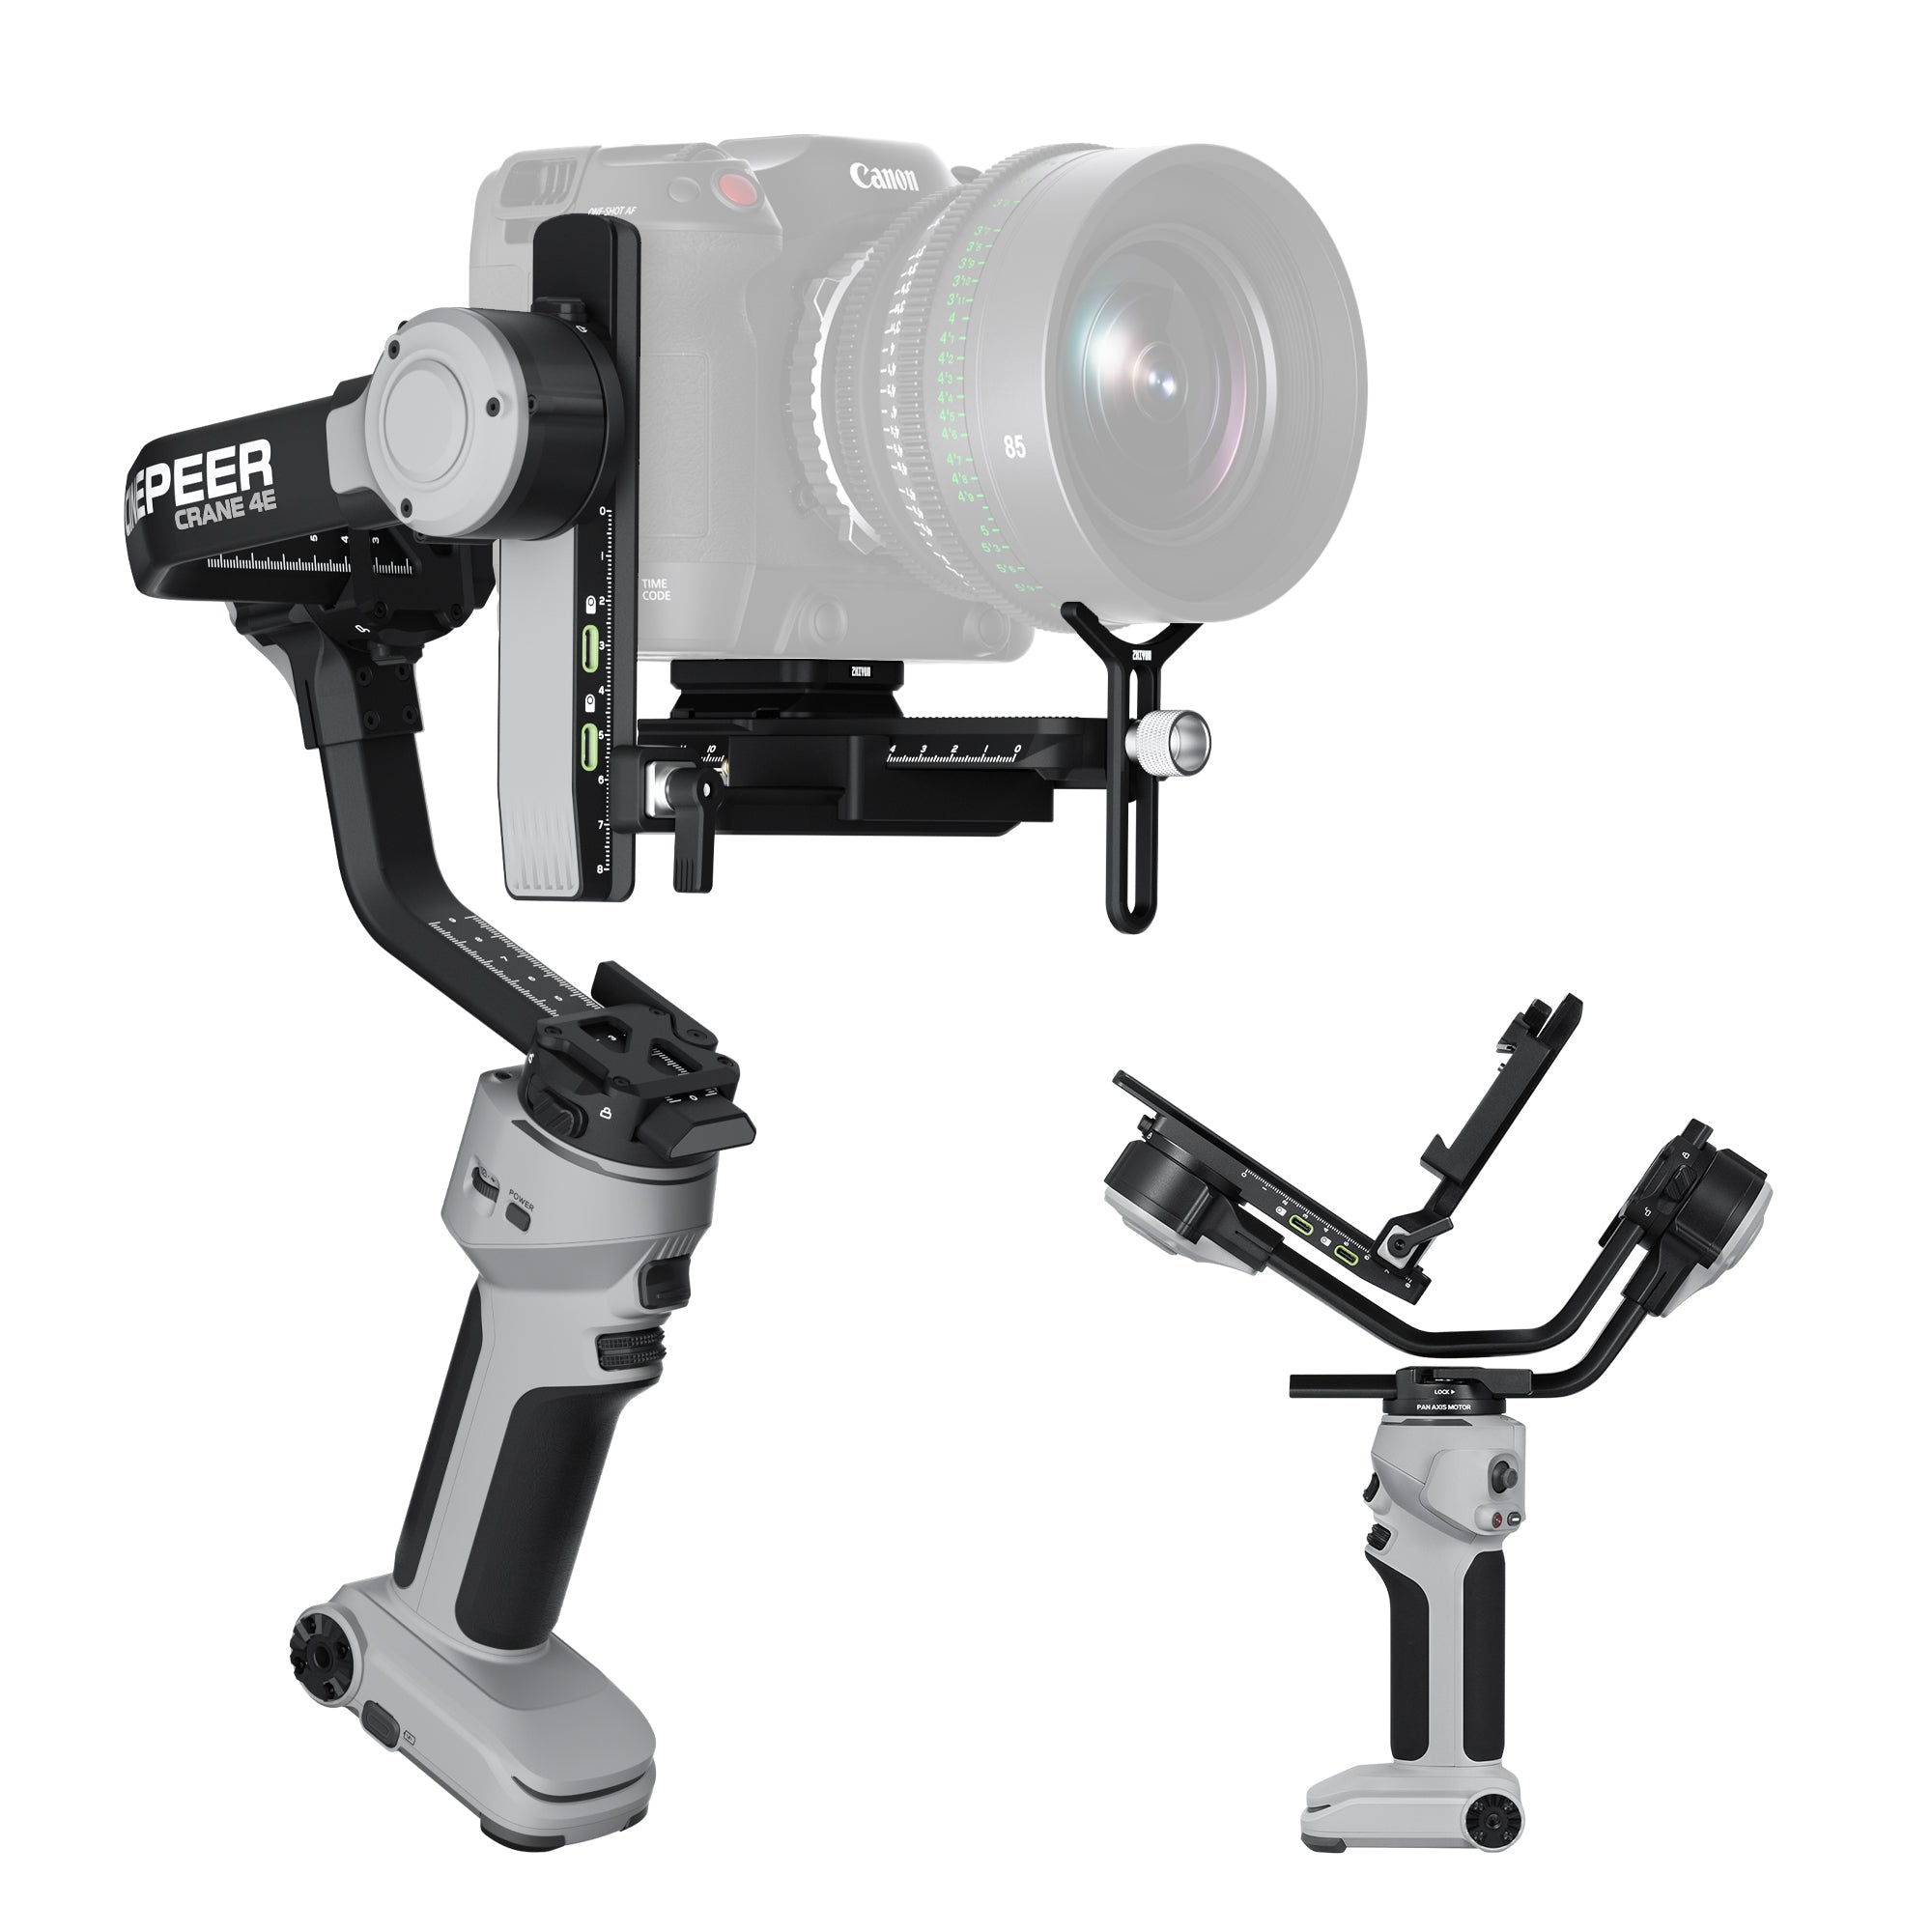
The ZHIYUN Crane 4E is the latest addition to ZHIYUN's Crane stabilizer lineup, designed to offer filmmakers an unparalleled balance of lightweight design, stability, and professional-grade functionality. Let’s explore the innovative features that make the crane 4e a must-have tool for creators seeking unmatched stability and control. Lightweight and Stable Design The Crane 4E camera stabilizer is engineered for ergonomic excellence, reducing wrist strain by 25% and lightening the load by 20% in Sling mode. Dual-hand usage becomes 15% easier, making extended shooting sessions more comfortable. Its optimized weight distribution ensures effortless stability, even with heavy cameras. Enhanced Load Capacity Equipped with robust arms and high-torque motors, the CINEPEER Crane 4E can handle mainstream full-frame and compact cameras with ease. This ensures stability and smooth operation in any shooting scenario. Integrated Horizontal and Vertical Lock Structure The Crane 4E’s innovative design allows for seamless transitions between horizontal and vertical shooting modes. Native vertical mounting is now more intuitive, giving creators an edge in fast-paced shooting environments. Professional Expansion Options Support for two servo zoom/focus motors enables precise control over focus and zoom, elevating cinematic effects. Pair this with the TransMount image transmission system for remote monitoring and collaborative shooting. Customizable Control for Precision With a front control wheel and side adjustment dial, the Crane 4E gimbal offers intuitive adjustments for parameters like shutter speed, aperture, and ISO. This ensures that creators can swiftly adapt to changing conditions. Long-Lasting Battery Life The built-in high-capacity battery provides up to 12 hours of operation. With PD fast charging, the stabilizer can be fully recharged in just 2 hours and supports simultaneous charging and usage for uninterrupted creativity. Who Is the ZHIYUN Crane 4E Designed For? The ZHIYUN CINEPEER Crane 4E is crafted for creators seeking a balance of lightweight design and robust functionality. For Long Shoots and Portability While the ZHIYUN Crane 3E prioritizes ultra-compact portability and the ZHIYUN Crane 4 excels at managing heavy equipment, the Crane 4E strikes an ideal middle ground. Its ergonomic design and reduced weight make it perfect for creators who need comfort during extended shoots without compromising on stability. Simplified Vertical Shooting The native vertical mounting system on the Crane 4E offers effortless transitions between horizontal and vertical orientations. This feature is particularly beneficial for content creators producing social media or portrait-oriented content, streamlining their workflow compared to older models. Enhanced Customization and Control The Crane 4E introduces a front control wheel and dual servo motor support, elevating its adaptability for precise adjustments. These features cater to filmmakers who demand flexibility and efficiency in capturing dynamic shots. Efficient Power Management Although the Crane 3E boasts a longer battery runtime of 16 hours, the Crane 4E’s 12-hour performance coupled with PD fast charging ensures minimal downtime and consistent operation. This balance is ideal for creators who value both reliability and quick recharging. Why Choose the ZHIYUN CINEPEER Crane 4E? The Crane 4E is a masterful blend of innovation and functionality. Whether you’re a professional filmmaker or a content creator, its lightweight stability, enhanced control, and versatile design make it a reliable companion for any project. With cutting-edge features like intuitive parameter adjustments, professional expansion options, and seamless vertical shooting, the Crane 4E redefines what’s possible with a stabilizer. Upgrade your filmmaking experience with the ZHIYUN Crane 4E and elevate your creations to new heights.

Say No to Gimbal Missteps: Essential Do's and Don'ts

Dec 04, 2024
A gimbal is a game-changer for filmmakers, vloggers, and content creators who want to achieve smooth, professional-looking footage. However, improper use can result in shaky videos, damaged equipment, and frustration. To ensure you achieve smooth filming with camera stabilizers, we’ve compiled a list of essential do's and don'ts that every user should follow. Do's for Using a Gimbal Calibrate Before Use One of the most critical steps in using a gimbal is proper calibration. Always balance your camera or smartphone on the gimbal before turning it on. This ensures that the motors work efficiently and prevents unnecessary strain. To achieve the best calibration results, consider using the ZHIYUN Crane 4. Its intelligent balance indicator lights provide timely reminders, ensuring precise calibration. This feature eliminates guesswork and enhances stability from the start. Use the Right Gimbal Mode Modern gimbals come with various modes like pan follow, lock, and POV. The ZHIYUN Crane 4 gimbal enhances this versatility with its horizontal and vertical lock structure, enabling seamless switching between landscape and portrait shooting. Take time to understand each mode and choose the one that suits your shooting scenario. For instance, use the pan-follow mode for smooth horizontal movements and lock mode for static shots. Plan Your Shots A gimbal enhances your shots, but it can’t fix poor planning. Pre-visualize your movements, angles, and transitions to create dynamic footage. Practicing your shots beforehand will also reduce jerky or rushed movements. Keep Movements Slow and Steady Gimbals are designed to stabilize gradual movements. Fast, erratic motions can confuse the motors and compromise stabilization. Move slowly and smoothly for the best results. Don'ts for Using a Gimbal Don’t Ignore Weight Limits Every gimbal has a maximum payload capacity. Overloading it with heavy cameras, lenses, or accessories can strain the motors and cause malfunctions. Always check the gimbal’s specifications and stay within its limits. Avoid Quick Movements Sudden, rapid movements can destabilize your gimbal and ruin your footage. Avoid sprinting, jerking, or abrupt stops, as they can disrupt the stabilization process. Don’t Skip Maintenance Dust, dirt, and grime can accumulate on your gimbal over time, especially when filming outdoors. Regularly clean the motors, arms, and joints with a soft cloth and ensure all screws are tight to maintain performance. Don’t Forget to Turn It Off When Not in Use Leaving your gimbal on when it’s not balancing a camera can damage the motors. Always turn it off when switching cameras or during extended breaks. Don’t Neglect Battery Care Improper battery management can shorten your gimbal’s lifespan. Avoid overcharging, and use the manufacturer’s recommended charging cables. Store the gimbal in a cool, dry place when not in use to preserve battery health. Unlock Professional Filming with the ZHIYUN Crane 4 and Crane 4E To take your gimbal experience to the next level, consider the ZHIYUN Crane 4 camera stabilizer. Designed for filmmakers seeking precision and ease, this gimbal offers innovative features like balance indicator lights for precise calibration, a versatile sling grip for flexible shooting modes, and a built-in 10W fill light for enhanced lighting. Its thoughtful design, including a wrist rest and magnetic wrench, ensures a seamless shooting experience. Whether you’re shooting horizontal or vertical, the ZHIYUN Crane 4 adapts effortlessly to your needs. ZHIYUN Crane 4E For those looking for an even more refined filming experience, the ZHIYUN Crane 4E is a master of lightweight stability. This gimbal features optimized weight distribution that reduces wrist strain by 25%, lightens the load by 20% in Sling mode, and eases dual-hand use by 15%. It supports mainstream full-frame and compact cameras with ease, providing stable shots in any situation. The CINEPEER Crane 4E also includes Bluetooth shutter control for seamless operation, an intuitive front customizable dial for precise adjustments, and ultra-long battery life with PD fast charging. With integrated features like a native vertical mount and professional expansion support for zoom/focus motors, the ZHIYUN Crane 4E camera stabilizer ensures you can capture every moment with speed and precision. Intuitive camera parameter adjustments make it easy to switch between settings like shutter speed, aperture, and ISO, optimizing your workflow. Conclusion A gimbal is an invaluable tool for creating cinematic-quality videos, but only if used correctly. By following these do's and don'ts, you can avoid common pitfalls and maximize your gimbal’s potential. Whether you’re a beginner or a seasoned pro, these tips will ensure your footage is stable, smooth, and professional. Ready to elevate your filming game? Grab your gimbal, follow these guidelines, and start creating stunning visuals today! FAQS: Q: How do I balance my gimbal correctly for optimal performance? A: Start by mounting your camera securely and aligning it with the gimbal’s axes. Adjust each axis—tilt, roll, and pan—until the camera remains stable without motor assistance. A properly balanced gimbal reduces motor strain and results in smoother footage. Q: What are the risks of overloading my gimbal, and how can I prevent it? A: Overloading can cause the motors to overheat, shorten the gimbal’s lifespan, and lead to erratic performance. Always check the gimbal’s payload capacity and ensure your camera setup, including accessories like lenses or microphones, stays within limits. Q: How do I eliminate jerky movements while using a gimbal? A: Practice proper gimbal walking techniques, such as the "ninja walk," which involves soft, deliberate steps and minimal bouncing. Use the gimbal’s follow modes for gradual direction changes and avoid abrupt or forceful motions. Q: What are the most useful accessories to enhance gimbal use? A: Essential accessories include extra batteries for extended shoots, quick-release plates for easy camera mounting, a tripod extension for static shots, and a smartphone adapter for monitoring footage. A sturdy carrying case also helps protect your gimbal during transport. Q: What maintenance tips will help extend the lifespan of my gimbal? A: Clean the gimbal’s joints and motors regularly to remove dirt and dust. Store it in a protective case when not in use, and avoid dropping or overloading it. Periodically check for loose screws or parts and tighten them as needed to keep the gimbal in top condition.

Unlocking the Secrets of Light: A Guide to Soft and Hard Lighting in Photography

Dec 04, 2024
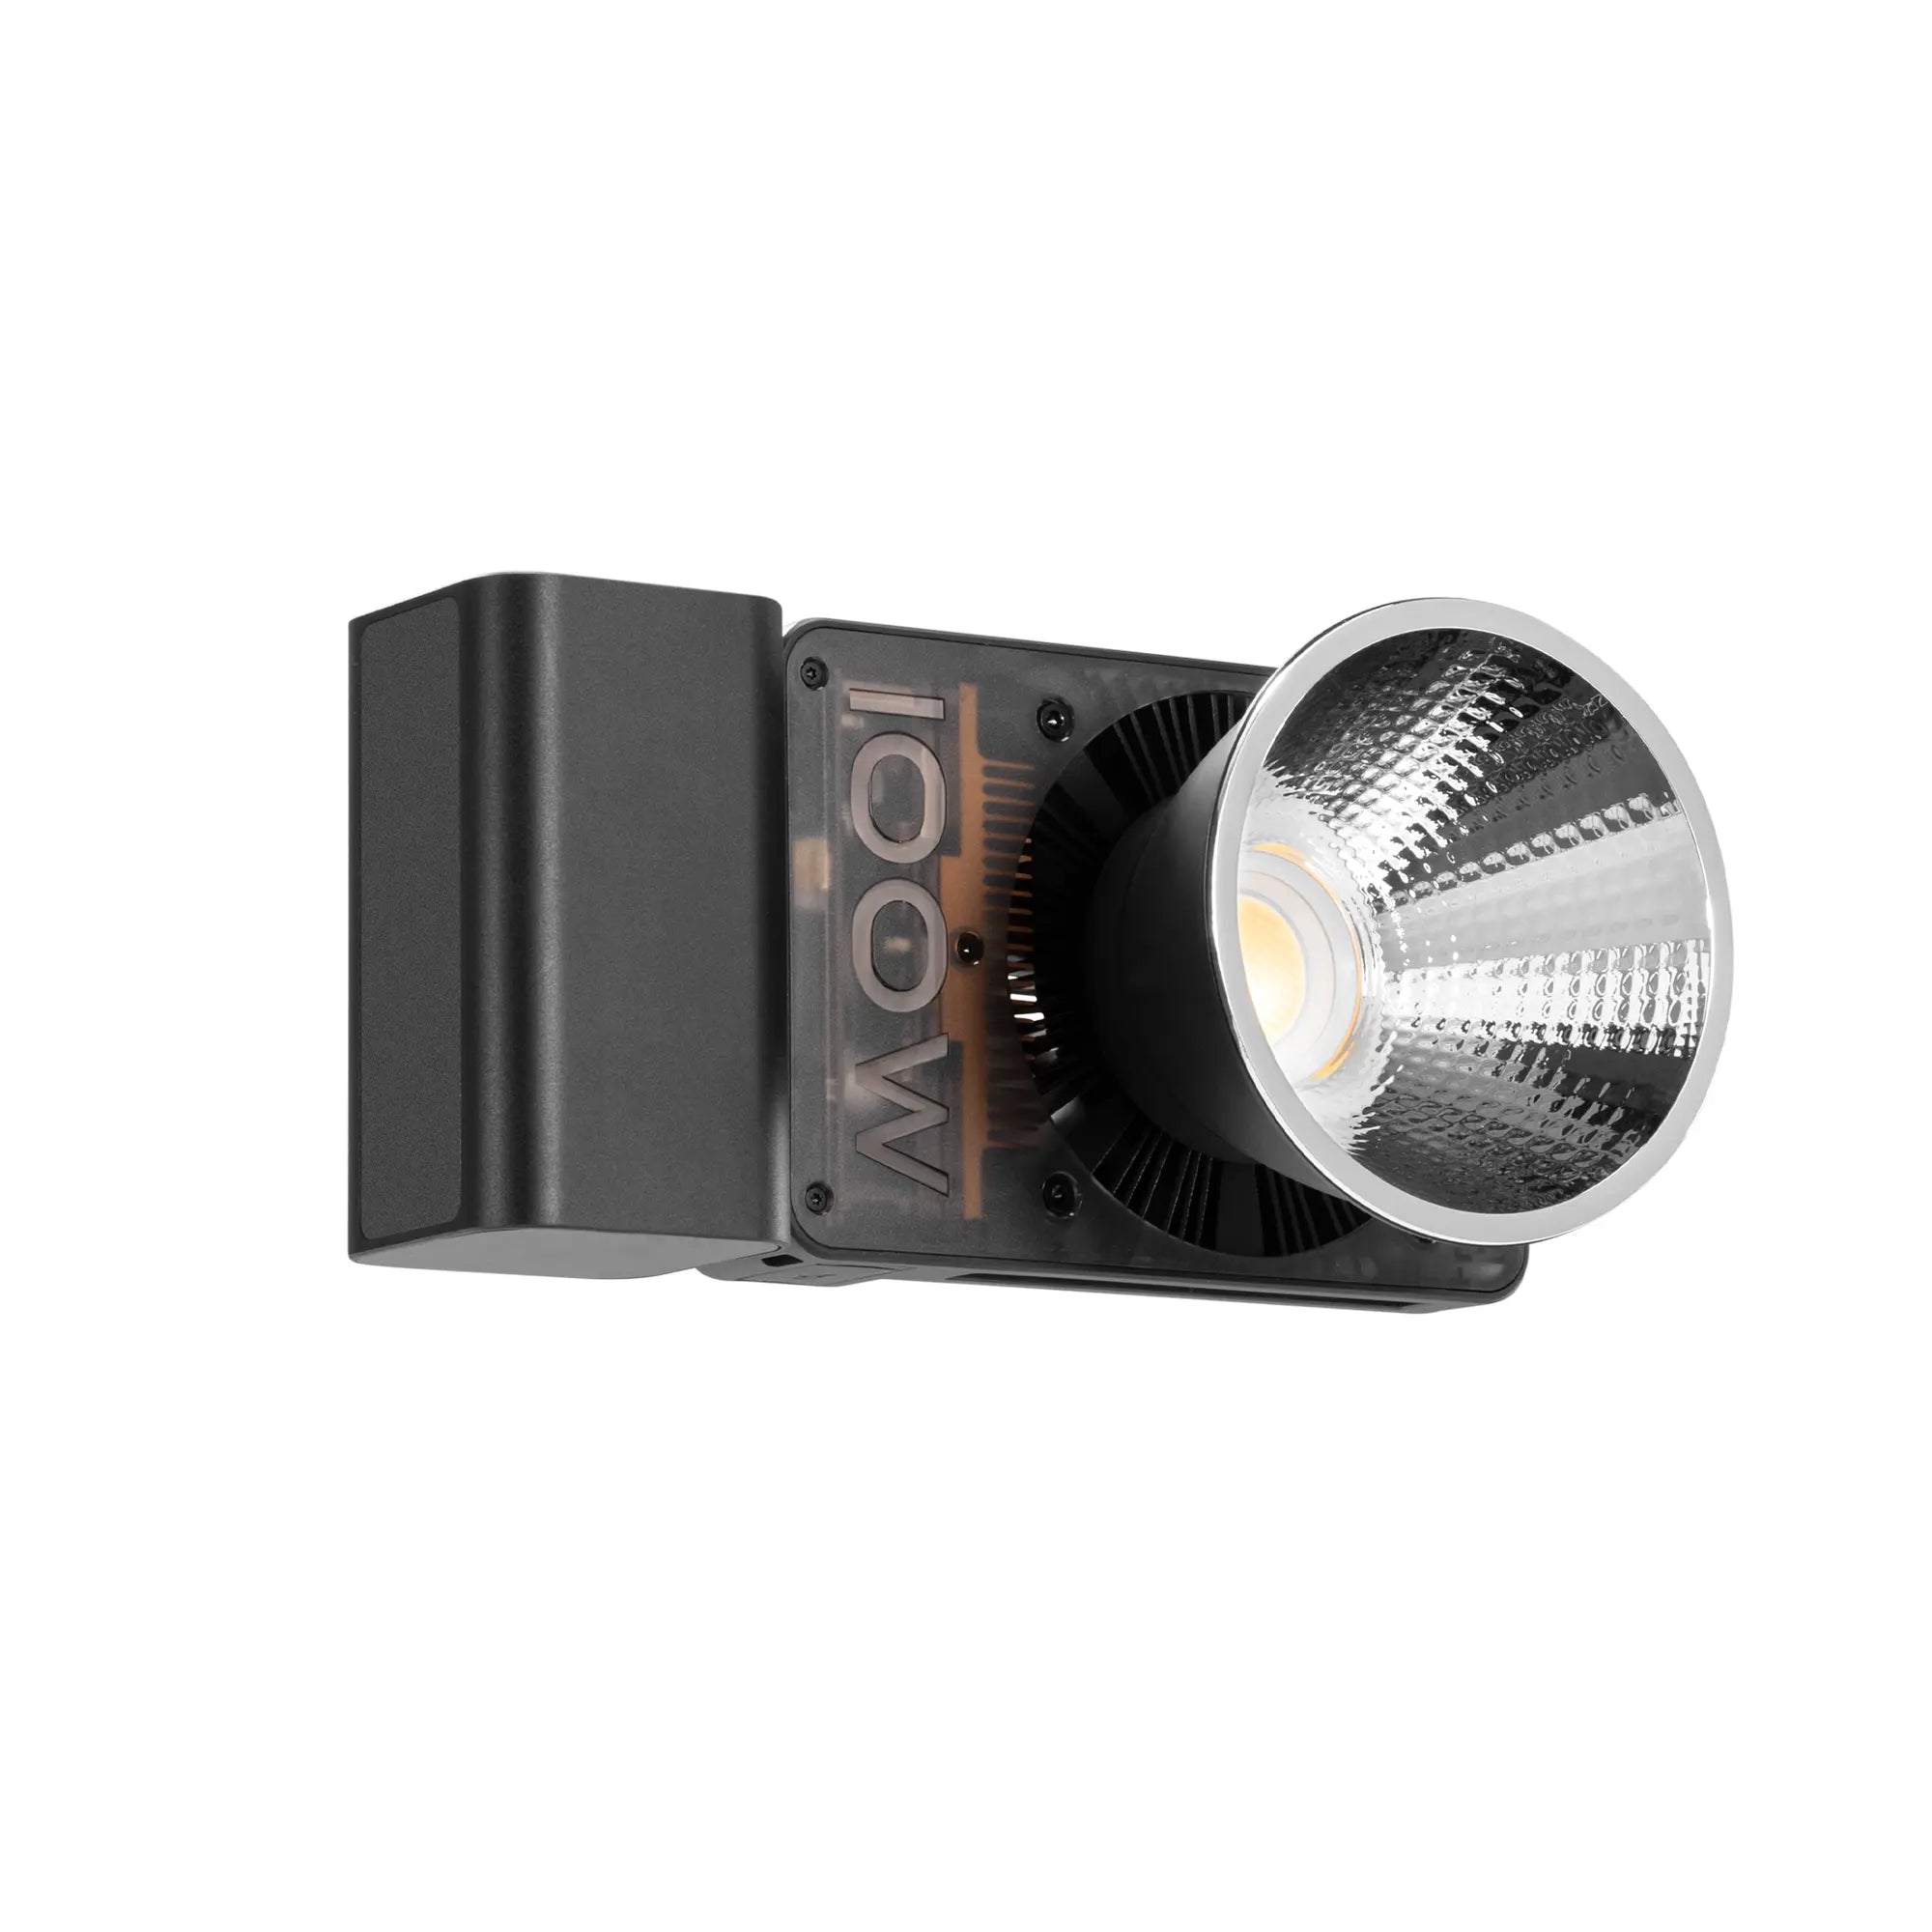
Lighting is one of the most critical elements in photography, capable of transforming a simple shot into a breathtaking image. Whether you're an amateur photographer or a seasoned pro, understanding the difference between soft and hard light can elevate your work to new creative heights. In this guide, we'll break down these two types of lighting, explain their effects, and show you how to master them for stunning photography. What Is Soft Light? Soft light refers to light that produces minimal shadows and a smooth transition between highlights and shadows. It is diffused, often spread over a larger surface or softened by filters or natural conditions like cloudy skies. Characteristics of Soft Light: Creates gentle, barely visible shadows. Reduces texture and detail, giving a smooth appearance. Ideal for portrait photography, as it flatters skin tones. How to Create Soft Light: Use a diffuser:Tools like softboxes or diffusers scatter light, softening its effect. Rely on natural conditions:Overcast days or shade provide naturally soft light. Reflect light:Bounce light off a white or silver surface to diffuse it. Best Applications: Soft light is perfect for portraits, product photography, and any scenario where you want to highlight the subject with a flattering, natural glow. What Is Hard Light? Hard light is the opposite of soft light. It produces sharp, well-defined shadows and adds dramatic contrast to your images. Hard light is direct and focused, often coming from a small, concentrated source like the midday sun or a spotlight. Characteristics of Hard Light: Produces strong, dark shadows with sharp edges. Emphasizes texture and detail. Creates a more dramatic and intense mood. How to Create Hard Light: Direct light source: Use an undiffused light source like a bare bulb or direct sunlight. For professional-grade results, consider the ZHIYUN MOLUS G300, a lightweight yet powerful option. Weighing just 1.56kg, it provides adjustable color temperatures and cinematic-quality brightness of up to 300W, with a peak illuminance of 15,500Lux. For even more intense lighting, activate its MAX Extreme Mode, which boosts the output to 500W (20,300Lux) at 4300K color temperature—ideal for creating sharp, dramatic shadows. Control the distance: Position the light source close to the subject for more intensity. The MOLUS G300features a 7.5m control cable, allowing you to fine-tune the light setup without moving the entire fixture, offering unparalleled flexibility on set. Best Applications:Hard light works well for fashion photography, still life, and creative projects where contrast and drama are essential. Soft Light vs. Hard Light: Key Differences Understanding these differences helps you choose the right lighting for your creative vision. How to Choose Between Soft and Hard Light Consider the SubjectFor portraits, soft light is often preferred as it minimizes harsh shadows and highlights. In contrast, hard light is excellent for emphasizing texture, such as in architectural photography or gritty urban scenes. Think About the MoodDo you want your photo to feel warm and inviting or bold and striking? Your choice of lighting will directly impact the emotional tone of your image. Experiment with ModifiersTools like diffusers, reflectors, and grids allow you to transition between soft and hard light, giving you greater control over the final outcome. The ZHIYUN MOLUS B-Seriesis an excellent choice for this, offering customizable brightness and color temperature (2700K to 6500K), making it easy to adapt to any lighting setup. Practical Tips for Mastering Light in Photography Golden Hour for Soft Light:Shoot during the golden hour (shortly after sunrise or before sunset) for naturally soft and warm light. Midday Sun for Hard Light:Use the midday sun to create bold and dramatic shadows, but be mindful of overexposure. Control Light Indoors:Use adjustable LED lights or strobes to experiment with both soft and hard light setups. The ZHIYUN MOLUS X60, despite its compact size (comparable to a credit card), delivers a stable 60W output, ensuring professional-quality lighting. Its intuitive dual-dial controls allow for quick adjustments to brightness and color temperature, making it perfect for indoor creative setups. Additionally, the ZY Vega app enables wireless control, adding advanced features like color recognition and intelligent matching for effortless ambiance creation. The Creative Power of Light Mastering light in photography isn’t just about choosing soft or hard light—it’s about understanding how each impacts your images and learning to adapt based on your subject and vision. By experimenting with different lighting setups and understanding their effects, you can bring depth, mood, and artistry to your photography. Whether you’re shooting a serene portrait bathed in soft light or a dramatic still life illuminated by hard shadows, the key is to let the light tell your story. Ready to take your photography to the next level? Start experimenting with soft and hard light today, and watch your images transform from ordinary to extraordinary. FAQS: Q: What is soft lighting in photography? A: Soft lighting creates a gentle and even illumination with minimal shadows. It is typically achieved using diffused light sources like softboxes or cloudy skies, making it ideal for portraits and product photography. Q: What is hard lighting in photography? A: Hard lighting produces sharp and well-defined shadows with high contrast. It comes from a direct, focused light source, such as the sun or a bare bulb, adding drama and texture to the scene. Q: How can I create soft lighting at home? A: You can create soft lighting by diffusing light with household items like white sheets or lampshades. Positioning your subject near a large window with indirect light also works well. Q: When should I use hard lighting? A: Hard lighting is ideal for creating dramatic effects, emphasizing textures, or capturing a moody atmosphere. It’s often used in fashion photography, creative portraits, and product shots requiring bold contrast. Q: What are the best tools for achieving soft lighting? A: Tools like softboxes, umbrellas, diffusers, and bounce boards are excellent for creating soft lighting. Reflectors can also help spread light evenly on your subject. Q: How does the size of the light source affect soft and hard light? A: Larger light sources create softer light, while smaller, more focused light sources result in harder light. The distance between the light source and the subject also influences the effect.

Shooting in the Cold: A Guide to Perfecting Your Snow Photography

Dec 04, 2024
Snow photography presents a unique opportunity to capture the serene beauty of winter landscapes. However, the cold environment and challenging lighting conditions can make it tricky to achieve perfect shots. This guide will help you overcome these challenges, ensuring your snow photography stands out, whether you’re a seasoned pro or just starting out. Prepare Your Gear for the Cold Cold temperatures can affect your camera’s performance, so preparation is key. Battery Life: Cold weather drains batteries quickly. Bring spares and keep them warm in your pockets. Lens Protection: Use lens hoods to shield against snowflakes and prevent glare. Keep a microfiber cloth handy to clean your lens. Weatherproofing: If your camera isn’t weather-sealed, use a rain cover or plastic bag to protect it from moisture. Dress for Comfort and Mobility Your comfort is as important as your gear’s safety. Wear layered clothing, insulated gloves that allow finger dexterity, and sturdy waterproof boots. Being warm and comfortable allows you to focus on your composition without distractions. Understand Snow Lighting Challenges Snow reflects a lot of light, which can confuse your camera's meter and lead to underexposed or overexposed photos. Here’s how to manage it: Use Exposure Compensation: Dial in a +1 or +2 exposure compensation to brighten your shots and prevent the snow from appearing gray. Shoot in RAW: RAW files retain more data, allowing you to correct exposure and white balance issues in post-processing. Master White Balance: Snow can appear blue in photos due to the cold light. Use the “Daylight” or “Cloudy” setting, or adjust manually for accurate tones. Composition Tips for Snow Photography Snowy scenes often appear monochromatic, so focusing on composition is vital. Look for Contrasts: Incorporate elements like trees, colorful clothing, or buildings to add contrast against the white snow. Use Leading Lines: Paths, fences, or shadows on the snow can draw the viewer’s eye into the scene. Capture Textures: Highlight patterns in the snow, like footprints, ripples, or icicles, to add depth and interest. Leverage Golden Hour and Blue Hour Lighting is crucial in snow photography, and winter provides unique opportunities during golden and blue hours. Golden Hour: Early morning or late afternoon light adds warmth and casts long shadows, perfect for creating drama in your snow photos. Blue Hour: The twilight before sunrise or after sunset offers a soft, cold glow that complements snowy landscapes beautifully. Experiment with Motion and Details Capture Falling Snow: Use a fast shutter speed to freeze snowflakes mid-air, or slow it down to create a dreamy effect. Zoom in on Details: Focus on frosty leaves, snow-covered branches, or icy patterns for unique close-ups. Essential Camera Settings for Snow Photography Choosing the right settings ensures your photos are sharp and vibrant. ISO: Keep ISO low (100-400) to avoid graininess in bright snowy conditions. Aperture: Use a small aperture (f/11-f/16) for landscapes to keep everything in focus. For close-ups, a wider aperture (f/2.8-f/5.6) can create beautiful bokeh. Shutter Speed: Adjust based on your subject. Use a fast speed for moving objects or snowflakes, and slower speeds for soft, dreamy effects. For photographers looking to capture the perfect shot in the snow, the ZHIYUN Crane 4 offers unparalleled stability and precision. This lightweight gimbal is engineered to handle heavy payloads, making it ideal for professional cameras and lenses. One of its standout features is the new intelligent balance indicator lights, which provide timely reminders for precise balance calibration, ensuring your shots are perfectly level even in harsh conditions. The extendable sling grip and flexible wrist rest offer superior comfort during long shoots, while the Bluetooth shutter control lets you easily trigger photos without having to touch the camera. With a built-in 10W fill light and customizable function settings, the Crane 4 enhances your creative process, making it easier to capture stunning snow scenes in both bright and low-light conditions. Conclusion Snow photography is a rewarding challenge that allows you to capture the magical stillness of winter. By preparing your gear, dressing for the weather, mastering lighting techniques, and experimenting with creative compositions, you can create images that truly stand out. As you venture out into the cold, remember to embrace the unique opportunities the snow presents. With the ZHIYUN Crane 4 camera stabilizer ensuring stability and precision, and your newfound knowledge of snow photography, you're ready to turn winter's serene beauty into breathtaking art. Happy shooting! FAQS: Q: Why do my snow photos look gray instead of white? A: Snow often appears gray due to your camera underexposing the scene to compensate for the brightness. Use exposure compensation (+1 or +2) to brighten the snow. Additionally, check your histogram to ensure the highlights are not clipped, retaining the snowy texture. Q: What are the best camera settings for snow photography? A: Use a low ISO (100-400) to avoid noise, a small aperture (f/11-f/16) for landscapes to keep everything sharp, and adjust the shutter speed depending on your subject. For moving snowflakes, a fast shutter (1/1000s or faster) works well, while a slower speed (1/30s) creates a soft, dreamy motion blur. Q: When is the best time to shoot in snowy conditions? A: Golden hour (early morning or late afternoon) provides warm, soft light and long shadows that enhance texture. Blue hour (just before sunrise or after sunset) offers a cold, ethereal glow that complements snow beautifully. Avoid midday light as it can be too harsh, flattening details in the snow. Q: How do I capture falling snow effectively? A: To freeze individual snowflakes mid-air, use a fast shutter speed (1/1000s or higher). For a dreamy, motion-filled effect, slow the shutter speed (1/30s or lower). Use a tripod or a stabilizer like the ZHIYUN Crane 4 to avoid camera shake during long exposures.  

How to Do Backlight Photography: A Simple Guide

Nov 24, 2024
Backlight photography is a powerful technique that can add drama and beauty to your images. By positioning the light source behind your subject, you can create striking effects such as glowing outlines, dramatic silhouettes, and an overall ethereal feel. Whether you’re a beginner or seasoned photographer, mastering backlighting can elevate your work. In this simple guide, we’ll walk you through the key tips and techniques to help you get started with backlight photography. What is Backlight Photography? Backlight photography is when the light source, such as the sun or an artificial light, is positioned behind the subject, pointing toward the camera. This creates a contrast between the subject and the light, often resulting in silhouettes or a halo effect around the subject. The technique can be used in portrait photography, landscape photography, and product shots to create unique and eye-catching images. Choose the Right Time of Day for Natural Light The time of day plays a huge role in how effective your backlight photography will be. The best times to shoot outdoors are during the "golden hours" — shortly after sunrise or just before sunset. The sunlight is softer during these times, creating a more flattering and diffused backlighting effect. If you’re shooting during midday, when the sun is high and harsh, you might struggle with overexposure or overly harsh shadows. In this case, try shooting in shaded areas or use a reflector to soften the light and reduce intensity. Position Your Subject Correctly To get the best backlight effect, place your subject in front of the light source. If you’re shooting portraits, have your subject face slightly away from the light while maintaining a direct line to the camera. This way, the light will create a beautiful glow around their hair or edges of their clothing. Experiment with different angles to find the best way to highlight the outline of your subject. For instance, having the subject at an angle to the light can create more dynamic shapes and interesting shadows. Adjust Exposure to Avoid Overexposure Backlighting can often lead to overexposure, where the light source is too strong compared to the subject, making the subject too dark or washed out. To fix this, adjust your camera settings. Lower the exposure:Reducing the exposure compensation can help avoid overexposed backgrounds or highlights. Use spot metering: This allows you to meter the light at a specific area in the frame, such as your subject, ensuring they’re properly exposed even if the background is much brighter. Increase ISO if necessary:If your subject is underexposed, slightly increasing the ISO can help balance the exposure without losing too much detail. Many cameras and smartphones offer HDR (High Dynamic Range) mode, which automatically adjusts for lighting differences, helping you capture both the subject and background clearly. Create Beautiful Silhouettes One of the most striking effects of backlighting is the silhouette. When your subject is positioned in front of a bright light source, the light exposure causes the subject to appear dark, creating a sharp outline against the brighter background. To achieve a perfect silhouette, make sure: The subject’s outline is clear and easily recognizable. You expose for the light source behind the subject, so they remain dark. The background is simple, without distracting elements. Silhouettes work especially well with dramatic or recognizable shapes, such as people, trees, or objects with interesting forms. Use Reflectors and Diffusers for Soft Light If the light is too harsh or creating unwanted shadows on your subject, using a reflector can help bounce light back onto your subject, softening the effect. A diffuser can also be used to scatter the light, making it softer and more flattering. Reflectors are especially helpful in portrait photography, where the light needs to fill in shadows on the face. You can easily purchase a reflector or even use a piece of white foam board to bounce light. Experiment with Artificial Lights Natural light isn’t always an option, so experimenting with artificial lights can expand your creative possibilities. The ZHIYUN MOLUS B-Series provides exceptional versatility with its range of power options (100W to 500W) and cinematic color rendering from 2700K to 6500K. The integrated power source and efficient cooling system allow you to focus on your creativity without worrying about overheating or complicated setups. The MOLUS B-Series’ ability to seamlessly glide through color temperatures and brightness levels, along with the ZY Vega App for wireless control, ensures perfect backlighting at your fingertips. Conclusion Backlight photography is a simple yet powerful technique that can create stunning effects in your photos. By carefully positioning your subject, adjusting your exposure settings, and using reflectors or diffusers, you can master this technique and produce images with a professional touch. Remember, practice makes perfect. Don’t be afraid to experiment with different times of day, light sources, and compositions. With these simple tips, you’ll soon be capturing striking backlit images that stand out and tell a compelling story. FAQS: Q: What is backlight photography? A: Backlight photography is a technique where the light source is positioned behind the subject, creating striking effects such as silhouettes, glowing outlines, and dramatic contrasts. The light shines towards the camera, illuminating the edges of the subject. Q: When is the best time to do backlight photography? A: The best times are during the "golden hours," shortly after sunrise or just before sunset, when the sunlight is soft and diffused. If shooting midday, use shaded areas or reflectors to soften harsh light. Q: How can I prevent overexposure in backlight photography? A: To avoid overexposure, lower the exposure settings on your camera, use spot metering for your subject, and adjust the ISO to balance the exposure. HDR mode can also help automatically adjust for lighting differences. Q: How do I position my subject for backlight photography? A: Position your subject in front of the light source, with their body slightly turned away from it, maintaining a direct line to the camera. This creates a glowing outline around the subject. Q: Can I use backlight photography for portraits? A: Yes, backlighting works beautifully for portraits. It adds drama and a halo effect around the subject, which enhances their features and creates a more dynamic composition.

Do I Need a Gimbal for My iPhone?

Nov 24, 2024
Smartphones have revolutionized the way we capture moments, and iPhones, with their cutting-edge cameras, are leading the charge. But even the best smartphone cameras can struggle with stability, especially during movement. This brings us to an essential question for content creators, vloggers, and casual photographers alike: Do you need a gimbal for your iPhone? In this blog, we’ll explore what a gimbal is, its benefits, and how to determine if it’s the right tool for your iPhone photography and videography needs. What Is a Gimbal? A gimbal is a stabilization device that uses motors and sensors to keep your camera or smartphone steady while filming or taking photos. Unlike basic image stabilization features built into smartphones, gimbals provide physical stability, ensuring smooth and shake-free footage, even in challenging conditions like walking, running, or panning quickly. Benefits of Using a Gimbal for iPhone Professional-Quality Stabilization Modern iPhones are equipped with impressive stabilization technology, but they can’t match the smoothness a gimbal provides. Whether you're capturing cinematic shots or casual videos, a gimbal minimizes unwanted shakes, giving your footage a polished, professional look. Enhanced Creative Control Gimbals open up a world of creative possibilities. Features like 360-degree rotation, follow modes, and time-lapse capabilities allow you to experiment with dynamic shots and angles. Improved Low-Light Performance Stability is crucial in low-light conditions, where longer exposure times are required. A gimbal helps keep your iPhone steady, resulting in clearer, sharper photos and videos. Effortless Vlogging and Streaming For vloggers and live streamers, a gimbal can be a game-changer. It lets you move around freely while ensuring your iPhone stays focused on you, making your content look seamless and professional. Longer Recording Sessions Holding your iPhone for extended periods can be tiring. A gimbal's ergonomic design provides a comfortable grip, reducing strain and making it easier to film longer videos. For those considering investing in a gimbal, two standout options are the ZHIYUN CINEPEER CQ5 and the ZHIYUN Smooth 5S AI. ZHIYUN CINEPEER CQ5 combines portability with versatility. It features a compact, foldable design that fits into your pocket, making it perfect for on-the-go creators. With an intuitive voice assistant activated by saying "Hey Cami," you can control the gimbal hands-free. The built-in 215mm extension rod and magnetic fill light enable wide-angle shots and enhanced lighting for professional-quality footage. ZHIYUN Smooth 5S AI is ideal for advanced users. With its magnetic AI tracking module and intelligent gesture control, it ensures seamless filming even from a distance. The orthogonal 3-axis structure allows for 360° full-angle movement, while built-in and add-on fill lights provide unbeatable illumination. Its professional-grade stabilization makes it a powerful tool for serious filmmakers.   Do You Really Need a Gimbal? The decision to invest in a gimbal depends on how you use your iPhone camera. Here are some scenarios to consider: You’re a Content Creator or Vlogger If you frequently create videos for platforms like YouTube, Instagram, or TikTok, a gimbal can significantly elevate the quality of your content. It ensures smooth transitions and stable shots, even during fast-paced activities. You Enjoy Action or Travel Videography Capturing your adventures while hiking, biking, or exploring new cities often involves movement. A gimbal helps maintain smooth footage, making your travel videos more engaging and professional. You Love Experimenting with Photography If you enjoy experimenting with techniques like panoramas, time-lapses, or creative angles, a gimbal can provide the stability and control needed to perfect these shots. You Only Take Casual Photos and Videos For casual users who mainly take static shots or occasional videos, your iPhone’s built-in stabilization might be enough. In such cases, a gimbal could feel like an unnecessary luxury. Final Thoughts While iPhones offer excellent camera features, a gimbal takes your videography and photography to the next level. It ensures smooth, professional-quality footage and opens the door to creative possibilities that are hard to achieve with handheld shooting alone. If you’re serious about creating high-quality content or capturing life’s moments with a cinematic touch, investing in a gimbal like the ZHIYUN CINEPEER CQ5 and the ZHIYUN Smooth 5S AI is a decision you won’t regret. However, for casual users, relying on your iPhone’s built-in stabilization may suffice. Ready to elevate your iPhone videography? Explore these gimbals today and experience the difference they can make in your content creation journey. FAQS: Q: What is a gimbal, and how does it work? A: A gimbal is a stabilization device designed to keep your iPhone steady while filming or taking photos. It uses motors and sensors to counteract movements and vibrations, ensuring smooth, stable footage even during motion. This makes it an ideal tool for videographers, vloggers, and anyone looking to improve the quality of their videos. Q: What are the benefits of using a gimbal with an iPhone? A: A gimbal provides multiple advantages, such as improved stabilization for smoother videos, enhanced performance in low-light conditions, and the ability to perform creative camera movements like pans, tilts, and tracking shots. It also reduces hand fatigue during long shoots and can elevate your mobile content to professional levels. Q: Can a gimbal help with low-light shooting? A: Absolutely. A gimbal helps stabilize your iPhone, minimizing motion blur that often occurs in low-light conditions. Some gimbals, like the ZHIYUN smooth 5s ai, come equipped with fill lights or allow you to attach magnetic lights, providing better illumination and more professional-looking footage in challenging lighting environments.

Mastering Multi-Camera Production: Tips for Seamless Shoots

Nov 15, 2024
Multi-camera production is a powerful way to capture a dynamic, engaging visual story. Whether you’re filming a live event, an interview, or a scripted scene, multi-camera setups can bring out new dimensions, capturing reactions, diverse angles, and seamless continuity. However, multi-camera production can also present unique challenges, from syncing footage to managing complex camera setups. Here are some essential tips to help you achieve a smooth, professional multi-camera shoot.   Plan Your Shots with Purpose One of the biggest advantages of multi-camera production is the ability to capture multiple angles and perspectives simultaneously. To make the most of this, carefully plan each camera’s role in the production. Identify your primary camera—the one that will capture the main action—and secondary cameras for close-ups, reaction shots, or wide-angle perspectives. Storyboard your shots if possible, or map them out on a set layout to visualize where each camera will be positioned.   Tip: Keep in mind how each shot will cut together in editing. Ensuring that every angle serves a purpose in the final composition will make editing smoother and create a more cohesive narrative. Select the Right Equipment For a successful multi-camera shoot, equipment choice is crucial. Consider these essentials: Matching Cameras:Using cameras with similar resolutions, frame rates, and color profiles is key to ensuring consistent footage. If possible, use identical cameras or, at the very least, models with similar specifications. Lenses: Choose lenses based on your desired framing for each shot. Wider lenses work well for establishing shots, while telephoto lenses can capture detailed close-ups without disturbing the scene. Synchronization: Many cameras have built-in timecode capabilities or can be synced with external audio devices. This helps keep footage aligned, making post-production much easier. Tripods and Stabilizers:Each camera should be properly stabilized to avoid jarring shifts. Tripods, gimbals, and other stabilizers can help keep your shots steady, especially for long takes. For added stability in multi-camera setups, the ZHIYUN CINEPEER WEEBILL 3E is an excellent choice. This ultra-compact gimbal, weighing just 990g, is designed for portability and comfort, making long shoots easier. With Bluetooth Shutter control, customizable buttons, and Sling Mode 2.5 to reduce fatigue, it’s an ideal stabilizer for capturing smooth, professional footage across multiple angles.   Lighting for Multi-Camera Shoots Lighting plays a critical role in multi-camera production. Since you’re capturing footage from multiple angles, lighting needs to be uniform and flexible. Avoid positioning lights in ways that might cast shadows visible from certain cameras. Soft lighting is often a good choice, as it minimizes harsh shadows and provides even illumination across the set. For optimal lighting control, consider using the ZHIYUN MOLUS G300 and ZHIYUN MOLUS B-Series lights. The MOLUS G300 combines high brightness at 300W with a unique MAX Extreme Mode that can overclock up to 500W, delivering impressive lighting power suitable for multi-camera setups. Its user-friendly design, including separate control and compatibility with the ZY Vega App, makes it easy to adjust settings on the fly, allowing seamless transitions between scenes.   Alternatively, the ZHIYUN MOLUS B-Series provides a range of power options from 100W to 500W, making it highly adaptable for various lighting needs. With pro color rendering (2700K to 6500K) and intuitive controls, including app-based remote adjustments, the B-Series offers precision in creating the right atmosphere for every shot. Both of these lights bring flexibility and power to multi-camera setups, ensuring consistency across all angles and enhancing the visual impact of your production.   Ensure Sound Consistency Sound is as important as visual continuity in a multi-camera production. When possible, use an external audio recorder to capture high-quality audio, as built-in camera mics are typically less reliable. Make sure all cameras can capture ambient sound if needed for synchronization, and use lapel or boom mics to capture voices with clarity.   Tip: If filming a live event, consider using audio feeds directly from the venue’s audio mixer, ensuring high-quality sound without background noise. Additionally, clap or use a slate at the beginning of the shoot to sync audio across multiple sources. 5. Manage Your Camera Angles and Movements Maintaining a variety of shots can make your production visually interesting. Here’s a quick breakdown of key angles and movements to consider: Static Shots:Primary cameras are often static to maintain continuity. These shots serve as anchor points in the final edit. Tracking Shots:Use secondary cameras to follow movement across the scene, adding dynamism. Reaction Shots: Capture expressions and reactions with a close-up camera, especially during interviews or performances. Wide Shots:Wide-angle cameras capture the full environment and are perfect for establishing context.   Tip: When directing, avoid overloading your footage with too many camera movements. Stability is often preferable, allowing editors to have more control over pacing and transitions.   Conclusion Mastering multi-camera production requires thoughtful planning, the right equipment, and an understanding of how each component—camera positioning, lighting, sound, and shot composition—contributes to the final piece. By planning your shots, selecting equipment that meets your needs, and ensuring balanced lighting and sound, you’ll create a seamless viewing experience that captivates your audience. As you build your multi-camera skills, remember that a well-coordinated shoot can make editing smoother and enhance the storytelling impact. Whether you’re capturing live events or cinematic scenes, these tips will help you produce professional, dynamic content with precision and creativity. Happy filming!   FAQS: Q: What is multi-camera production? A: Multi-camera production involves using multiple cameras to capture various angles and perspectives simultaneously, often used in live events, interviews, or complex scenes to create dynamic footage. Q: Why use a multi-camera setup? A: Multi-camera setups allow for capturing different perspectives at once, which adds depth to the video and makes editing easier. It’s ideal for live events, as it minimizes the need for retakes and helps in covering multiple aspects of the action. Q: What types of shots work well in multi-camera production? A: A mix of static, tracking, reaction, and wide shots creates visual interest. Static shots provide continuity, while tracking shots and close-ups add dynamics and emphasize details. Q: How can I streamline post-production for multi-camera footage? A: Sync all footage initially using timecode or audio markers, organize clips by camera angles, and start by editing primary shots. This structured approach helps streamline the process, making it easier to incorporate secondary shots and refine the final cut.

Enhancing Video Quality: How IBIS and Gimbals Work Together for Perfect Stability

Nov 15, 2024
Capturing smooth, stable footage is essential in filmmaking and videography. Even minor shakes can disrupt a viewer’s experience and reduce the professional quality of the video. Two of the most popular tools to achieve stable footage are In-Body Image Stabilization (IBIS) and gimbals. When used together, they provide a powerful combination that can take video quality to the next level. In this article, we’ll break down what IBIS and gimbals are, their individual benefits, and how they can work in harmony for stunningly stable shots.   What is In-Body Image Stabilization (IBIS)? In-Body Image Stabilization, commonly known as IBIS, is a technology built directly into the camera body. With IBIS, the camera’s sensor moves slightly to compensate for minor movements, reducing shake and helping to maintain a steady frame. This feature is especially useful when using handheld shots or shooting in low light without a tripod. IBIS is available in many modern mirrorless and DSLR cameras and is highly valued by photographers and videographers who need portable stabilization. Benefits of IBIS: Lightweight Stability: Since IBIS is built into the camera, it doesn’t add any extra weight to your setup. Versatile Use: Works with any lens, allowing videographers flexibility. Great for Low Light: Reduces the need for higher ISO settings, making it useful in low-light situations. Enhanced Portability: Ideal for handheld shooting where quick mobility is required.   What is a Gimbal? A gimbal is a separate, handheld device that provides stabilization by physically balancing the camera. It uses motors and sensors to counteract movement and keep the camera steady, making it especially valuable for moving shots. Gimbals are highly popular for dynamic videography, such as action shots, walking scenes, and tracking shots that follow a subject through different environments. Unlike IBIS, gimbals offer more extensive stabilization and allow for controlled, smooth movements across multiple axes.   Benefits of Gimbals: Dynamic Stabilization: Ideal for shots with significant movement, such as following a subject or capturing complex sequences. Multi-Axis Control: Stabilizes across three axes (tilt, roll, and pan), allowing for more diverse and fluid camera movement. Flexibility in Angles: Enables a wide range of creative angles, including low and high perspectives. Improved Cinematic Quality: Offers smoother transitions and more professional-looking footage. The Power of Combining IBIS and Gimbals While IBIS and gimbals are powerful individually, they can achieve exceptional stabilization when used together. Here’s how they can complement each other: Enhanced Stability in Challenging Conditions IBIS can manage subtle hand movements effectively, but when used with a gimbal, the two systems can counter both minor and major shakes. This is especially useful when filming in rough conditions like windy environments, crowded spaces, or uneven terrain.   Improved Low-Light Performance Gimbals can add stability without increasing the ISO, which helps keep the footage clean and noise-free in low-light settings. When IBIS and a gimbal work in tandem, you can capture stable shots without sacrificing video quality, even in challenging lighting situations.   Efficient Battery and Weight Management IBIS relies solely on the camera’s sensor, while gimbals use their own battery power to provide stability. This separation can reduce strain on your camera’s battery, allowing you to film for longer durations. Also, while carrying a gimbal adds extra weight, having IBIS means you can switch to handheld shots without needing another stabilizing device. Creative Versatility Gimbals allow for unique shots, like low-angle tracking or dramatic sweeps, while IBIS provides an extra layer of stability for fine movements. Together, they allow for a range of creative shots that are challenging to achieve with either tool alone.   For example, the ZHIYUN CINEPEER WEEBILL 3E is an ultra-compact, lightweight gimbal that’s ideal for handheld shooting. Its ergonomic A4-sized body is comfortable for long filming sessions and supports seamless wireless control with Bluetooth. Meanwhile, the ZHIYUN Crane 4 offers enhanced support with intelligent balance indicators and an extendable sling grip, which provides stability during complex shoots. These advanced gimbals ensure professional-grade stability and versatile filming options, allowing for effortless switching between portrait and landscape shots. How to Optimize Your Use of IBIS and Gimbals Choose the Right Gimbal for Your Camera SetupDifferent cameras vary in size and weight, and so do gimbals. If you’re using a mirrorless camera with built-in IBIS, look for a lightweight gimbal that won’t overpower your setup. Models like the ZHIYUN CINEPEER WEEBILL 3Eand ZHIYUN Crane 4 are excellent choices. The WEEBILL 3E’s Sling Mode 2.5 and customizable buttons make it perfect for mobile filmmakers, while the Crane 4's built-in fill light and dual follow focus interface enhance flexibility for professional-grade filming. Use IBIS for Subtle, Handheld ShotsFor scenes with minimal movement, IBIS alone can provide enough stability without needing a gimbal. Handheld shots with IBIS can be great for close-ups, interviews, or scenes where you want a more natural, organic feel. Switch to a Gimbal for Complex ShotsWhen shooting more complex scenes, like following a subject or capturing fast movements, switch to a gimbal. The gimbal will help counteract larger movements, while the IBIS will handle fine adjustments, allowing for smooth footage. Check Your Camera’s Stabilization SettingsSome cameras allow you to adjust the intensity of IBIS, which can affect how it interacts with a gimbal. Experiment with these settings to find the optimal stabilization level for your shots. Lowering IBIS intensity might help the gimbal’s motors work more smoothly with the camera.   Conclusion By using both IBIS and gimbals in your video production, you can elevate your footage’s quality and stability, making it suitable for professional-grade projects. IBIS provides portability and low-light benefits, while gimbals offer dynamic control for complex shots. Together, they create a perfect balance for achieving cinematic, shake-free footage.   Whether you’re filming action shots or close-ups, leveraging IBIS and gimbals can be your key to capturing seamless, captivating visuals that hold your audience’s attention.   FAQS: Q: What is IBIS, and how does it help with video stability? A: IBIS (In-Body Image Stabilization) is a system built into the camera body that compensates for camera shake by shifting the sensor to counteract unwanted movements. This technology enhances video quality by reducing blur and providing smoother footage, especially in handheld shooting situations. Q: Is IBIS enough for handheld videography without a gimbal? A: For minimal movement, IBIS can provide sufficient stabilization. However, for dynamic or highly mobile shots, a gimbal will offer better stability. Q: Which type of camera works best with IBIS for video stabilization? A: Cameras with built-in IBIS, such as mirrorless models (e.g., Sony Alpha series, Panasonic GH5), are excellent for video stabilization. These cameras benefit from both IBIS and gimbal support to achieve the highest level of smoothness and stability. Q: How does IBIS affect low-light performance? A: IBIS allows for stable shots without high ISO settings, which reduces noise in low-light shots, making it a great tool for handheld shooting in dim environments. Q: What features should I look for in a gimbal if I want to pair it with IBIS? A: Look for gimbals with adjustable settings that allow you to fine-tune the stabilization to complement IBIS. Key features to consider include Bluetooth control, customizable buttons, multiple shooting modes, and a lightweight design for comfortable, long-duration shooting.

Warm or Cool? Mastering Color Temperature for Stunning Photographs

Nov 04, 2024
Photography is not just about capturing images; it's about telling stories and evoking emotions. One of the most powerful tools in a photographer's arsenal is the understanding of color temperature. The temperature of light can drastically alter the mood of a photograph, influencing how viewers perceive the scene. In this blog post, we'll explore the concept of color temperature, the difference between warm and cool light, and how to master these elements to create stunning photographs.   Understanding Color Temperature Color temperature is measured in Kelvin (K) and refers to the hue of a light source. Lower color temperatures (around 2000K to 3000K) emit a warm, golden light, often associated with sunrise, sunset, or candlelight. Higher color temperatures (4000K to 6000K) produce cool, bluish light, similar to daylight or shade.   The color temperature of light can dramatically influence the atmosphere of your images. Warm light tends to evoke feelings of comfort, nostalgia, and intimacy, while cool light often conveys calmness, clarity, and a sense of distance.   The Power of Warm Light Warm light is often sought after for its ability to create a cozy and inviting atmosphere. Photographers often gravitate towards golden hour—the time just after sunrise or before sunset—when the sun casts a warm glow over the landscape. This soft light can enhance skin tones, create stunning silhouettes, and add depth to your images. Tips for Working with Warm Light: Golden Hour Photography: Aim to shoot during the golden hour for the most flattering warm light. This is when the sun is low on the horizon, creating a soft, diffused light that enhances colors. Use Reflectors: Reflectors can bounce warm light onto your subject, adding a beautiful glow and reducing harsh shadows. Gold reflectors are particularly effective for enhancing warm tones. Adjust White Balance: In post-processing, consider adjusting your white balance to enhance warm tones. Moving the slider towards the warmer side can give your images a more inviting feel. Experiment with Backlighting: Shooting with the light source behind your subject can create a halo effect, highlighting textures and adding warmth to your photograph.   The Allure of Cool Light Cool light, on the other hand, is essential for conveying clarity and precision. It's ideal for capturing crisp, clear images in bright daylight or shaded areas. Cool light can enhance details and create a fresh, clean look, making it a favorite for architectural and product photography. Tips for Working with Cool Light: Shooting in Shade: When the sun is harsh, shooting in the shade can provide cool, even lighting that helps prevent overexposed highlights and underexposed shadows. Daylight Balance:Use daylight-balanced lighting equipment when shooting indoors or in low light. This ensures your images maintain that crisp, cool tone. Cool White Balance: Adjust your camera's white balance settings to cooler temperatures (like tungsten) to enhance the bluish hues in your images. Mood and Atmosphere:Use cool light to convey emotions such as tranquility or isolation. This is particularly effective in landscape photography, where cool tones can create a sense of distance. Enhancing Your Lighting Setup: ZHIYUN CINEPEER CF100 and CINEPEER C100 To bring your vision to life with precision lighting, the ZHIYUN CINEPEER CF100 and CINEPEER C100 offer flexible color and brightness adjustments, making them ideal for both warm and cool lighting needs.   ZHIYUN CINEPEER CF100: This 100-watt stick light offers a One-Press MAX mode for high brightness up to 2610 Lux, with HSI and RGB for rich color control. It includes 6 lighting moods and 7 effects like color transitions, making it ideal for VLOGs and live streams. Flexible charging options ensure it’s ready whenever you are.  ZHIYUN CINEPEER C100: A professional-grade pixel light with 36,000 color options and a powerful 3870 Lux output, C100 is designed for true-to-life color in portrait and commercial work. Its long battery life and Bluetooth control allow synchronized multi-light setups with ease.   Conclusion Mastering color temperature is crucial for creating impactful photographs. Whether you’re drawn to the warmth of golden hour or the clarity of cool light, understanding how to manipulate these elements can elevate your work. With tools like the ZHIYUN CINEPEER CF100 and CINEPEER C100 Light, you can easily adjust lighting to achieve stunning visuals that resonate with your audience. Embrace the power of light and let your photography tell compelling stories.   FAQs: Q: What are some common sources of warm light? A: Common sources of warm light include natural phenomena like sunrise and sunset, as well as artificial sources such as incandescent bulbs, warm LED lights, and candlelight. These sources produce light that is rich in reds and yellows, making them ideal for creating a cozy and inviting atmosphere in photography. Q: What are the benefits of shooting in warm light? A: Shooting in warm light can enhance skin tones, making portraits more flattering and lifelike. It adds depth and dimension to images, creating a beautiful glow that highlights textures and details. Additionally, warm light can evoke emotions such as nostalgia and warmth, making it particularly effective for family portraits, weddings, and other intimate settings. Q: How can I adjust the color temperature in post-processing? A: In post-processing software like Adobe Lightroom or Photoshop, you can adjust the color temperature using the white balance tool. By moving the temperature slider toward the warmer side (right), you can enhance the warm tones in your image, while sliding it toward the cooler side (left) will emphasize cooler hues. This adjustment can help achieve the desired mood and tone that complements your photography. Q: What role does white balance play in color temperature? A: White balance is crucial in photography as it helps ensure that colors appear accurate and natural. Adjusting the white balance setting on your camera compensates for different lighting conditions, allowing you to maintain the desired color temperature in your images. Proper white balance can enhance the overall quality of the photo and accurately reflect the scene's true colors.

Let AI Direct: Elevate Your Content with a Smart Smartphone Gimbal

Nov 04, 2024
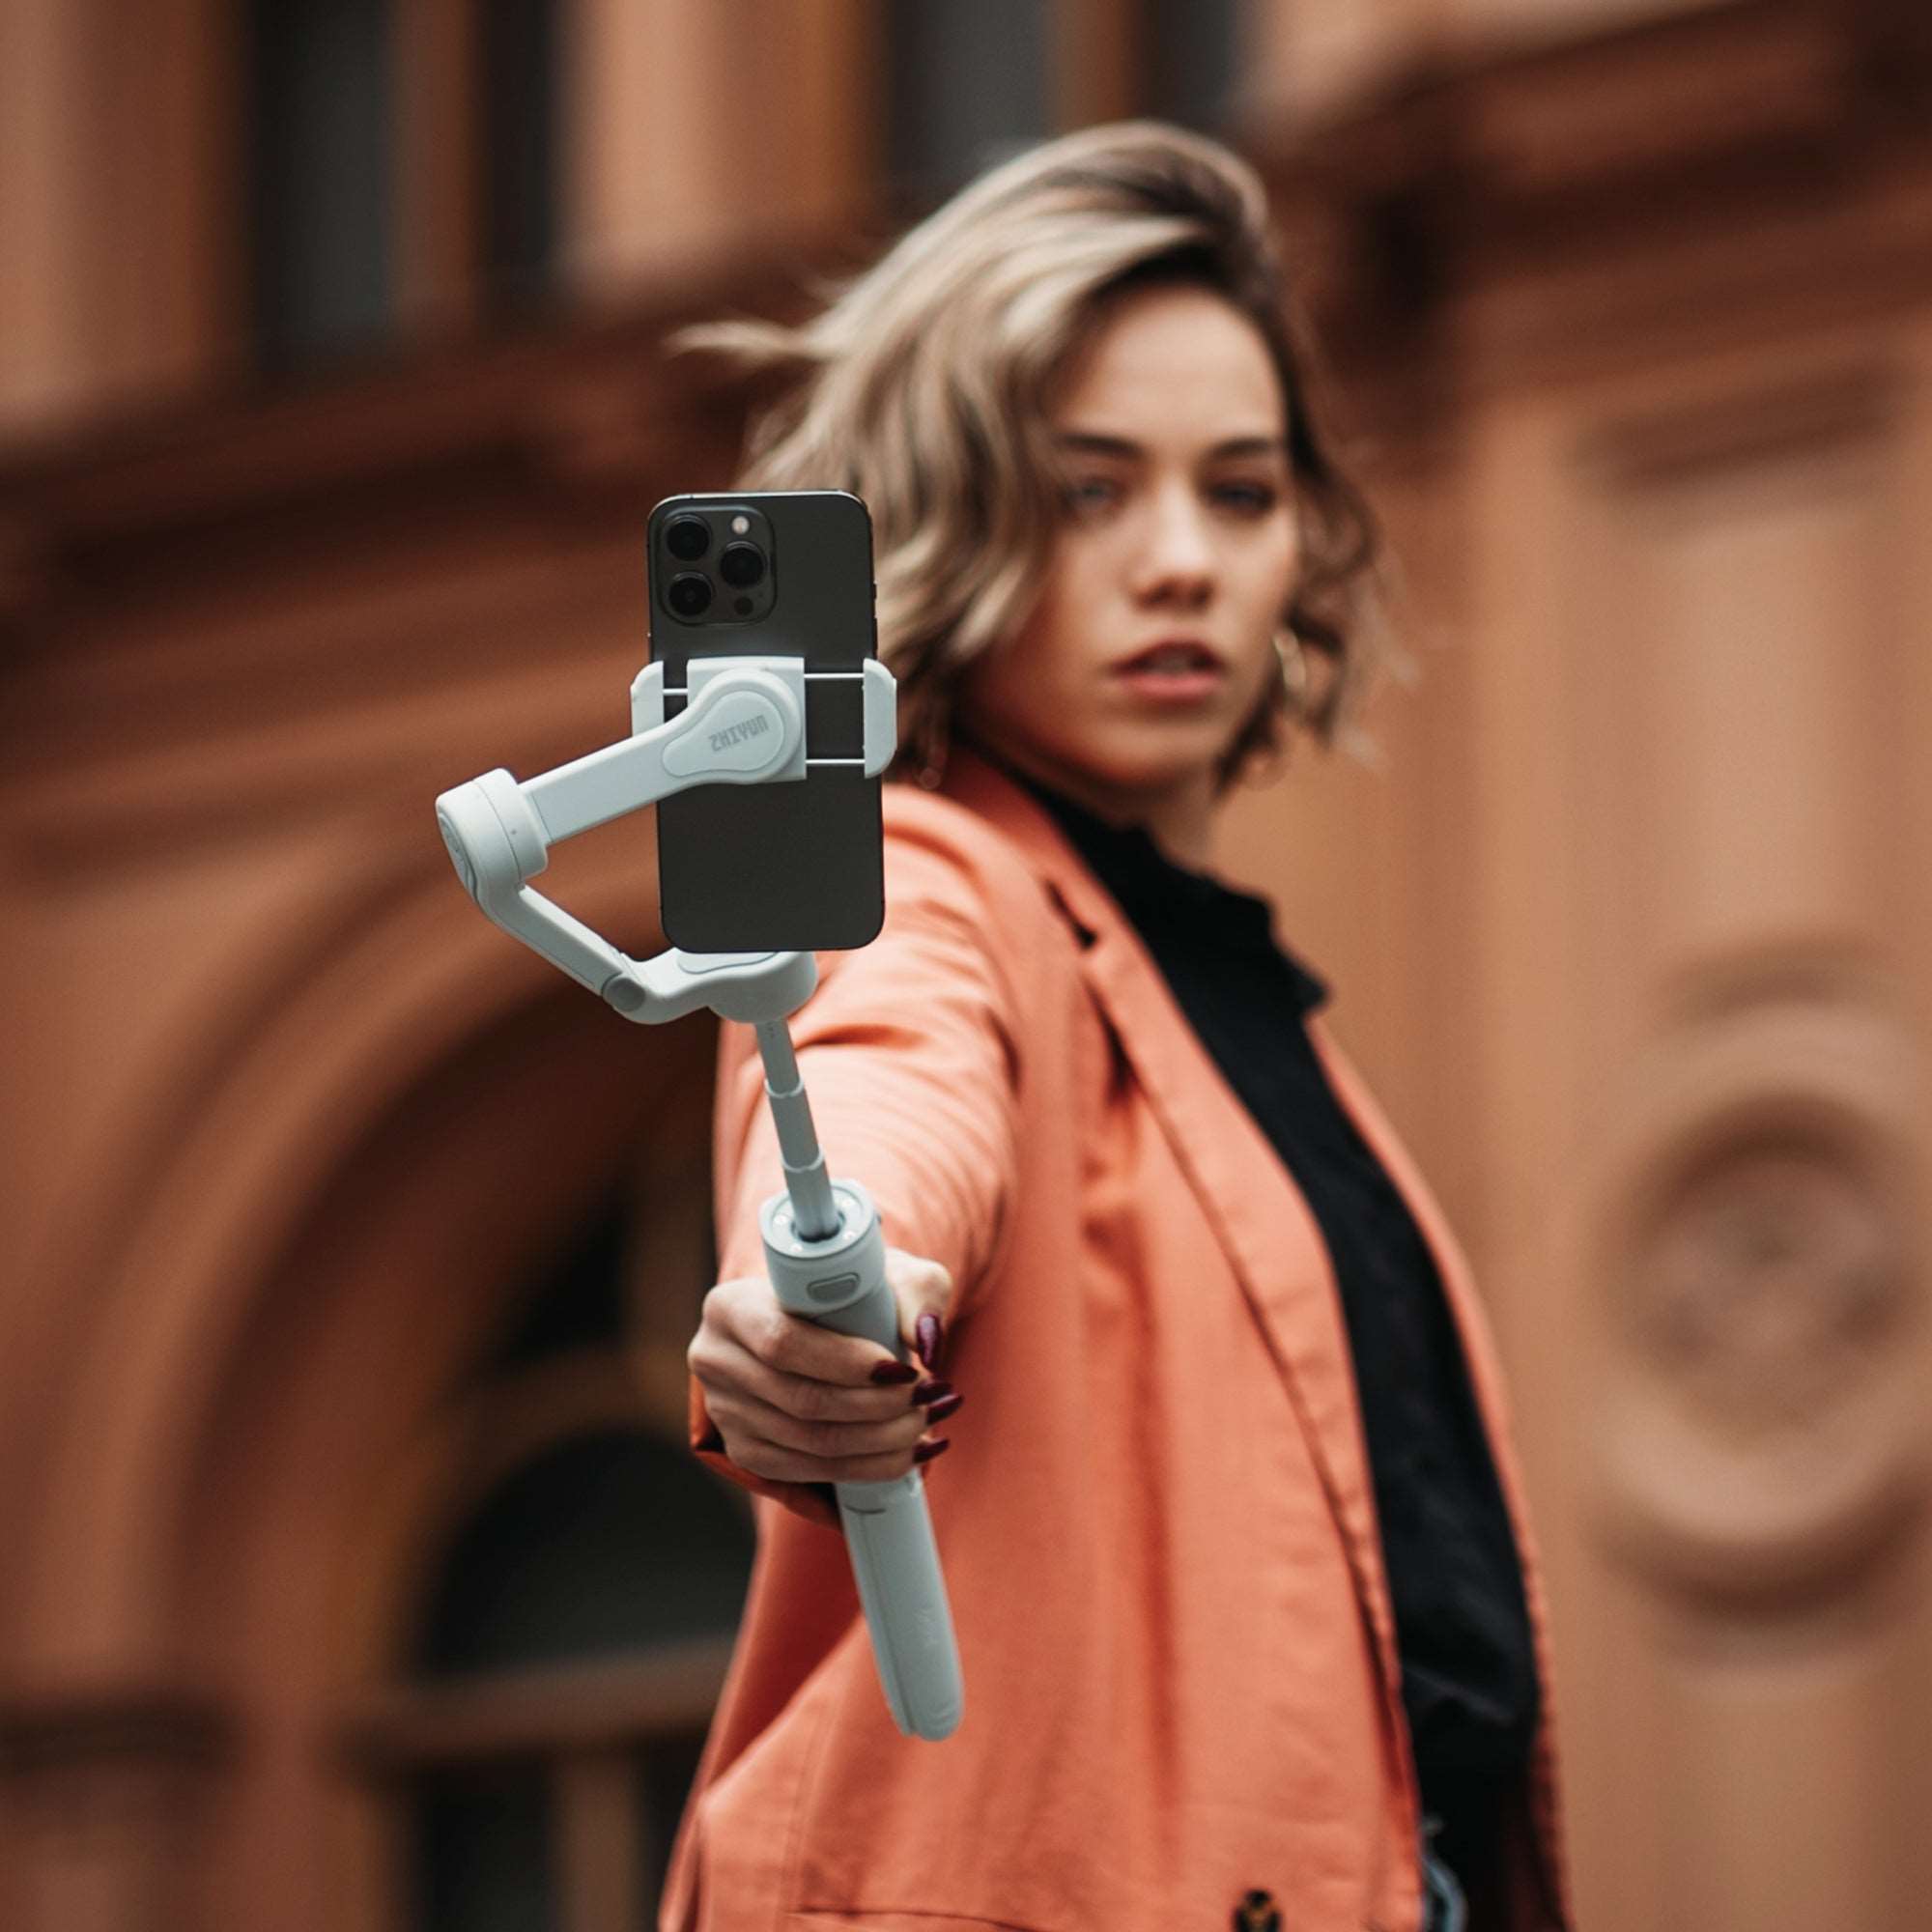
In the world of content creation, capturing smooth, professional-quality footage can often feel like a technical challenge. That’s where the innovation of AI-powered smartphone gimbals comes into play. These smart stabilizers offer advanced AI features that make filming effortless, transforming your smartphone into a powerful tool for creating cinematic content. In this blog, we’ll dive into the key benefits of AI-controlled smartphone gimbals.   The Power of AI in Smartphone Gimbals AI technology has revolutionized the capabilities of smartphone gimbals, offering features like voice control, gesture-based tracking, and real-time stabilization. These smart gimbals adapt to your movements and commands, enabling you to focus more on your creative vision and less on the technical aspects of filming. For content creators, vloggers, and social media influencers, an AI-powered gimbal provides the following key advantages: Hands-Free Control:AI enables hands-free operation through voice and gesture commands. Enhanced Stability: AI-powered stabilization algorithms ensure smooth footage, even during dynamic shots. Tracking Capabilities:Smart gimbals can track subjects autonomously, keeping them in focus without needing constant adjustments. ZHIYUN CINEPEER CQ5: Your Portable Filmmaking Partner The ZHIYUN CINEPEER CQ5 is a compact and portable gimbal designed with advanced AI features to simplify smartphone filming. With voice control and smart tracking, this gimbal acts as your personal camera operator, making it easy to capture professional-quality footage on the go.   Key Features of the ZHIYUN CINEPEER CQ5 Voice Control: Say “Hey Cami” to activate voice commands, allowing you to operate the gimbal without needing to touch it. This feature is especially useful for solo content creators who need to operate their camera remotely. AI-Powered Tracking: The CINEPEER CQ5’sAI tracker uses hand gestures to track your movements and adjust the camera's focus as you move. This is perfect for capturing action shots or dynamic angles without needing a dedicated camera operator. 215mm Extension Rod: Need a wider angle or an elevated view? The built-in 215mm extension rod lets you expand your reach, enabling more creative shooting possibilities and the ability to capture stunning wide-angle shots. Magnetic Fill Light: Low-light conditions are no longer a limitation. The ZHIYUN CQ5 includes a magnetic fill light with adjustable brightness levels, allowing you to add professional lighting to your shots on the fly. 3-Axis Stabilization: Smooth and stable footage is a must for high-quality video. With 3-axis stabilization, the CQ5 effectively reduces shake, delivering fluid movement and rock-solid stability.   The foldable design of the ZHIYUN CQ5 mobile stabilizer makes it ideal for creators on the go. Its compact build allows you to easily fit it into a bag or even a pocket, ensuring that you’re always ready to capture that perfect shot wherever you are.   ZHIYUN Smooth 5S AI: Advanced AI with Precision Craftsmanship For creators seeking an elevated level of precision and control, the ZHIYUN Smooth 5S AI is a standout choice. With high-quality craftsmanship, an intuitive control panel, and a powerful magnetic AI tracking module, the Smooth 5S AI allows you to capture professional footage with ease. Key Features of the ZHIYUN Smooth 5S AI Magnetic AI Tracking Module:The Smooth 5S AI’stracker can be attached to the front or rear of the device, allowing flexibility in tracking objects or people. Gesture-based control further enhances this feature, enabling remote video recording with simple hand signals. Integrated and Magnetic Fill Lights: Low-light settings can be challenging, but the Smooth 5S AI’s built-in fill light, combined with two additional magnetic lights, provides up to 2040 lux peak illuminance. This ensures well-lit shots even in dim environments, adding a cinematic quality to your videos. Orthogonal 3-Axis Structure: This unique structure offers full 360° rotation, which is ideal for capturing immersive shots. With ZHIYUN’s classic orthogonal design, you can enjoy true freedom in movement and achieve smooth transitions, enhancing the flow of your storytelling. Smart Control Panel: The all-in-one control panel puts key functions within easy reach. Adjust parameters, start and stop tracking, or switch modes—all from the handle, making it easier to operate in real-time. Advanced Stabilization Technology:Using ZHIYUN's enhanced stabilization algorithm, the Smooth 5S AI smartphone gimbaldelivers exceptional stability for ultra-smooth footage, allowing creators to capture professional-quality video in virtually any situation. The Smooth 5S AI phone stabilizer is crafted with a textured translucent body, adding both aesthetic appeal and ergonomic comfort. The sleek design, paired with its powerful functionality, makes this gimbal a top choice for filmmakers and content creators aiming for professional-grade results.   Choosing the Right AI Gimbal for Your Needs When deciding between the ZHIYUN CINEPEER CQ5 and the ZHIYUN Smooth 5S AI, consider your filming style and needs: Portability:If you’re a content creator who is always on the move, the compact and foldable design of the CQ5 might be a better fit. Its lightweight build and portability make it ideal for travel vlogging or spontaneous shooting. Professional Features:For those seeking advanced features and higher-grade craftsmanship, the Smooth 5S AI offers more options for customization and control. Its robust design and versatile functions are suitable for filmmakers who require a higher degree of precision. Lighting Needs: Both models provide excellent lighting solutions, but if you frequently shoot in low-light conditions, the Smooth 5S AI’s 2040-lux fill lights may give you the advantage needed for nighttime or indoor shoots.   Final Thoughts The future of smartphone gimbals is here, and it’s powered by AI. Whether you’re documenting a journey, filming a tutorial, or capturing everyday moments, the ZHIYUN CINEPEER CQ5 and the ZHIYUN Smooth 5S AI gimbals offer cutting-edge features to elevate your content. With these tools, high-quality video creation is within reach for everyone—no extra equipment or film school required. Embrace the power of AI and take your content to new heights with a smart smartphone gimbal today.   For more options, please check out ZHIYUN's complete mobile stabilizers series.

Unleash Your Creativity Hands-Free: Discover the ZHIYUN CINEPEER CQ5 AI Voice-Controlled Gimbal

Oct 31, 2024
Enter the Era of AI Voice-Controlled Gimbals In an era where content creation is constantly evolving, ZHIYUN has introduced the CINEPEER CQ5 phone stabilizer gimbal. As the first gimbal to feature ZHIYUN’s groundbreaking AI Voice Control System, this device frees your hands, allowing you to command your stabilizer with just a word. It’s more than a gimbal; it’s your intelligent filming assistant. AI Voice Control – Hands-Free Shooting Like Never Before Imagine filming your adventure or creating content without having to touch your device. With the ZHIYUN CINEPEER CQ5, you can simply say, “Hey Cami”, and instantly command your stabilizer. This feature is perfect for vloggers, solo content creators, or anyone who wants a hassle-free filming experience. The voice recognition system is highly responsive within a range of up to 3 meters, making it ideal for on-the-go shooting. This voice control functionality opens a new world of creativity, freeing up your hands to focus on the shot rather than the setup. Compact Folding Design – Portable, Powerful, and Pocket-Ready The CQ5 is designed with portability in mind. Its foldable design and sleek, slide-lock mechanism make it a breeze to carry and set up. When folded, it fits comfortably into a pocket or small bag, making it the perfect travel companion for spontaneous shooting sessions. Whether you’re on a solo hike or wandering through busy city streets, the CQ5 is always ready to capture the moment, no extra hassle required. Smart AI Tracking – Your Personal Camera Operator AI-powered tracking makes the ZHIYUN CQ5 an ideal tool for creators who need freedom to move. The gimbal’s intelligent AI can recognize hand gestures, providing touchless control from a distance. This feature transforms the CQ5 into your personal cameraman, seamlessly keeping you in frame while you focus on delivering the best content. Whether capturing fast-paced action or shooting solo vlogs, the AI tracking system ensures every shot remains smooth and centered.   (Note: AI tracking is available with the ZHIYUN CINEPEER CQ5 Combo package.) Extendable Rod for Wide-Angle Shots – Unlock New Perspectives The ZHIYUN CINEPEER CQ5 takes creativity to new heights with its 215mm extendable rod. With a quick pull, you can capture wide-angle shots that are otherwise challenging with standard gimbals. This feature is ideal for group selfies, panoramic shots, and dynamic angles that add an artistic touch to your content. Extend your reach and bring a new perspective to your filming, effortlessly elevating your shots. Magnetic Fill Light – Perfect Lighting at Your Fingertips Low light conditions are no longer a challenge with the CQ5’s magnetic fill light. Featuring 5 levels of brightness adjustment, it’s easy to add just the right amount of light to enhance your footage. The magnetic design ensures secure placement without the hassle of cables, making it quick to attach and adjust on the go. Whether you’re shooting in dimly lit settings or just want to add a professional touch, this fill light provides everything you need to capture stunning, well-lit footage.   Seamless Dual Control Dial – Effortless Adjustments on the Fly The dual control dial on the CQ5 gimbal is designed with user convenience in mind. This feature allows you to switch between working modes, adjust focal length, and control the brightness of the magnetic fill light effortlessly. The dial’s intuitive design means that all adjustments are just a simple twist away, enabling quick customization without pausing to access the app. With the CQ5, you’re always ready to capture that perfect shot in an instant.   Rock-Solid Stability and All-Day Battery Life – Filming Without Limits Thanks to ZHIYUN’s advanced 3-axis stabilization technology, the CQ5 delivers incredibly smooth footage, even during fast movements. The stabilization is so precise that the footage appears as steady as if it were shot on a tripod. Plus, the quick-mount phone clamp saves you from tedious balancing adjustments, allowing you to start shooting right away.   The CQ5 also features an impressive 11-hour battery life, with fast charging capabilities that allow you to power up in just two hours. With this extensive battery life, you can confidently capture everything from dawn to dusk without worrying about running out of power.   Experience the Future of Gimbals with ZHIYUN CINEPEER CQ5 The ZHIYUN CINEPEER CQ5 is more than just a gimbal; it’s a revolutionary tool that makes advanced filming accessible to everyone. With features like AI voice control, smart tracking, an extendable rod, and a magnetic fill light, this device caters to both beginners and seasoned creators alike. The ZHIYUN CQ5 mobile stabilizer truly embodies ZHIYUN’s vision of creating intelligent, user-friendly solutions for modern filmmakers.   So, if you’re ready to elevate your content and experience the freedom of hands-free shooting, it’s time to step into the future with the ZHIYUN CINEPEER CQ5. Say "Hey Cami" and unlock a new level of creative control today!   FAQs: Q: Is the AI-powered tracking available in all models? A: No, it is only for Smooth 5S AI and CQ5. Q: How long does the ZHIYUN CINEPEER CQ5 battery last? A: The CQ5 provides up to 11 hours of battery life and supports quick charging, reaching full power in just two hours. Q: Can the ZHIYUN CINEPEER CQ5 be used for low-light filming? A: Yes, the CQ5 is equipped with a magnetic fill light, which attaches easily to the phone clamp and provides five levels of adjustable brightness. This feature allows for optimal lighting in various conditions, from dim indoor settings to evening shots outdoors. Q: How is the dual control dial beneficial for adjusting shots? A: The dual control dial is engineered for quick adjustments, allowing you to shift between modes, focus, and control brightness on the fly. This means you don’t need to pause or reach for your phone every time you want to make minor adjustments. Instead, you can maintain control over your shot with just a twist, seamlessly transitioning between scenes and settings without interrupting the flow of your filming.

How to Photograph the Northern Lights: A Beginner’s Guide

Oct 31, 2024
Capturing the Northern Lights, or Aurora Borealis, is an exhilarating experience for photographers. These magnificent, colorful displays paint the night sky with greens, purples, and reds, making them a dream subject. However, photographing them effectively requires proper preparation, equipment, and techniques. In this guide, we’ll show you how to photograph the Northern Lights and incorporate helpful tools like stabilizers and photography lights to enhance your results.   Choose the Right Location and Time To capture the Northern Lights, you’ll need to be in the right place at the right time. The best locations for viewing include high-latitude areas such as: Norway (Tromsø or Lofoten Islands) Iceland Alaska Northern Canada   Aim for clear, dark skies and check aurora forecasts to increase your chances. The peak season to witness the Northern Lights is between September and March, when the nights are long and the sky is darkest.   Use the Right Equipment While you can capture auroras with a basic camera, using professional-grade equipment will ensure your photos stand out. Here's what you'll need: Camera: A DSLR or mirrorless camera with manual settings is essential for adjusting exposure and focus. Wide-angle lens: Choose a fast lens with an aperture of f/2.8 or lower to capture more of the night sky. Tripod:Keeping your camera steady during long exposures is crucial. Use a sturdy tripod to stabilize the shot and avoid blurry images. Gimbal or stabilizer:If you want to take smooth, motion-filled videos of the Northern Lights, consider using a gimbal stabilizer like the ZHIYUN Crane 4. The ZHIYUN Crane 4 camera stabilizer is lightweight yet highly stable, capable of handling heavier camera setups. It features balance indicator lights to ensure precise calibration and a quick-release module that allows easy switching between horizontal and vertical shooting modes—perfect for capturing both landscape and portrait shots of the aurora. Additionally, its extendable sling grip offers more comfort and flexibility, allowing you to adjust for different shooting styles, whether in sling mode or two-handed. Camera Settings for Northern Lights Photography To successfully photograph the Northern Lights, you’ll need to adjust your camera settings to capture enough light while avoiding overexposure. Here are some recommended starting points: Aperture:Set your lens to its widest aperture (f/2.8 or lower) to allow more light into the camera. ISO: Start with an ISO of around 800-3200. Higher ISO values can brighten your image but might introduce noise, so find a balance that works for your camera. Shutter Speed: Aim for a shutter speed between 5 and 20 seconds. If the auroras are moving quickly, use a shorter exposure to avoid blurring the lights. Manual focus: Switch your camera to manual focus and adjust to infinity. Autofocus struggles in low-light conditions, so use a distant light source to focus manually.   Add Depth with a Foreground To make your Northern Lights photos more dynamic, consider adding foreground elements like mountains, trees, or even a person to create depth in your composition. To ensure these elements are visible without overpowering the natural beauty of the aurora, use a portable and adaptable photography light like the ZHIYUN CINEPEER C100. This lightweight, portable light offers full-color RGB with 36,000 hue options, adjustable color temperature from 2700K to 6500K, and a powerful 100W peak output, making it perfect for illuminating your foreground. The ZHIYUN C100 also features built-in music mode and multiple lighting effects, giving you the flexibility to adapt your lighting setup to different scenarios. With its ultra-long battery life, adaptive charging technology, and DynaVort Cooling System™, the ZHIYUN CINEPEER C100 light ensures you won’t miss a shot, staying cool and reliable in even the most challenging conditions.   Composition Tips for Stunning Shots Composing your shot is just as important as camera settings. While the Northern Lights themselves are awe-inspiring, including a well-chosen foreground can make your image more dynamic. Here are a few tips: Rule of Thirds:Position the horizon line on the lower or upper third of the frame for a balanced shot. Incorporate landscape elements: Mountains, trees, and lakes provide context and help guide the viewer’s eye through the photo.   Consider Time-Lapse and Video In addition to still shots, capturing a time-lapse or video of the Northern Lights can add a unique perspective. Set your camera on a time-lapse mode with an interval of 5-10 seconds between shots, and let it run for an extended period to capture the movement of the auroras.   Post-Processing Tips After capturing your shots, you’ll likely need to do some light editing. Tools like Adobe Lightroom or Photoshop can help enhance your photos: Increase exposure slightly if needed. Reduce noise caused by higher ISO settings. Boost contrast and vibrancy to make the auroras pop. Make sure to adjust carefully so the colors remain natural and the overall feel of the photo remains authentic.   Conclusion Photographing the Northern Lights requires preparation, the right gear, and a bit of patience. By following the tips outlined in this guide, you’ll be well on your way to capturing breathtaking images of this natural wonder. With the right settings, a sturdy gimbal stabilizer, and a creative composition, your photos will do justice to one of nature’s most beautiful displays.   Whether you’re a seasoned photographer or a beginner, photographing the Northern Lights is an unforgettable experience. So grab your camera, dress warmly, and head out into the night sky for your chance to capture the auroras in all their glory.   FAQs: Q: How to set iPhone camera for northern lights? A: Night Mode: Enable Night Mode for long exposure shots. The iPhone will automatically suggest this in low-light conditions. ISO: Increase the ISO to 800-1600 for brighter images in the dark. Exposure: Manually adjust exposure to around 10 seconds or more to capture the auroras’ movement. Focus: Tap and hold to lock focus on a distant light source. You can also adjust the exposure by sliding up or down on the focus box. Q: What weather conditions are ideal for photographing the Northern Lights? A: Clear, cloudless skies are crucial for Northern Lights photography. Cold temperatures also reduce atmospheric moisture, improving visibility of the aurora. Q: How can I protect my camera in extreme cold conditions? A: To avoid battery drain in freezing temperatures, keep spare batteries warm in your pocket. Consider using weatherproof camera covers to protect your gear from moisture and frost. Q: How can I avoid condensation on my camera lens? A: To prevent condensation, let your camera acclimatize to the cold by leaving it outside for a while before you start shooting. After the shoot, place the camera in a sealed plastic bag before bringing it back indoors to avoid fogging.