










Your cart
Your cart is empty
News


Mastering Vlogs: Essential Camera Techniques for Smooth Transitions
Aug 15, 2024
In the ever-evolving world of vlogging, mastering smooth transitions is key to creating engaging and professional-looking videos. Transitions are more than just a way to move from one scene to another; they can enhance storytelling, maintain viewer interest, and elevate the overall production quality of your content. Here, we’ll explore essential camera techniques that will help you achieve seamless transitions in your vlogs.
Plan Your Shots
Smooth transitions begin with good planning. Before you start filming, outline the key scenes of your vlog and consider how you want to transition between them. Planning your shots allows you to visualize the flow of your video and identify opportunities for creative transitions. Storyboarding or sketching a rough sequence of scenes can be incredibly helpful in this process.
Use In-Camera Transitions
In-camera transitions are executed while filming and don't require post-production effects. They can add a dynamic touch to your vlogs. Here are a few techniques:
Whip Pan:Quickly move the camera from one direction to another, creating a motion blur. Start the next shot with a similar movement to create a seamless transition.
Match Cut:Align objects or shapes in two different scenes to match their position and movement. For instance, ending one scene with a door closing and starting the next with another door opening.
Camera Blocking:Move the camera behind an object, such as a wall or a person, to obscure the view. Begin the next scene with the camera emerging from behind a similar object.
Leverage Editing Software
While in-camera transitions are effective, editing software can elevate your transitions to the next level. Programs like Adobe Premiere Pro, Final Cut Pro, and DaVinci Resolve offer a range of tools to create smooth transitions.
Cross Dissolve:This classic technique fades out one clip while fading in the next, creating a smooth blend between scenes.
L-Cut and J-Cut:These involve overlapping audio and video. An L-Cut has audio from the next scene start before the video, while a J-Cut has the video from the next scene start while the audio from the previous scene continues.
Masking Transitions:Use masking to create creative transitions by revealing one scene over another. This requires precise editing but can result in visually stunning effects.
Get Steady: The Importance of Stabilizers
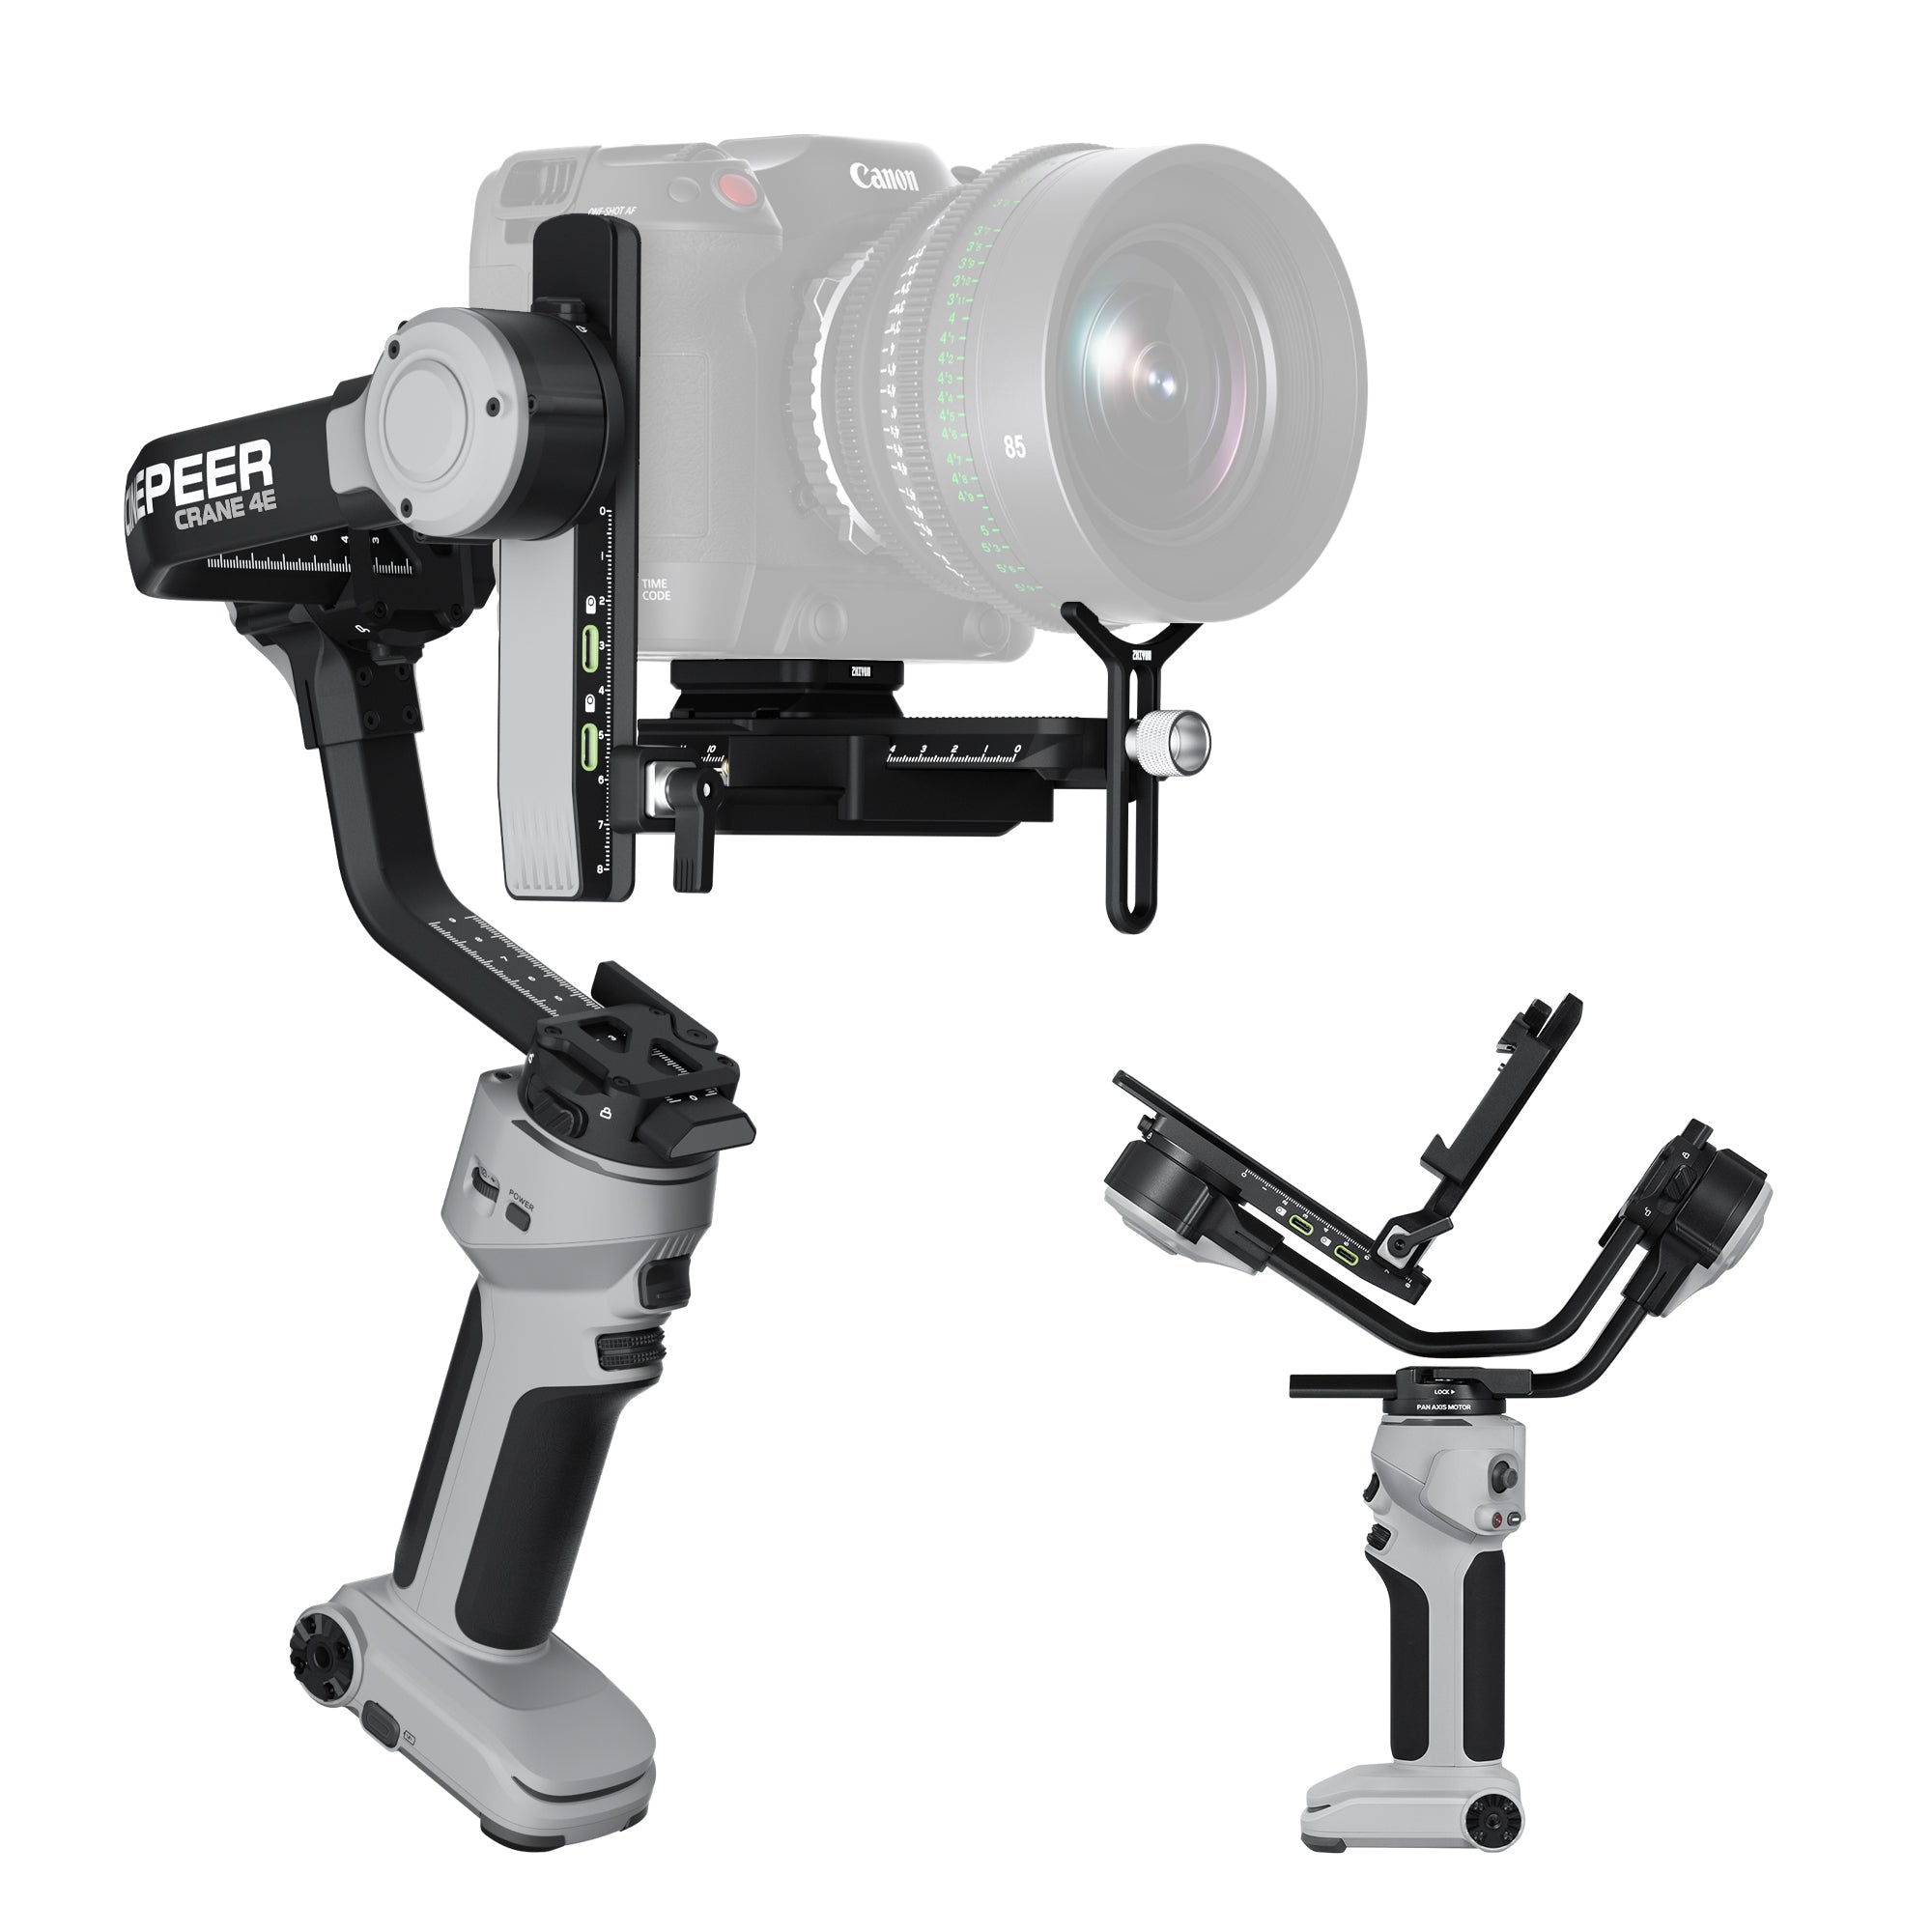
Imagine capturing the sun-kissed beaches, vibrant markets, and breathtaking landscapes of your travels without a hint of shake or blur. That's where stabilizers come in, seamlessly transforming every step, turn, and leap into a fluid narrative. Whether it’s beach photography, lifestyle photography, or vlogging, a stabilizer ensures that your footage remains stable and crystal clear, capturing every magic moment in its purest form. Step up your game with ZHIYUN Crane 4 camera stabilizers, the lightweight warrior designed to conquer even the most demanding vlog challenges. Lightweight, sturdy, and powerful, it boasts Bluetooth shutter control for fluid filming and a long-lasting battery with PD fast charge.
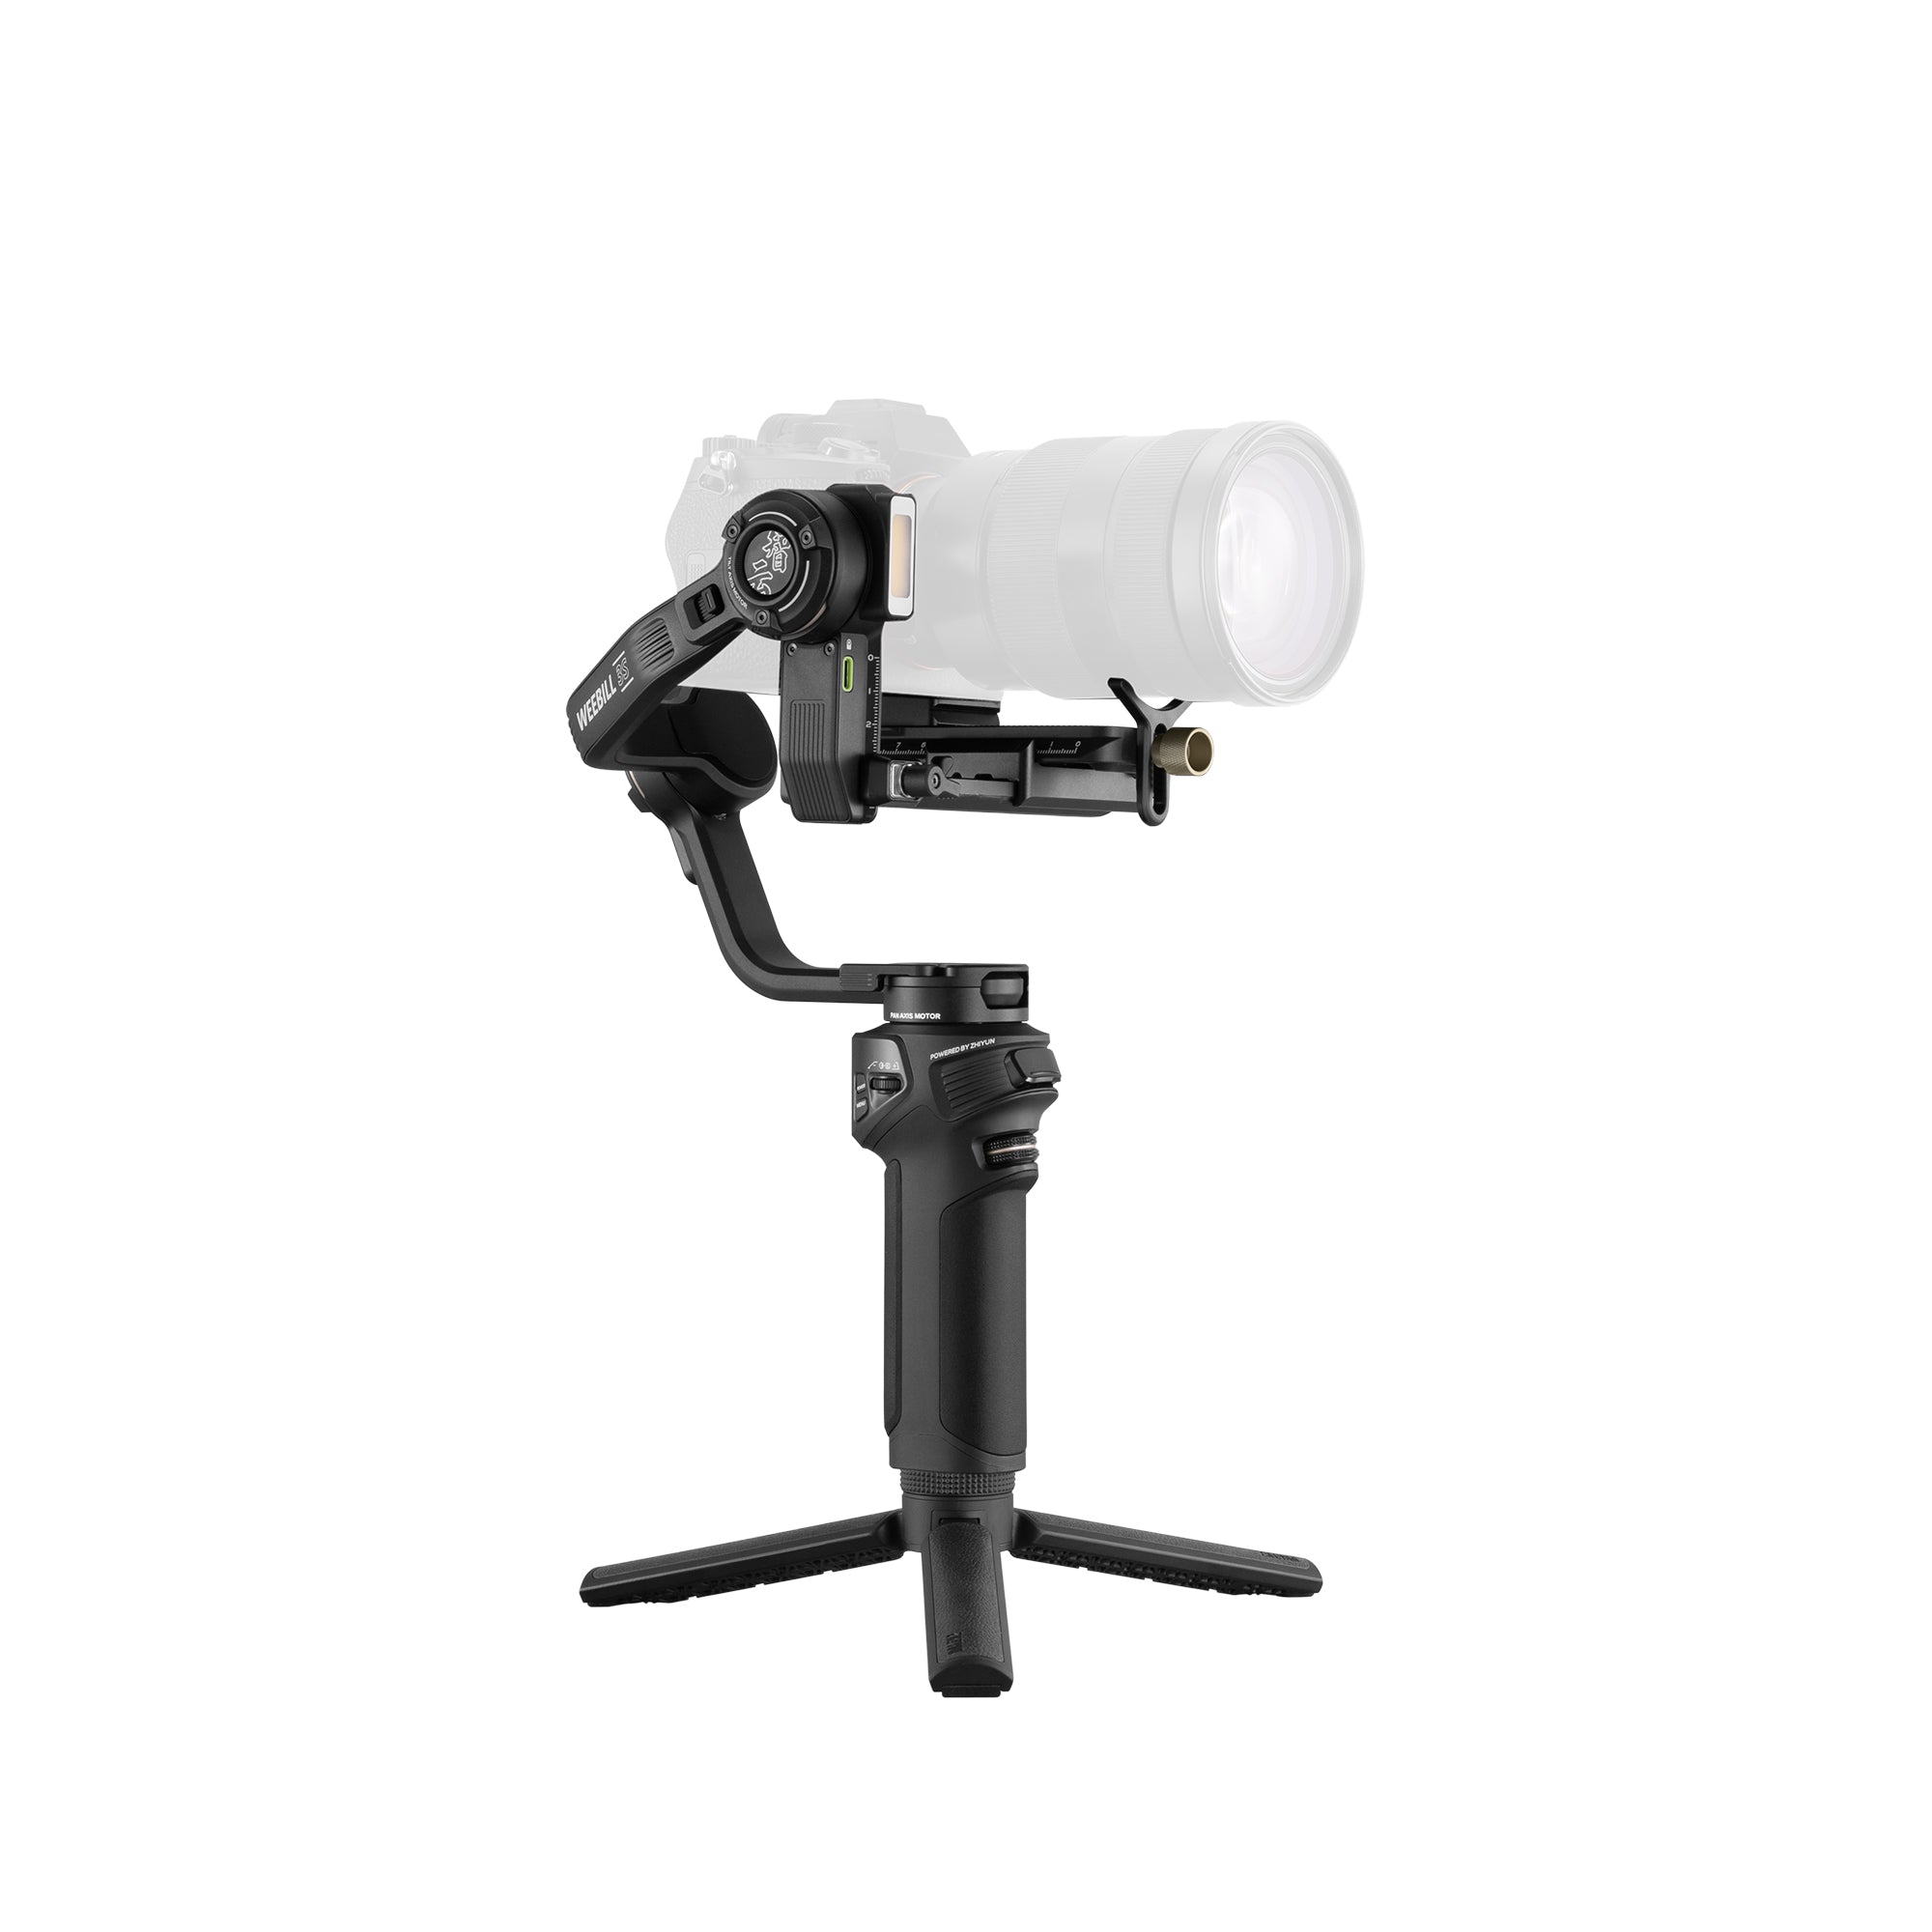
For an ultra-compact yet powerful solution, ZHIYUN CINEPEER WEEBILL 3E is the ultimate travel companion. Its sleek design and featherweight build make it easy to slip into your backpack without adding unnecessary bulk. With Bluetooth shutter control at your fingertips and Sling Mode 2.5 reducing fatigue during extended shoots, you’ll be able to capture every twist and turn of your journey with ease.
Use Natural Elements
Incorporating natural elements into your transitions can add a professional touch. Here are some ideas:
Zoom Transitions:Start by zooming in on an object to fill the frame, and begin the next shot by zooming out from a similar object.
Sky or Ground Transitions:Point the camera toward the sky or ground to end a scene and begin the next shot from the same perspective.
Water Transitions:Utilize water splashes, waves, or reflections to transition between scenes, creating a fluid effect.
Maintain Continuity
Continuity is crucial for smooth transitions. Ensure that lighting, color balance, and motion direction are consistent between shots. This helps maintain the illusion of a seamless transition. Pay attention to the small details, such as the position of objects and the direction of movement, to avoid jarring the viewer.
Experiment with Speed Ramping
Speed ramping involves changing the speed of a clip to create a smooth transition. This technique can be particularly effective for action sequences or dynamic scenes. Gradually speeding up or slowing down the footage can create a seamless blend between different scenes.
Slow Motion:Use slow-motion shots to create a dramatic effect and smooth out transitions.
Fast Forward:Speed up mundane activities to move quickly from one scene to another, maintaining viewer interest.
Utilize Light and Color
Light and color can be powerful tools for creating smooth transitions. Here’s how:
Color Matching:Ensure that the color tones of consecutive shots are similar. This can be achieved through color grading in post-production.
Lighting Transitions:Use changes in lighting to transition between scenes. For instance, ending a scene with a dim light and starting the next with a bright light.
Lens Flares:Incorporate lens flares to create a visually appealing transition, especially when moving between outdoor scenes.
Practice and Experiment
Mastering smooth transitions requires practice and experimentation. Don't be afraid to try new techniques and push your creative boundaries. Watch other vlogs and films for inspiration, and practice replicating the transitions you admire. Over time, you'll develop your unique style and a repertoire of transition techniques that work best for your content.
Conclusion
Smooth transitions are a vital component of professional vlogging. By planning your shots, using in-camera techniques, leveraging editing software, incorporating natural elements, maintaining continuity, experimenting with speed ramping, utilizing light and color, and ensuring stability with tools like the ZHIYUN Crane 4 and ZHIYUN CINEPEER WEEBILL 3E, you can create engaging and seamless transitions that elevate your vlogs. Remember, the key to mastering transitions is practice and experimentation. So, grab your camera, start filming, and take your vlogs to the next level with smooth, professional transitions.
FAQs:
Q: How can I use natural elements to create transitions?
A: Natural elements like zooming in and out, pointing the camera toward the sky or ground, or utilizing water splashes can create visually appealing transitions. These methods can add a professional touch to your vlogs and help maintain viewer interest.
Q: What are some tips for maintaining continuity between scenes?
A: To maintain continuity, ensure consistent lighting, color balance, and motion direction between shots. Pay attention to small details, such as the position of objects and the direction of movement, to avoid jarring transitions that can distract viewers.


The Art of Silhouette Photography: Capturing Drama Through Light and Shadow
Jul 30, 2024
Silhouette photography is a captivating genre that turns everyday scenes into striking visual narratives. By manipulating the balance between light and shadow, this technique transforms a subject into a dark outline against a brightly lit backdrop. At its core, silhouette photography is about using backlighting to highlight the shape and form of the subject, creating a powerful contrast that can elevate a simple scene into a dramatic work of art. In this blog, we'll explore the essentials of silhouette photography and offer some tips on how to master this compelling art form.
Finding the Perfect Scene
The foundation of silhouette photography is to ensure that your subject is positioned against a bright light source. The most common and effective scenario for this is during sunrise or sunset. During these times, the sunlight is softer and less harsh, creating a gentle yet distinct backlight that is ideal for silhouette photography. The sun should be positioned behind your subject, and this backlighting will cause the subject to appear as a dark shape against the brightly lit sky or landscape.
However, sunset and sunrise are not the only times suitable for silhouette photography. Any strong light source behind the subject can be utilized, such as streetlights, lamps, or ZHIYUN MOLUS B-Series photography light. This series offers versatile lighting with adjustable color temperatures from 2700K to 6500K, making it perfect for creating dramatic backlighting effects. Whether you need a warm glow or a cool tone, the MOLUS B-Series lets you fine-tune your lighting with intuitive dials and wireless control via the ZY Vega APP, ensuring you capture the perfect silhouette. The key is to find a location where the subject is backlit, allowing it to become a dark silhouette.
Mastering Exposure Settings
To achieve the best silhouette effect, controlling your camera's exposure is crucial. Typically, you would use the "Manual" (M) mode on your camera for silhouette photography. This allows you to fine-tune your exposure settings to ensure the subject remains dark against the bright background. Start by using a fast shutter speed to minimize the amount of light that hits the sensor and a small aperture (high f-stop number) to keep the background properly exposed while keeping the subject dark.
If you prefer using semi-automatic modes like Aperture Priority (Av) or Shutter Priority (Tv), you can still achieve excellent results by adjusting exposure compensation (EV). Reduce the exposure compensation to underexpose the subject, which will enhance the silhouette effect.
Utilizing Metering Modes
For those using semi-automatic exposure modes, the choice of metering mode can significantly impact your results. Using "Spot Metering" or "Center-Weighted Metering" can help you focus on the brightest part of the scene to set your exposure. By metering off the brightest part of the background, you can lock the exposure settings and ensure the subject remains a well-defined silhouette. Make sure to use the AE-Lock (Auto Exposure Lock) feature to lock in the exposure settings, which allows for better control over the final image.
Paying Attention to Subject Shape
In silhouette photography, the subject's shape and form are paramount, as there is little to no detail within the silhouette itself. To capture the most striking silhouette, try viewing your subject from different angles to find the one that best highlights its shape. You might also experiment with dynamic subjects, such as flowers swaying in the wind or people running, to capture more engaging and fluid outlines. Consider incorporating diverse subjects like a cat silhouette, butterfly silhouette, palm tree silhouette, or dancer silhouette to add variety and interest to your shots. Take multiple shots to ensure you have a range of silhouettes to choose from.
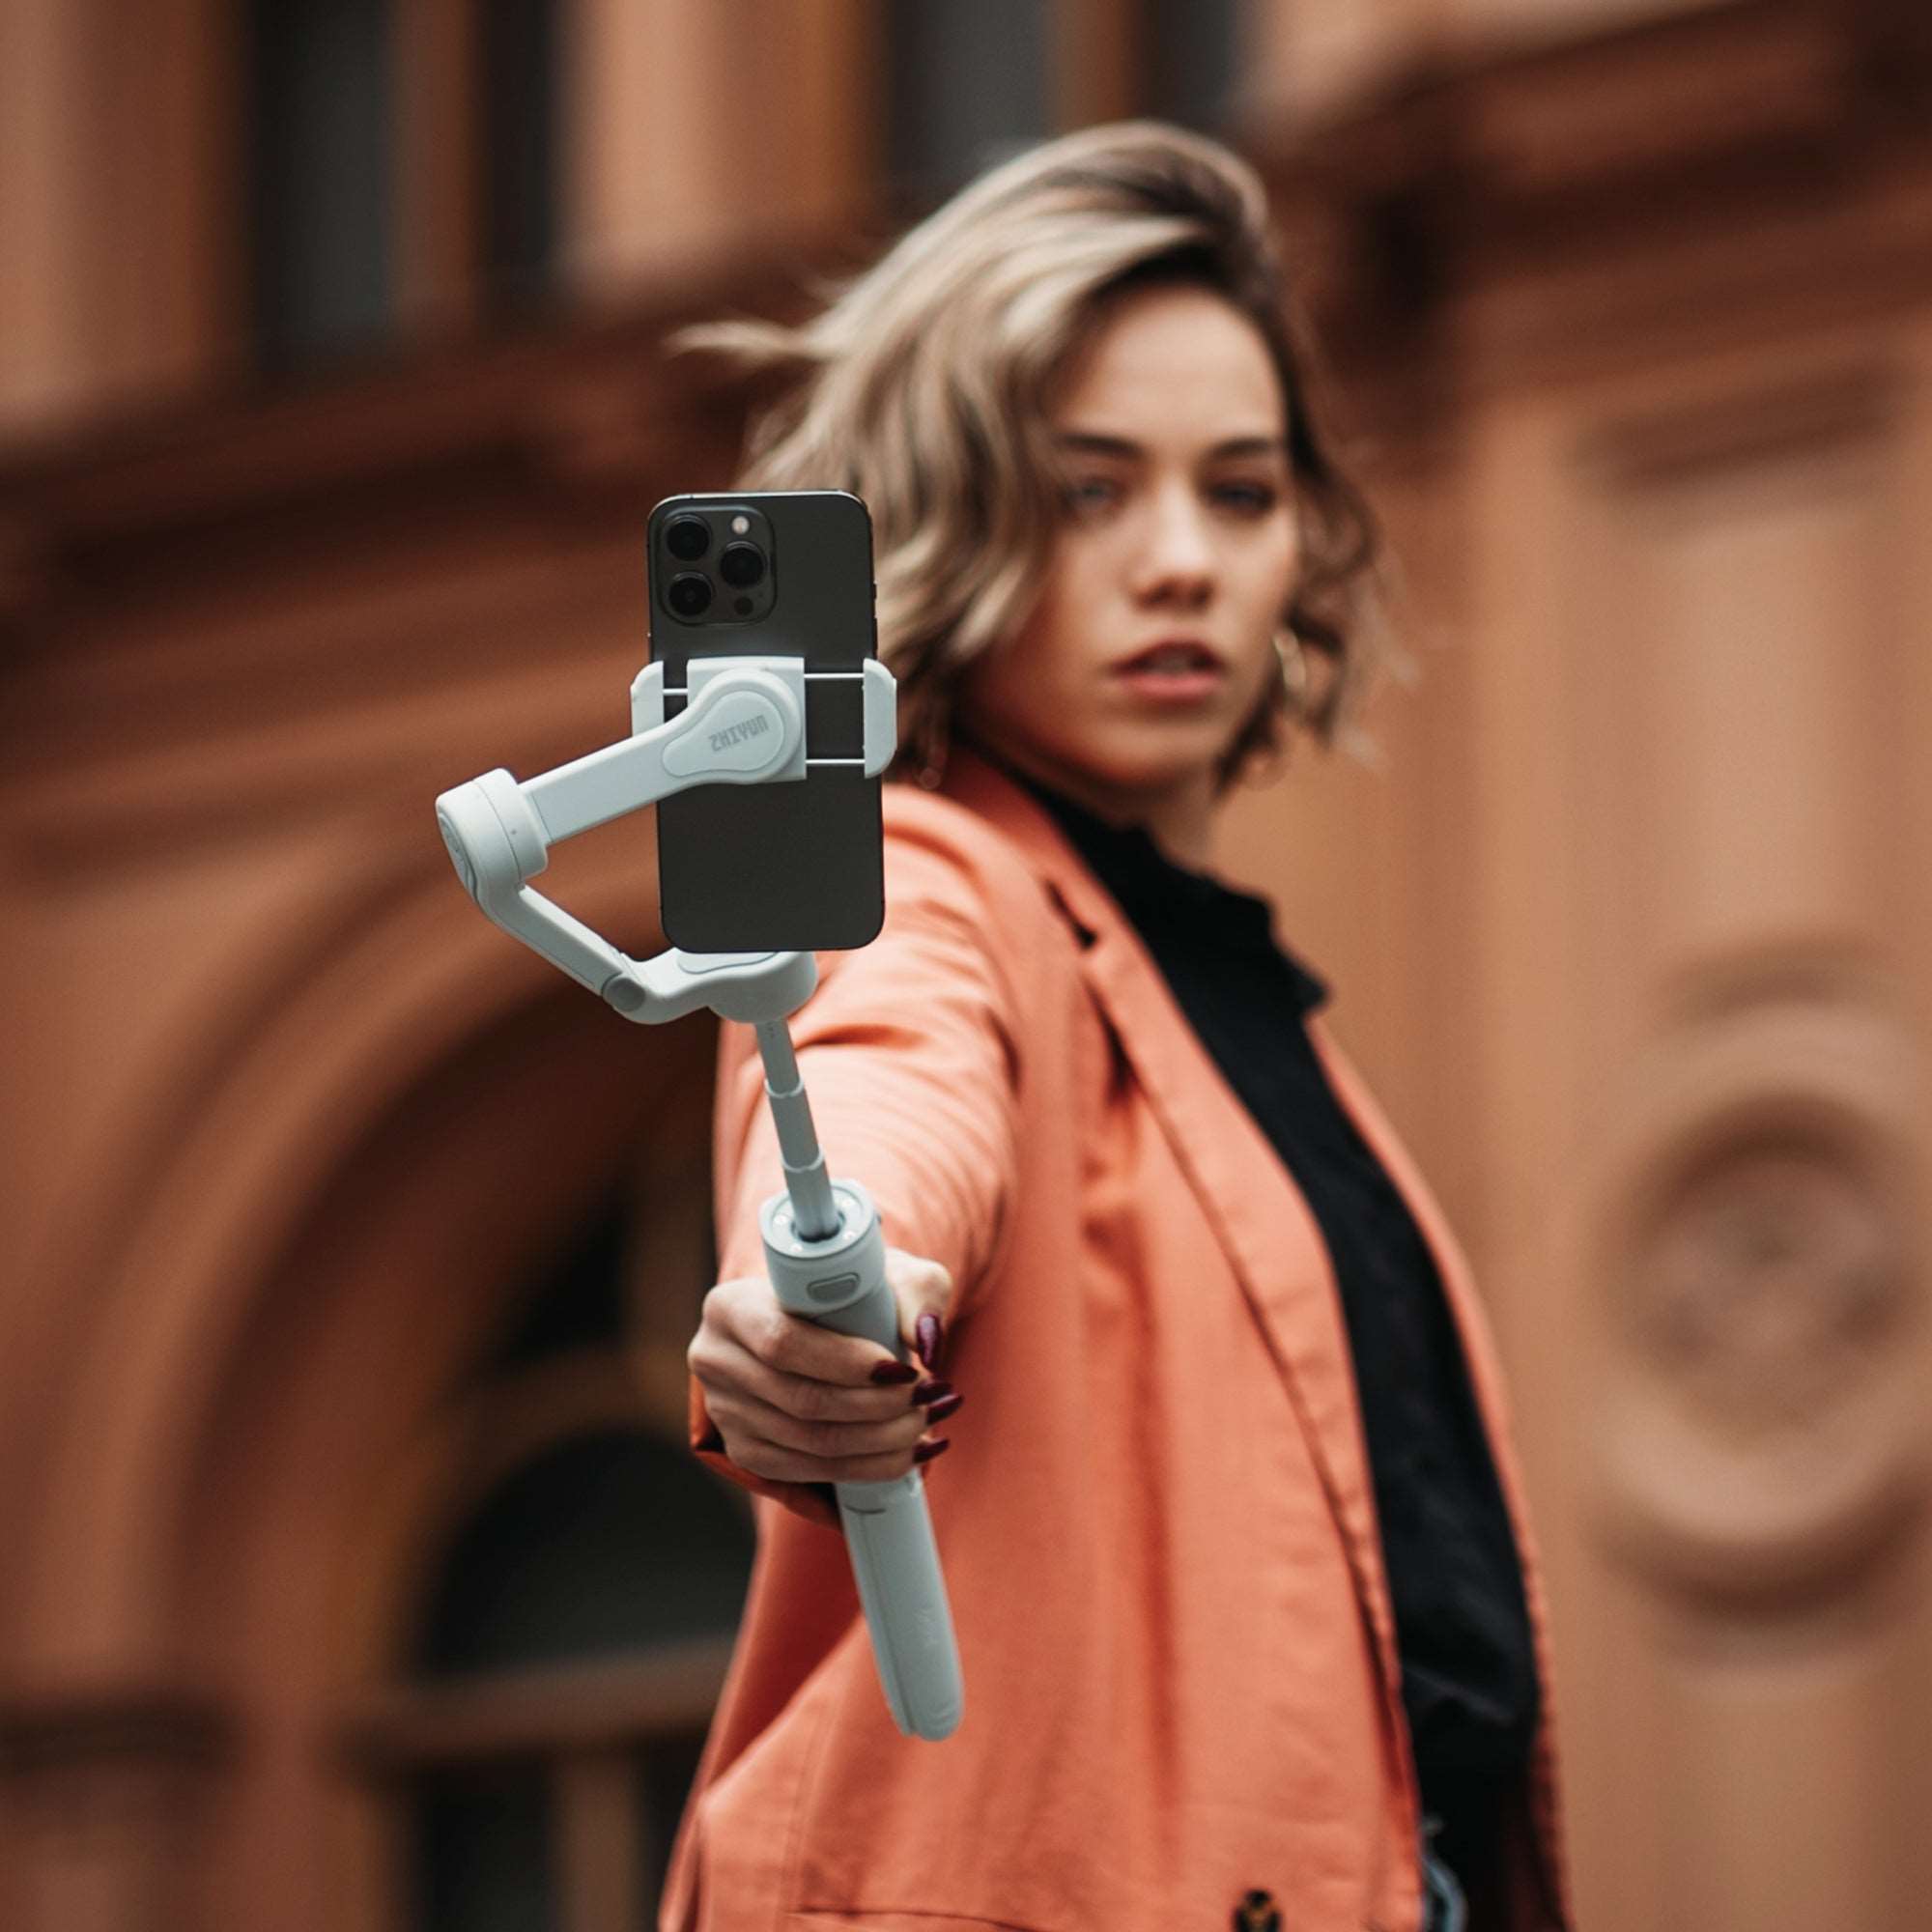
If you’re concerned about achieving the best possible result, you can use a camera stabilizer or a smartphone gimbal stabilizer. ZHIYUN Smooth 5S can be incredibly helpful. This stabilizer ensures smooth, shake-free footage and offers dual-side magnetic lights and a built-in fill light, which can enhance your subject's outline even in challenging lighting conditions. Its features, including AI shooting templates and long battery life, help you capture and perfect the silhouette with ease.
Conclusion
Silhouette photography is a powerful technique that transforms ordinary scenes into extraordinary images by leveraging the interplay of light and shadow. By understanding the principles of backlighting, mastering exposure settings, and paying close attention to the shape and form of your subject, you can create visually arresting photographs that capture the imagination. Whether you're photographing a sunset, a cityscape, or a simple object against a strong light source, silhouette photography offers a unique way to express creativity and bring a dramatic edge to your images. So, grab your camera, find a perfect backlight, and start experimenting with silhouettes to see the world in a whole new light.
FAQ:
Q: What is silhouette photography?
A: Silhouette photography is a technique where the subject appears as a dark outline against a brightly lit background. This is achieved by positioning the subject between the camera and a strong light source, such as the sun during sunrise or sunset. The resulting image emphasizes the shape and form of the subject, creating a dramatic visual effect.
Q: What camera settings should I use for silhouette photography?
A: For silhouette photography, use manual mode (M) to control exposure settings. Start with a fast shutter speed to limit light exposure and a small aperture (high f-stop number) to keep the background properly exposed while keeping the subject dark. You can also use semi-automatic modes like Aperture Priority (Av) or Shutter Priority (Tv) with exposure compensation (EV) set to underexpose the subject.


Capture Stunning Coastal Photos and Videos with These 8 Composition Tips
Jul 30, 2024
Summer is here, and many of us are heading to the beach or a coastal farm and ranch to soak up the sun and enjoy the ocean breeze. Whether you're at a coastal cafe or just enjoying a day by the sea, capturing the beauty of the coastline can be incredibly rewarding. So, what should you keep in mind when photographing or filming coastal landscapes? Let’s dive into some essential composition tips that will help you take your seaside photos and videos to the next level!
Master the Basics: The Rule of Thirds
If you're new to coastal photography and videography, start with the basic yet highly effective Rule of Thirds. Imagine a grid overlay with two horizontal and two vertical lines, dividing your frame into nine equal parts. Place your main subject, whether it's a coastal house or a coastal coffee table, where the lines intersect. This technique instantly creates a balanced and visually appealing composition for both photos and videos.
Identify the Star of Your Shot
In coastal scenes, you typically have three main elements to choose from as your focal point: the sky, the sea, and man-made structures (like lighthouses, coastal houses, or a coastal restaurant). Once you've identified your main subject, think about how to highlight it. For example, if you want to emphasize coastal rocks or a view of coastal horizons, let them occupy two-thirds of the frame, leaving the sky or sea to fill the remaining third. This not only adheres to the Rule of Thirds but also draws attention to your chosen subject. Supporting elements can be included as foreground or background without overshadowing the main focus.
Capture the Freedom of the Coastline in Motion
One of the most exhilarating ways to capture the essence of the coastline is by recording while running along the beach. The combination of the sea breeze tousling your hair, the rhythmic sound of crashing waves, and the dynamic motion of your surroundings can evoke a profound sense of freedom and vitality in your video. To ensure your footage remains smooth and professional, consider using a stabilizer.
For those with a camera, ZHIYUN Crane 4 is an excellent choice. Lightweight yet stable, it can handle heavy payloads and features upgraded Bluetooth shutter control, allowing seamless recording and photo-taking functions. With 12 hours runtime, it allows for non-stop filming, so you don't need to worry about running out of battery while enjoying a full day at the beach.
If you're concerned about the bulkiness of a camera setup or simply prefer using your smartphone, ZHIYUN Smooth 5S AI mobile stabilizer is a fantastic alternative. ZHIYUN utilizes an advanced magnetic AI tracker that can be placed at the front or rear. The intuitive gesture control allows users to easily manage tracking functions. The module supports start/stop shooting within the ZHIYUN app or native camera, as well as custom framing tracking. Users can effortlessly record long-distance solo videos to capture wonderful moments.
With either the ZHIYUN Crane 4 or the Smooth 5S AI, your coastal excursions can be transformed into professional-quality videos that capture the true beauty and energy of the coastline.
Experiment with Different Focal Lengths
Different focal lengths can dramatically change the feel of your coastal photos and videos:
Wide-angle lenses capture expansive views, perfect for showcasing the vastness of the ocean and coastal flats. The distortion from ultra-wide lenses can also add a dramatic touch.
Mid-range lenses offer a realistic perspective, ideal for everyday coastal scenes, whether at a coastal house or a coastal restaurant.
Telephoto lenses are great for focusing on distant details, such as waves crashing against rocks or close-ups of coastal architecture.
Utilize Leading Lines
Leading lines can guide the viewer's eye through the photo or video, drawing attention to the main subject. Look for natural or man-made lines, like pathways at a coastal ranch or the shoreline itself, to incorporate into your composition.
Avoid Placing Vertical Elements at the Edges
When using wide-angle lenses, avoid placing vertical elements, like trees or poles at a coastal house, at the edges of your frame. The lens distortion can make these elements look warped. It’s better to position them closer to the center or use a longer focal length to prevent distortion.
Incorporate Contrast
Photographs and videos are two-dimensional, so using contrast helps convey depth and scale. Introduce a sense of scale by including familiar objects like people, chairs at a coastal cafe, or small structures. To emphasize distance, use the "near-far" technique with a wide-angle lens, making objects close to the camera appear larger while those further away look smaller.
Embrace Negative Space
Negative space, or areas of your shot left intentionally blank, like vast stretches of sky or ocean, can add a sense of grandeur and openness to your images. This space allows the viewer to focus on the main subject and gives the photo or video a clean, minimalist look.
Conclusion
Whether you're an amateur or a seasoned photographer and videographer, keeping these composition tips in mind can elevate your coastal visuals. From mastering the Rule of Thirds to experimenting with focal lengths and leading lines, each tip will help you create stunning, balanced, and engaging photos and videos. So, grab your camera, head to the beach, and start capturing the breathtaking beauty of the coastline!
FAQ:
Q: What are leading lines, and how do I use them in my coastal compositions?
A: Leading lines guide the viewer's eye through the photo or video, drawing attention to the main subject. Look for natural or man-made lines like pathways, fences, or shorelines to incorporate into your shots.
Q: How can contrast help convey depth and scale in my coastal photos and videos?
A: Use contrast to introduce a sense of scale by including familiar objects like people or small structures. Employ the "near-far" technique with a wide-angle lens to make close objects appear larger and distant objects smaller.
Q: What is negative space, and how can it enhance my coastal visuals?
A: Negative space is the area of your shot left intentionally blank, like vast stretches of sky or ocean. It adds a sense of grandeur and openness, allowing the viewer to focus on the main subject and giving a clean, minimalist look.
Q: Why should I avoid placing vertical elements at the edges of my frame with
wide angle lenses?
A: Wide-angle lenses can cause distortion, making vertical elements like trees or poles appear warped if placed at the edges. Position them closer to the center or use a longer focal length to avoid this issue.


Why a Phone Stabilizer with Light is Essential for Vloggers
Jul 23, 2024
In the rapidly evolving world of digital content creation, vlogging has emerged as a powerful medium for individuals to share their stories, expertise, and creativity with global audiences. As the demand for high-quality video content continues to soar, vloggers are constantly seeking ways to enhance their production value and engage viewers more effectively. One indispensable tool that has revolutionized the vlogging landscape is the phone stabilizer with integrated lighting for vloggers. In this blog post, we delve into why these innovative devices have become essential for vloggers aiming to elevate their content.
Importance of Stability in Vlogging
At the heart of compelling vlogs lies the need for stability in video footage. Nothing detracts from viewer experience more than shaky, unstable camera work. Whether vlogging about travel adventures, beauty tutorials, or daily life, maintaining smooth and steady footage is crucial for retaining viewer engagement and conveying professionalism.
Benefits of Phone Stabilizer
Enhanced Video Quality
Phone stabilizers significantly enhance video quality by minimizing blur and reducing unwanted camera movements. This results in smoother, more professional-looking footage that captivates viewers from start to finish.
Versatility and Ease of Use
One of the standout advantages of using a phone stabilizer with integrated lighting is its versatility and ease of use. These devices are designed to be lightweight and portable, making them ideal for vloggers who are constantly on the move. Whether shooting indoors in low-light conditions or outdoors during golden hour, the adjustable lighting settings ensure optimal brightness and color temperature for every setting.
Creative Possibilities
Beyond stability and lighting, phone stabilizers open up a world of creative possibilities for vloggers. They enable creators to experiment with different camera angles, capture cinematic shots, and add professional polish to their videos without the need for bulky, expensive equipment. Whether you're filming a product review, conducting interviews, or documenting a special event, a phone stabilizer empowers you to unleash your creativity and produce visually stunning content.
Features to Look for in a Phone Stabilizer with Light
When choosing a phone stabilizer with integrated lighting, several key features should be considered:
- Adjustable Brightness and Color Temperature
Look for stabilizers that offer customizable lighting settings to adapt to various shooting environments and achieve the desired mood and ambiance in your videos.
- Stabilization Technology
Invest in devices equipped with advanced stabilization technology, such as 3-axis gimbal systems, which ensure smooth, shake-free footage even when moving or walking.
- Portability and Battery Life
Opt for lightweight, compact designs that are easy to carry and use on the go. Long-lasting battery life is also essential for extended shooting sessions without interruptions.
Creative Possibilities with Phone Stabilizers
Beyond stability and lighting, phone stabilizers like the ZHIYUN Smooth 5S offer vloggers a wealth of creative possibilities. Featuring a professional 3-axis design, dual-side magnetic lights, and a built-in fill light with up to 2040 lux peak illuminance, the Smooth 5S ensures impeccable stabilization and optimal lighting in any shooting scenario. Its intuitive controls and long-lasting battery life of up to 24 hours make it a versatile tool for capturing cinematic angles, conducting dynamic interviews, and adding professional polish to videos without bulky equipment. Whether you're documenting daily life or showcasing product reviews, the Smooth 5S phone stabilizer empowers vloggers to unleash their creativity and produce visually stunning content effortlessly.
Conclusion
In conclusion, the evolution of vlogging has ushered in a new era of creativity and connectivity, where high-quality video production is paramount. A phone stabilizer with integrated lighting isn't just a tool; it's a game-changer that empowers vloggers to elevate their content, expand their audience reach, and stand out in a competitive digital landscape. Whether you're a seasoned vlogger looking to enhance your production value or an aspiring creator venturing into the world of content creation, investing in a phone stabilizer with light is a strategic decision that can significantly enhance the quality and impact of your vlogs.
FAQ:
Q: What are the key factors to consider when choosing a phone stabilizer with light?
A: Important factors include adjustable brightness and color temperature settings, portability for ease of use on the go, long-lasting battery life, and compatibility with your smartphone model.
Q: What types of lighting features should be considered?
A: Adjustable brightness levels, color temperature settings, and the ability to diffuse or focus light are important features. This flexibility allows vloggers to adapt lighting to different environments and achieve desired visual effects.


Summer Travel Essentials: Must-Have Gear for Your Next Adventure
Jul 23, 2024
Summer is here, and it's the perfect time to pack your bags and embark on an unforgettable vacation. Whether you're exploring exotic destinations, lounging on pristine beaches, or hiking through majestic mountains, capturing these moments is essential to reliving the memories for years to come. To ensure your vacation is smooth and enjoyable, here are some must-have travel essentials that will enhance your experience and keep you prepared for anything.1. Cash: The Universal BackupIn our increasingly digital world, it's easy to rely on mobile payments and credit cards for all transactions. However, it's wise to carry some cash as a backup. Whether you're in a remote area with spotty internet connection or encountering a vendor who doesn't accept cards, having cash can save you a lot of hassle. Make sure to carry a mix of small and large denominations to cover various needs without the need for change.2. Sun Protection: Guarding Your SkinOne of the most important items to pack for a summer vacation is sun protection. Spending time outdoors means prolonged exposure to the sun's UV rays, which can cause sunburns, premature aging, and increase the risk of skin cancer. To keep your skin healthy and protected, bring along a good sunscreen with a high SPF rating.In addition to sunscreen, consider packing a wide-brimmed hat, sunglasses with UV protection, and lightweight, long-sleeved clothing. These items will provide additional layers of defense against harmful UV rays while keeping you cool and comfortable. Remember to reapply sunscreen every two hours, especially after swimming or sweating, to maintain its effectiveness.3. Clothing: Comfort Meets StyleSummer travel outfits should combine functionality with fashion, ensuring you're ready for any activity while looking great.Pack a mix of casual wear for daytime activities and a few stylish pieces for evening outings or special occasions. Comfortable walking shoes are a must for exploring new places on foot, while a pair of sandals or flip-flops can be great for the beach or poolside. Don't forget a swimsuit if you plan on swimming, and consider a light jacket or sweater for cooler evenings.
4. Gimbal: Capture Every Moment with PerfectionEven if you prepare the best camera for photography is not enough. Whether you're bringing a camera or just your smartphone, a gimbal is an essential piece of kit for capturing vacation moments without blurry or shaky footage. A gimbal stabilizes your camera or phone, eliminating unwanted movement and ensuring that every shot is crisp and steady. This is particularly crucial when you're on the go, exploring new places, and documenting your adventures.
For filmmakers on the go, the ZHIYUN CINEPEER WEEBILL 3E gimbal delivers ultra-compact stability in just 990g. This lightweight yet robust camera stabilizer is perfect for those who want to travel light without compromising on quality. Its integrated OLED display provides clear information at a glance, making it easier to adjust settings on the fly. The customizable buttons offer a tailored shooting experience, while the Bluetooth shutter control allows for hassle-free shooting without the tangle of cables. The innovative Sling Mode 2.5 design reduces arm fatigue by over 40%, enabling you to capture smooth footage for extended periods without feeling the strain.
But don't worry if you're just traveling with your phone. The ZHIYUN Smooth 5S AI, a mobile phone gimbal stabilizer, ensures those vacation videos are as steady as can be. Its advanced magnetic AI tracking system keeps your subject centered without manual adjustments, making it ideal for capturing dynamic scenes with ease. The intuitive gesture controls further simplify recording on the go, allowing you to start and stop recording with simple hand movements. The Smooth 5S AI phone stabilizer features an orthogonal 3-axis structure, providing comprehensive stabilization for your mobile device. Additionally, the built-in LED light enhances your videos, ensuring clear and vibrant footage even in low-light conditions.
Conclusion:
As you prepare for your summer vacation, don't forget to include these travel essentials in your packing list. Carrying some cash ensures you're prepared for any payment situation, while sun protection keeps your skin safe from harmful UV rays. Comfortable and stylish clothing allows you to enjoy your trip in both comfort and style. Finally, a gimbal, whether for your camera or smartphone, guarantees that your vacation memories are captured in stunning clarity and smoothness.
FAQ:
Q: How can a gimbal enhance your vacation photography?
A: A gimbal stabilizes your camera or smartphone, ensuring smooth and steady footage. This stability is crucial for capturing clear and professional-looking photos and videos, especially when you're on the move or exploring dynamic environments.
Q: What should you consider when choosing comfortable footwear for summer travel?
A: When selecting footwear for summer travel, prioritize comfort and versatility. Opt for lightweight shoes that provide good support for walking long distances and exploring various terrains comfortably. Breathable materials are ideal for keeping your feet cool in warm weather conditions.
Q: How can you stay hydrated during hot summer travels?
A: Staying hydrated is key to enjoying summer travels. Carry a reusable water bottle and drink plenty of water throughout the day, especially in hot weather or when participating in outdoor activities. Avoid excessive caffeine and alcohol consumption, as they can contribute to dehydration.


Photography and People: Techniques and Insights for Portrait Photography
Jul 23, 2024
Portrait photography is a captivating art form that goes beyond merely capturing a person's likeness. It's about revealing the essence of an individual, telling their story, and creating a lasting impression. Whether you're an aspiring photographer or looking to refine your skills, this blog will explore essential techniques and insights to elevate your portrait photography game.
1.Master the Art of Lighting
Lighting is the cornerstone of photography, and it's particularly crucial in portrait work. Natural light can be your best friend, offering a soft, flattering glow. The "golden hour" just after sunrise or before sunset provides warm, diffused light that's ideal for outdoor portraits. When working indoors, position your photo subject near a window for beautiful, directional light.
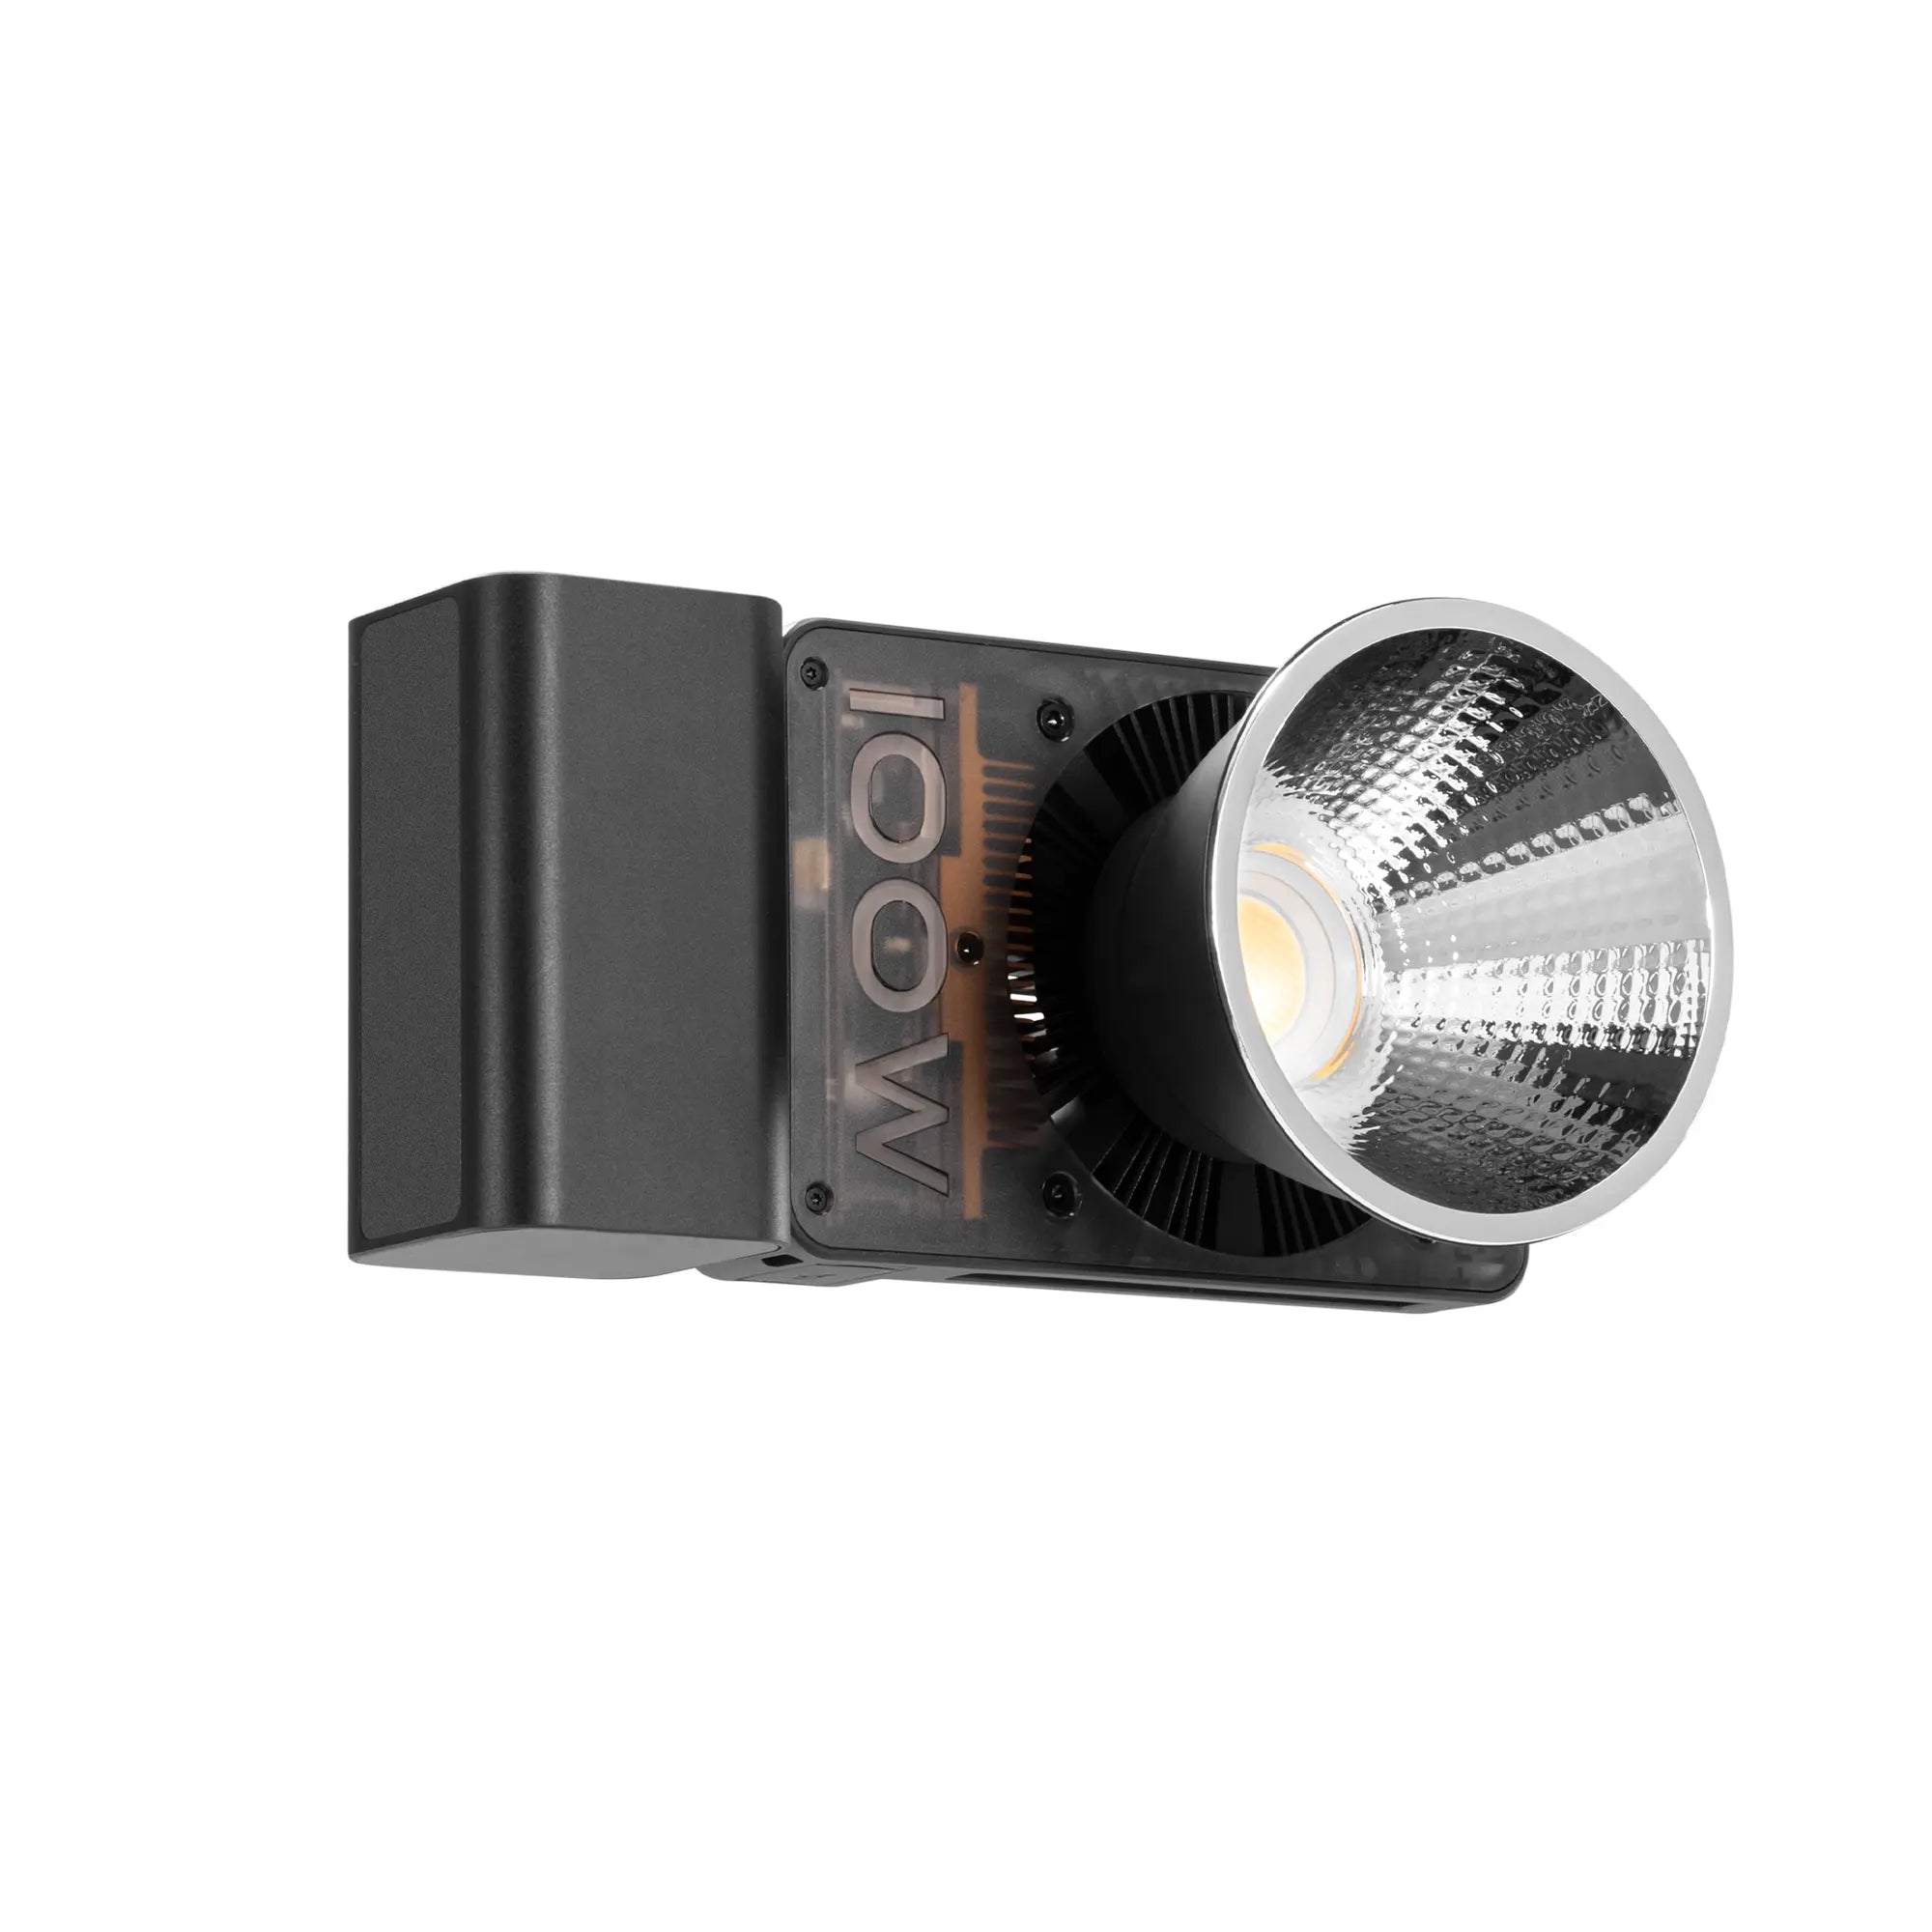
For more control, learn to work with artificial lighting. Softboxes, umbrellas, and reflectors can help you shape and manipulate light to achieve the desired mood and effect. A versatile tool for this purpose is ZHIYUN CINEPEER CX100. Ultra-light at just 710g and fitting in your hand, it delivers powerful 3840Lux brightness and exceptional light quality with a wide color temperature range, allowing for seamless adaptation to numerous professional shooting scenarios. The ZHIYUN CX100 supports both DC input and PD protocol Type-C fast charging, and can be connected to a compatible power bank or adapter to maintain full power output, ensuring uninterrupted operation during extended shoots. Experiment with different photography lighting techniques to understand how they affect the subject's features and the overall atmosphere of the image.
2.Choose the Right Lens
The lens you choose can dramatically impact the look of your portraits. A 50mm prime lens is often considered the gold standard for portrait photography, offering a natural perspective and excellent image quality. For tighter headshots, an 85mm or 135mm lens can provide beautiful compression and bokeh.
Wider lenses (35mm or wider) can be used for environmental portraits, including more of the surroundings to tell a broader story. However, be cautious with wide-angle lenses, as they can distort facial features if used too close to the subject. Regardless of your choice, always keep a camera lens cleaning kit handy to ensure optimal image quality.
3.Composition and Framing
While the rule of thirds is a useful guideline, don't be afraid to break it for creative effect. Experiment with different angles and perspectives. Shooting from slightly above can be flattering for most subjects, while a lower angle can convey power or authority.
Pay attention to the background and ensure it complements rather than distracts from your subject. A shallow depth of field (achieved with a wide aperture) can help isolate your subject from the background, creating a pleasing bokeh effect. Mastering various photography composition techniques will significantly enhance your portrait work.
4.Experiment with Different Styles
Many people like the self-portrait photography, but portrait photography encompasses various styles, from classic studio shots to candid street photography. Don't be afraid to experiment with different approaches:
Environmental portraits: Capture subjects in their natural habitat, whether it's a workplace, home, or favorite location.
Conceptual portraits: Use props, unique locations, or creative lighting to tell a specific story or convey an idea. Enhance your conceptual portraits with ZHIYUN MOLUS G300. Weighing just 1.56kg, this powerhouse offers adjustable color temperatures, 300W high brightness, and exceptional color accuracy. Introducing Live Mode, which allows you to turn on the light instantly upon connecting to a power source. With the built-in 14 lighting effects, your creativity is boundless in any scene.
Black and white portrait photography: Strip away color to focus on light, shadow, and emotion.
Series or themed shoots: Create a cohesive body of work around a particular theme or group of people.
Conclusion
Portrait photography is a captivating art form that transcends merely capturing a person's likeness. It involves revealing the essence of an individual, telling their story, and creating a lasting impression. By mastering the art of lighting, selecting the right lens, and experimenting with various styles, you can elevate your portrait photography to new heights. Whether you're using high-end cameras or more budget-friendly options, remember that your vision and skill are the most crucial elements.
Last but not least, ethical photography is paramount. Always obtain proper consent, especially when photographing minors, and respect your subject's boundaries. Ensure your subjects are comfortable with how their images will be used and shared. Practicing ethical photography not only upholds the dignity of your subjects but also builds trust and credibility in your work.
FAQ:
Q: How does lighting affect portrait photography, and what are some tips for using natural and artificial light?
A: Lighting is essential in portrait photography as it shapes the mood and highlights the subject’s features. Natural light, especially during the "golden hour," offers a flattering glow. For indoor shoots, positioning your subject near a window can provide beautiful light. When using artificial lighting, tools like softboxes, umbrellas, and reflectors can help manipulate light for desired effects.
Q: Which lenses are recommended for portrait photography and why?
A: A 50mm prime lens is highly recommended for its natural perspective and excellent image quality. For tighter headshots, 85mm or 135mm lenses provide beautiful compression and bokeh. Wider lenses (35mm or wider) are suitable for environmental portraits, including more surroundings, but may distort facial features if used too close to the subject.
Q: How can I improve the composition and framing of my portraits?
A: While the rule of thirds is a useful guideline, experiment with different angles and perspectives for creative effects. Pay attention to the background to ensure it complements the subject. Using a wide aperture can create a shallow depth of field, isolating the subject and producing a pleasing bokeh effect.
Q: What are some different styles of portrait photography photographers can experiment with?
A: Portrait photography includes various styles such as:
Environmental portraits: Capturing subjects in their natural surroundings.
Conceptual portraits: Using props and unique locations to tell a story or convey an idea.
Black and white portraits: Focusing on light, shadow, and emotion.
Series or themed shoots: Creating a cohesive body of work around a particular theme.


Enhancing Your iPhone Photography: Tips and Techniques
Jul 23, 2024
In the era of smartphones, the iPhone has emerged as a powerful tool for photography enthusiasts and professionals alike. With each new model, Apple pushes the boundaries of what’s possible with mobile photography, incorporating advanced sensors, powerful image processing capabilities, and sophisticated software. Whether you're an amateur looking to improve your skills or a seasoned photographer exploring mobile photography, here are some tips and techniques to enhance your iPhone photography.
Night Mode for Stunning Low-Light Photos
Low-light photography often results in grainy and blurry images, but Night Mode changes the game. This feature automatically enhances brightness and clarity, allowing you to capture sharp and vivid photos even in the dark. Perfect for evening events, cityscapes, or indoor settings with minimal light, Night Mode ensures that your photos retain detail and color accuracy without the need for a flash. This capability is especially useful when you want to capture the mood of a dimly lit restaurant, the ambiance of a concert, or the serene beauty of a nighttime landscape.
To further elevate your low-light photography, some photography lighting techniques are very important. And ZHIYUN CINEPEER CM25 photography light is an ideal companion. With its 25W High Brightness and 3360 Lux output, it provides ample illumination to enhance your shots. The Pro Color Rendering feature, with a range of 2700K-6200K and CRI≥96 and TLCI≥97, ensures accurate color reproduction in any setting. Despite its powerful capabilities, the CINEPEER CM25 is 100% pocketable, weighing only 232g and fitting comfortably in the palm of your hand. Easy Adjustment is made possible with two simple and intuitive dials for parameter settings, and its built-in battery supports PD power supply for convenient recharging. This makes the ZHIYUN CM25 perfect for any low-light scenario, ensuring your photos are always well-lit and vibrant.
Blurring Backgrounds with Portrait Mode
Portrait Mode creates a professional-looking blurred background, or bokeh effect, making your subject stand out. Ideal for portraits, close-ups, and artistic shots, this feature adds depth and dimension to your photos. Whether you're taking a picture of a person, pet, or object, Portrait Mode ensures the background is beautifully blurred, drawing attention to the subject and giving your photos a DSLR-like quality. This is particularly effective for capturing intimate moments, creating dramatic effects in nature photography, or highlighting intricate details in macro shots. For those interested in black and white portrait photography, the blurred background can add a timeless and classic touch to your images.
Capturing Special Moments with Live Photos
Live Photos bring your images to life by capturing a few seconds of motion and sound before and after you press the shutter button. This feature is perfect for preserving the atmosphere of special moments, from laughter at a family gathering to the excitement of a sports event. Live Photos add a dynamic element to your photo library, allowing you to relive the moments with a touch of animation. This feature is excellent for capturing fleeting expressions, lively street scenes, or the energy of a child's play, providing a richer context and emotional depth to your photos.
To enhance your Live Photo experience, consider using ZHIYUN Smooth 5S. With its Pro 3-Axis Structure and Free Angle Movement, you can achieve unbreakable stabilization for your shots. The Smooth 5S also features Magnetic and Built-In Fill Lights, perfect for capturing moments in various lighting conditions. Whether you're shooting vertically or horizontally, the Smooth 5S supports both orientations, ensuring you never miss a moment. Its Intuitive Panel Control allows for easy adjustments, making it an ideal companion for capturing those dynamic, emotion-filled Live Photos.
Improving Composition with the Grid
The rule of thirds is a fundamental principle in photography that helps create balanced and visually appealing images. By activating the grid feature in your iPhone camera settings, you can easily apply this rule to your compositions. The grid divides your frame into nine equal parts, guiding you to position key elements along the lines or intersections. This simple tool enhances your ability to frame subjects harmoniously, whether you're shooting landscapes, portraits, or street photography. Utilizing the grid helps in creating well-balanced photos, ensuring that the main elements of your composition are placed in a way that draws the viewer’s eye naturally.
Conclusion
Your iPhone is more than just a phone—it's a powerful tool for capturing stunning photos. Utilizing Night Mode for low-light scenarios, Portrait Mode for beautiful background blur, Live Photos for dynamic memories, and the grid for better composition will elevate your photography skills. Embrace these features, along with photography composition techniques and photography lighting techniques, to transform everyday moments into extraordinary images. Let your creativity shine through your iPhone's lens and experiment with different camera brands, mini cameras, and various photographic styles. Practice these techniques regularly and watch as your photos evolve into captivating works of art.
FAQ:
Q: How can I take better photos in low-light conditions with my iPhone?
A: Utilize the Night Mode feature on your iPhone. It automatically activates in low-light settings and is indicated by a moon icon. Keep your iPhone steady, preferably using a tripod, and adjust the exposure time by tapping the moon icon and sliding the timer to the desired length.
Q: What are some tips for composing better photos using my iPhone?
A: Activate the grid feature by going to your iPhone settings, scrolling down to Camera settings, and toggling the Grid option on. Use the grid to apply the rule of thirds by aligning key elements along the lines or at intersections for balanced and visually appealing compositions.
Q: What is the rule of thirds and how does the grid feature help in composing photos?
A: The rule of thirds is a photography principle that helps create balanced and visually appealing images by dividing the frame into nine equal parts. The grid feature on your iPhone camera helps you apply this rule, guiding you to position key elements along the lines or intersections for better composition.
Q: How does Live Photos feature work on the iPhone?
A: Live Photos capture a few seconds of motion and sound before and after you press the shutter button, preserving the atmosphere of special moments. This feature is excellent for capturing fleeting expressions, lively street scenes, or the energy of a child's play, adding a dynamic element to your photo library.


How to Make Your Photography More Interesting
Jul 23, 2024
Photography is an incredible form of art that allows you to capture moments, tell stories, and express your creativity. However, as with any artistic endeavor, there can come a time when your photography feels stagnant or uninspired. If you find yourself in such a rut, don't worry. Here are some creative photography techniques and ideas that can help you make your photography more interesting and engaging.
Experiment with Perspectives
One of the simplest yet most effective ways to make your photos more interesting is by changing your perspective. Instead of taking pictures from your usual standing height, try different angles:
Low Angle:Get down to the ground and shoot upwards. This perspective can make your subject look larger than life and can add a dramatic effect.
High Angle: Conversely, shooting from a high angle can give your audience a bird’s-eye view, making the scene appear smaller and often more comprehensive.
Dutch Angle: Tilt your camera slightly to create a sense of disorientation or dynamism.
Changing perspectives can give a new life to even the most mundane subjects.
Play with Light and Shadows
Lighting is a fundamental element in photography that can drastically alter the mood and depth of your images. Utilizing advanced lighting equipment can significantly enhance your photos:
Golden Hour: What is the golden hour in photography? The period shortly after sunrise and before sunset, known as the golden hour, provides soft, warm lighting that is incredibly flattering for portraits and landscapes.
Backlighting: Position your subject between your camera and the light source to create a silhouette or add a halo effect around your subject.
Photography Lights:Photography Light device is an essential tool for mastering light and shadow, effectively eliminating the constraints of weather and time. Action camera flashlight may help you a lot. And ZHIYUN MOLUS X60is also a good choice. Despite its compact, credit-card-sized design, it delivers a powerful 60W output without stroboscopic effects. The X60RGB variant adds dynamic RGB moods, perfect for creating vibrant lighting effects. With the convenience of grip battery or PD charging and remote adjustments via the ZY Vega App, it ensures you have full control over your lighting environment anytime, anywhere.
Additionally, don’t shy away from shadows. They can add a sense of mystery or highlight textures and shapes in your photos.
Use Reflections
Reflections can add a fascinating layer of complexity to your photographs:
Mirrors: Use mirrors to create surreal images or double your subject in the frame.
Water: Puddles, lakes, or even a simple glass of water can serve as reflective surfaces that enhance your composition. During this process, you can use an action camera protector which can keep your gear safe from water and dust.
Windows: Reflections in windows can juxtapose different elements, blending indoor and outdoor scenes.Incorporating reflections can make your photos more visually engaging and thought-provoking.
Incorporate Motion
Introducing motion into your photography can convey action and emotion:
Long Exposure: Use long exposure settings to capture movement, such as flowing water, moving clouds, or city lights. This technique can create beautiful, fluid images.
Panning: Follow a moving subject with your camera. This technique keeps the subject sharp while blurring the background, effectively conveying speed and motion.
Freeze Frame: Use a fast shutter speed to capture a split second of action, such as a droplet of water mid-splash or a bird in flight.Motion can bring dynamism to your photos, making them more compelling. To achieve the best results when incorporating motion, consider using a camera stabilizer like ZHIYUN Crane 4. This stabilizer ensures precise balance calibration with intelligent balance indicator lights, allowing you to switch freely between horizontal and vertical lock structures. Its energy-saving adjustment features, such as the flexible wrist rest and extendable sling grip, make it easier to handle during long shoots. Additionally, the Bluetooth shutter control offers convenient operation, while the built-in magnetic tightening wrench and protective cover ensure a seamless and efficient photography experience.
Conclusion
Making your photography more interesting doesn't require expensive camera brands or exotic locations. Even a mini camera can do that! By experimenting with perspectives, light, reflections, motion, and utilizing advanced tools like the ZHIYUN MOLUS X60 light and Crane 4 camera stabilizer, you can infuse your photos with creativity and originality. Remember, the key to captivating photography is to see the world through a unique lens and to continuously challenge yourself to try new techniques and ideas. So do not worry about “how to start photography”, just grab your camera, step out of your comfort zone, and start exploring these creative photography methods today!
FAQ:
Q: What are effective ways to improve composition in your photographs?
A: Use the rule of thirds to position your subject off-center for a more balanced and interesting shot. Experiment with leading lines to draw the viewer’s eye into the scene, and pay attention to framing by using natural elements like windows or trees to focus attention on your subject.
Q: What are some techniques for using light creatively in photography?
A: Experiment with different lighting techniques such as utilizing the golden hour for warm, soft light and the blue hour for cool, twilight tones. Try backlighting to create silhouettes and rim lighting, and use side lighting to emphasize texture and depth. And play with artificial light sources like LEDs or candles to achieve unique effects.
Q: How can reflections enhance my photographs?
A: Reflections can add complexity and interest to your photos. Use mirrors for surreal effects, water for enhancing compositions, and windows to blend indoor and outdoor scenes. These elements can make your images more visually engaging and thought-provoking.


Effective Ways to Make Your Photo Subject Stand Out
Jul 23, 2024
In photography, one of the key elements to creating a captivating image is ensuring that the subject stands out. Whether you're shooting landscapes, portraits, or still life, the ability to draw attention to your main subject can make or break your photo. Here are four effective methods to highlight your photo's subject, each accompanied by practical examples.
Using Motion vs. Stillness to Highlight the Subject
One powerful way to make your subject stand out is by contrasting motion with stillness. By incorporating a moving element against a static background, or vice versa, you can naturally draw the viewer's eye to the subject in motion or at rest.
Imagine a bustling city street with people walking and cars moving. If you capture a street performer standing still while everyone around them is in motion, the performer becomes the focal point. You can achieve this effect by using a slower shutter speed to blur the movement of the surroundings while keeping the performer sharp and in focus. Whether you're using a mini camera for convenience or the leading camera for professional quality, mastering this technique is essential.
Using Focus and Blur to Highlight the Subject
The contrast between sharp and blurred elements in a photo can be extremely effective in making the subject stand out. This technique involves using depth of field to isolate the subject, making it the only part of the image that is in sharp focus.
Consider a self-portrait photography session in a park. By setting a wide aperture (such as f/2.8), you can blur the background, making yourself the standout subject. This technique, known as bokeh, is particularly useful in portrait photography where you want to minimize distractions and emphasize the subject's features.
Using Light and Dark to Highlight the Subject
Playing with light and dark contrasts can create dramatic effects that highlight your subject. By placing your subject in a well-lit area against a darker background, or vice versa, you can make it the primary focus of the image.
Think of a lone tree standing on a hill during sunset. If the tree is illuminated by the last rays of the sun while the background is gradually getting darker, the tree becomes the focal point of the image. This technique can also be used in black and white portrait photography, where the interplay of light and shadows adds depth and character to the subject.
Photography lighting techniques are very effective. For professional-grade brightness and control, consider ZHIYUN MOLUS G300. With its 300W high brightness and overclockable MAX Extreme Mode up to 500W, it ensures your subject remains perfectly illuminated against any backdrop. Its user-friendly design and ZY Vega App make it ideal for orchestrating multi-light setups with ease.
If you prefer a more compact and portable option without compromising on performance, ZHIYUN CINEPEER CM25 offers maximum 25W power and 3360 Lux brightness. Weighing only 232g and featuring intuitive dials for easy adjustments, it's perfect for photographers seeking versatility and convenience. Its built-in battery and support for PD power supply ensure reliable power wherever your photography takes you.
Using Size to Highlight the Subject
Photography composition techniques also serve as an important role in making your subject stand out. And size contrast is an effective way. By placing a smaller subject against a larger background or using perspective to exaggerate the size difference, you can draw attention to the subject.
In a landscape shot, placing a small figure in the foreground against a vast mountain range can emphasize the scale and grandeur of the landscape while highlighting the human element. This not only draws attention to the person but also enhances the overall composition of the photo by providing a sense of scale and perspective.
Conclusion
Highlighting the subject in a photo is essential for creating compelling and engaging images. By using contrasts in motion, focus, light, and size, you can effectively draw attention to your main subject and make it stand out. Experiment with these techniques to see which works best for different scenarios and subjects. Whether you're capturing the stillness amidst motion, the sharpness within blur, the light in the dark, or the small against the large, mastering these methods will elevate your photography and help you create striking, memorable images.
FAQ:
Q: How can I make my photo subject stand out effectively?
A: You can use techniques like contrasting motion with stillness, playing with focus and blur, utilizing light and dark contrasts, or employing size contrast to highlight your subject.
Q: What is the bokeh effect in photography and how can I achieve it?
A: Bokeh refers to the aesthetic quality of the out-of-focus areas in a photo. Achieve this effect by using a wide aperture (e.g., f/2.8) to blur the background and isolate your subject.
Q: What are some practical tips for capturing motion to emphasize the subject?
A: Capturing motion effectively involves techniques such as panning (following the subject's movement with your camera), using a slower shutter speed to create motion blur around a stationary subject, or freezing fast action with a faster shutter speed to make the subject stand out sharply.
Q: How do the MOLUS G300 and CINEPEER CM25 differ in terms of usability and application?
A: The MOLUS G300 is suited for professionals needing precise control over lighting setups, offering features like brightness adjustments and multi-light synchronization via the ZY Vega App, perfect for studio and controlled environments. On the other hand, the CINEPEER CM25 prioritizes portability and ease of use with simple dial controls and a lightweight, compact design.


AI Meets Mobility: Transform Your Shots with ZHIYUN Smooth 5S AI
Jul 11, 2024
Introduction:
As artificial intelligence continues to revolutionize various industries, its impact on mobile filmmaking is profound. AI technology has become integral to the way we capture and create content, making it more accessible and sophisticated than ever before. In this context, the ZHIYUN Smooth 5S AI emerges as a game-changer, seamlessly blending advanced AI features with exquisite design and user-friendly functionality. This blog will explore the standout features of the Smooth 5S AI, making it an essential tool for any content creator.
Always Follow the Target: Advanced Magnetic AI Tracker
The ZHIYUN Smooth 5S AI sets itself apart with its Magnetic AI Tracker. This advanced tracking module can be placed at the front or rear of the gimbal, offering unparalleled flexibility. The intuitive gesture control allows users to manage tracking functions effortlessly, supporting start/stop shooting within the ZHIYUN app or native camera. With custom framing tracking, you can easily record long-distance solo videos, ensuring that you never miss capturing those wonderful moments.
Exquisite Craftsmanship: Crystal-Clear Body
One of the most striking features of the Smooth 5S AI mobile stabilizer is its crystal-clear body, meticulously carved to perfection. The axis arms are made with a textured translucent material, providing an enhanced sensory experience. The control panel boasts a dual-layer cover design with a translucent shell, adding an extra layer of sophistication. Multi-layer spraying techniques create a smooth, glossy finish, while the handle is wrapped in textured silicone for improved grip and comfort.
Intelligent Gesture Control
The Intelligent Gesture Control feature of the Smooth 5S AI allows users to operate the gimbal with simple hand movements. Integrated multi-task instructions enable you to use different gestures to open or close the tracking function of the shooting object. This makes remote video recording, intelligent smooth shooting, and quick capture of life highlights easier than ever.
Built-In & Add-On Fill Lights: Unbeatable Lighting Effect
Lighting is a crucial element in filmmaking, and the ZHIYUN Smooth 5S AI excels in this area. The tilt axis is equipped with a high-power fill light boasting 650 lux peak illuminance. Additionally, two magnetic fill lights can be added, providing an unbeatable lighting effect of 2040 lux at peak. This ensures that your videos are well-lit, no matter the environment.
Orthogonal 3-Axis Structure: Full-Angle Movement
The Smooth 5S AI features an Orthogonal 3-Axis Gimbal Structure. This structure provides ample space and impressive load capacity, enabling true 360° unlimited rotation. The result is immersive "Vortex Mode" visual effects that are easy to achieve, adding a professional touch to your videos.
All-In-One Control Panel
Navigating the Smooth 5S AI is a breeze, thanks to its All-In-One Control Panel. This full-key control panel allows you to smoothly adjust parameters at your fingertips, unlocking limitless possibilities for your smartphone filmmaking journey. Whether you are adjusting the gimbal’s settings or controlling your smartphone's camera, everything is within easy reach.
Advanced Stabilization Technology
At the heart of the Smooth 5S AI is ZHIYUN's advanced stabilization algorithm and high-torque motors, providing professional-grade smoothness to everyday mobile creation. This technology ensures that your videos are stable and shake-free, even during dynamic movements.
Fast Charging for All-Day Creativity
The Smooth 5S AI phone stabilizer is designed for extended use, with a battery life that caters to various shooting scenarios. It can operate continuously for 7 hours with the AI tracker and built-in fill light turned on, and for 2 hours and 20 minutes with two magnetic fill lights and the built-in fill light. In Standby Mode, it can last up to 26 hours, ensuring that your creativity is never interrupted.
Unleash Your Creativity with ZY Cami and StaCam App
The Smooth 5S AI is compatible with the ZY Cami app, which features exclusive SMART mode and a vast collection of intelligent video templates. These tools provide user-friendly editing and one-click video production, making it easier than ever to create professional-quality content. Additionally, the StaCam app supports customizable framing, lens focal length adjustments, depth beauty effects, and advanced video customization, further enhancing your filmmaking capabilities.
Conclusion: Embrace the Future of Filmmaking with AI
In an era where AI transforms how we create, the ZHIYUN Smooth 5S AI leads the way in mobile filmmaking. Its advanced features, exquisite craftsmanship, and user-friendly design make it essential for elevating your content. Whether you're a seasoned videographer or an aspiring creator, the Smooth 5S AI helps you capture stunning, stable, and well-lit videos. Embrace the future with the ZHIYUN Smooth 5S AI and unleash your creativity.
FAQ:
Q: What are the benefits of using AI-powered object tracking in mobile stabilizers?
A: AI-powered object tracking allows users to automatically follow subjects, keeping them in focus and centered within the frame without manual adjustment.
Q: What are the benefits of the Orthogonal 3-axis Structure?
A: The Orthogonal 3-axis Structure allows for full-angle movement and 360° rotation, enabling creative shots with no angle limitations, including immersive "Vortex Mode" effects.
Q: How long does the battery last on the Smooth 5S AI?
A: The Smooth 5S AI can operate continuously for 7 hours with the AI tracker and built-in fill light turned on, and for 2 hours and 20 minutes with additional magnetic fill lights. In standby mode, it can last up to 26 hours.


Gimbal vs. Flycam: Which is the Best Choice for Your Filmmaking?
Jul 11, 2024
Introduction
As a filmmaker, choosing the right camera support equipment is crucial for capturing high-quality footage. Two popular options are handheld gimbals and flycams. While both serve similar stabilization functions, each has their own strengths depending on your production needs. Let’s explore the key differences between gimbals and flycams to help you decide which is the best fit.
What is a Flycam?
A flycam utilizes a counterbalanced camera platform that hangs from an over-the-shoulder rig or jib arm. The camera “flies” freely along articulating support arms, ideal for creating swooping jib and slider-like movements on a larger cinematic scale. Flycams accommodate heavier cinema camera payloads but require more extensive setup.
What is a Gimbal?
A gimbal is a motorized device that uses internal sensors and motors to detect pitch, roll, and yaw movements and counteract shakes in real-time. Popular gimbals like the ZHIYUN Crane 4 provide buttery smooth handheld shots without jitter. The Crane 4 is lightweight, stable, and capable of handling heavy payloads. It features a new wrist rest and handle for improved grip, balance indicator lights for precise calibration, and a magnetic wrench and reflector for added convenience, showcasing its professionalism and attention to detail.
Gimbal vs Flycam Usage
Gimbals excel for run-and-gun shooting from the hand or atop camera rigs. Flycams need time to rig precisely for pre-planned moves.
Gimbals enable spontaneous docu-style shots following unpredictable action. Flycams suit staged productions with repeatable moves.
Flycams fatigue the body less but restrict movement within their calibrated range. Gimbals move with full mobility anywhere.
Stabilization and Shots
The3-axis gimbalstabilization system like the ZHIYUN gimbal camera stabilizer series counters micro-jitters and pans/tilts smoothly. Flycams depend more on handling for precision moves.
Flycams glide stably on weighted arms but shaking initiates at higher speeds than dampened gimbals.
Gimbals produce nimble tracking shots within balances. Flycams create epic scaled slider/jib shots and reveals.
Gimbal vs. Flycam: Comparing Key Factors
Stabilization Quality
Gimbals generally offer superior stabilization due to their motorized systems. They can handle rapid movements and complex shots with greater ease and consistency. Flycams, while effective, may not provide the same level of smoothness in very dynamic conditions.
Ease of Use
Gimbals are more user-friendly, often featuring auto-calibration and straightforward controls. Flycams require manual balancing and more skill to operate efficiently, making them less accessible for beginners.
Battery Dependency
Gimbals rely on batteries, which means you'll need to manage power levels and have spares ready for longer shoots. Flycams, being mechanical, do not have this limitation, offering uninterrupted operation.
Which Should You Choose?
The decision between a gimbal and a Flycam ultimately depends on your specific filmmaking needs, budget, and level of experience.
Choose a Flycam If:
You are shooting in remote locations where battery charging is impractical.
You prefer a lightweight and portable device for on-the-go filmmaking.
You are comfortable with or willing to learn the manual balancing process.
Choose a Gimbal If:
You need superior stabilization for dynamic and complex shots.
You prefer a device that is easy to use with minimal setup.
You are shooting in environments where battery management is not a significant issue.
For those seeking an even more portable gimbal that still delivers professional stabilization, consider the ultra-compact ZHIYUN WEEBILL 3E. Weighing just 990g and roughly the size of an A4 sheet, the WEEBILL 3E fits easily into any shooter's kit bag. Its ergonomic design, Bluetooth shutter control, customizable buttons, native portrait switching, and Sling Mode 2.5 features make it highly usable for both run-and-gun documentary work as well as controlled on-location filming.
Conclusion
Both gimbals and Flycams offer valuable stabilization solutions for filmmakers, each with its own advantages and limitations. Understanding your needs will help you choose the right tool to enhance your creative vision and elevate your footage quality. To learn more about other essential filmmaking equipment, check out our guide: THE GUIDE TO ESSENTIAL FILMMAKING EQUIPMENT.
FAQ:
Q: What is the main difference between a gimbal and a Flycam?
A: The main difference lies in their stabilization mechanisms. Gimbals use motorized systems with sensors to stabilize the camera in real-time, while Flycams rely on counterbalanced platforms and mechanical stabilizers.
Q: Do gimbals or Flycams provide better stabilization?
A: Gimbals typically offer superior camera stabilization, especially in dynamic and complex shooting conditions, due to their motorized systems. Flycams are effective but may not be as smooth in very dynamic situations.
Q: What types of shots are gimbals best for?
A: Gimbals are best for dynamic tracking shots, smooth pans, tilts, and following unpredictable action due to their motorized stabilization and full mobility.
Q: What types of shots are Flycams best for?
A: Flycams excel at creating smooth, cinematic movements such as swooping jib shots, stable slider movements, and large-scale reveals, especially in staged productions.


Perfect Your Shots: Essential Tips for Using a 3-Axis Gimbal
Jul 11, 2024
In the world of videography, smooth, cinematic shots are crucial to captivating your audience. Whether you're a seasoned professional or a budding filmmaker, mastering the use of a 3-axis gimbal can elevate your work to the next level. In this blog, we'll explore essential tips for using a 3-axis gimbal to help you perfect your shots and create stunning videos.
What is a 3-Axis Gimbal?
A 3-axis gimbal is a handheld stabilizing device that uses motors and sensors to keep your camera steady. It compensates for unwanted movements across three axes: pitch (tilt), roll, and yaw (pan). This technology ensures that your footage remains smooth, even if your hands are shaky or you're moving around.
Why Use a 3-Axis Gimbal?
Smooth Footage:Gimbals eliminate the jitters and shakes that can ruin a shot, providing professional-quality stability.
Versatility:They allow for dynamic shots, including tracking, panning, and tilting, which would be difficult to achieve manually.
Ease of Use: Modern gimbals are user-friendly, making them accessible even for beginners.
Essential Tips for Using a 3-Axis Gimbal
Balance Your Gimbal Properly
Before turning on your gimbal, ensure that your camera is balanced correctly. An imbalanced gimbal can strain the motors and result in poor stabilization. Follow these steps to balance your gimbal:
Mount the Camera: Attach your camera securely to the gimbal.
Adjust the Tilt Axis: Position the camera so that it stays level when tilted up or down.
Adjust the Roll Axis: Ensure the camera stays level from side to side.
Adjust the Pan Axis: The camera should remain steady when rotated left or right.
Balancing your gimbal may take a few minutes, but it’s crucial for optimal performance.
Use the Right Modes and Settings
Modern 3-axis gimbals come with various modes tailored for different shooting scenarios. Familiarize yourself with these modes:
Pan Follow Mode: The gimbal follows your panning movements but stays level when you tilt or roll.
Lock Mode: Keeps the camera fixed in one direction, regardless of how you move.
Follow Mode: The gimbal follows your pan, tilt, and roll movements for more dynamic shots.
Experiment with these modes to see which works best for your needs.
Move Smoothly
To maximize the effectiveness of your gimbal, practice smooth and deliberate movements. Avoid sudden jerks or rapid changes in direction. Instead, move your body and the gimbal as one unit to maintain fluidity in your shots. Bend your knees and use a heel-to-toe walking motion to further reduce vibrations.
Plan Your Shots
While gimbals are great for spontaneous shooting, planning your shots can make a significant difference. Think about the sequence of movements you want to capture and rehearse them. This foresight helps you avoid unnecessary movements and ensures your footage is cohesive.
Practice Different Angles
Experimenting with different angles can add a creative flair to your videos. Use the gimbal to capture low-angle shots by holding it close to the ground or achieve high-angle shots by extending your arms. Combining various perspectives keeps your audience engaged and enhances the storytelling of your video.
Use Accessories Wisely
Enhance your gimbal setup with accessories like external monitors, microphones, and lights. These additions can improve the quality of your footage and sound without compromising stability. Just ensure that any added weight is balanced to avoid straining the gimbal's motors.
Regular Maintenance
Regular maintenance keeps your gimbal in top condition. After each use, check for loose screws, clean the gimbal, and store it in a safe place. Periodically update the firmware to benefit from the latest features and improvements from the manufacturer.
Highlighting the ZHIYUN Crane 4
For those looking to invest in a top-tier gimbal, the ZHIYUN Crane 4 camera stabilizer is a remarkable choice. Lightweight yet capable of handling heavy payloads, the Crane 4 features a new wrist rest and handle for improved grip, balance indicator lights for timely reminders, and a magnetic wrench and reflector for added convenience. These thoughtful design elements showcase the professionalism of this gimbal.
The 3-Axis camera gimbal stabilizer Crane 4's intelligent balance indicator lights provide precise balance calibration, making it easier to achieve smooth shots. Its innovative horizontal and vertical lock structure allows for effortless switching between landscape and portrait modes. The extendable sling grip and flexible wrist rest enhance comfort and versatility, making it a favorite among videographers. Additionally, the Bluetooth shutter control simplifies shooting, while the built-in magnetic wrench and protective cover add to the overall convenience.
Troubleshooting Common Issues
Even with careful use, you might encounter some issues. Here are quick fixes for common problems:
Drifting: If the gimbal drifts, recalibrate it according to the manufacturer's instructions.
Motor Noise: Ensure your gimbal is balanced and not overloaded with accessories.
Vibrations: Check for loose connections and recalibrate if necessary.
Conclusion
Mastering a 3-axis gimbal takes practice and patience, but the results are worth the effort. By following these essential tips, you can perfect your shots and create professional-quality videos that captivate your audience. Whether you’re shooting a short film, a vlog, or an event, a 3-axis gimbal is a valuable tool in your videography arsenal. So, balance your gimbal, plan your shots, and start creating stunning, smooth footage today!
FAQ:
Q: Why is posture important when operating a gimbal?
A: Maintain balanced posture with legs spread for stability, two hands firmly gripping, back straight to prevent shakes being transferred. Stand on level surfaces and avoid rapid upper body movements.
Q: Why is posture important when operating a gimbal?
A: Maintain balanced posture with legs spread for stability, two hands firmly gripping, back straight to prevent shakes being transferred. Stand on level surfaces and avoid rapid upper body movements.
Q: How does follow focus affect gimbal performance?
A: Adding follow focus accessories increases payload weight stressing motors if not counterbalanced properly. Perform slow, buttery focus pulls instead of swift changes to prevent focus hunting issues. Know your lens limits.
Q: What are some creative angles I can try with a gimbal?
A: Experiment with different angles to add creativity to your videos:
Capture low-angle shots by holding the gimbal close to the ground.
Achieve high-angle shots by extending your arms.
Mix various perspectives to keep your audience engaged and enhance your storytelling.
Q: How can I move smoothly while using a gimbal?
A: To achieve smooth movements:
Avoid sudden jerks or rapid changes in direction.
Move your body and the gimbal as one unit.
Use a heel-to-toe walking motion.
Bend your knees slightly to reduce vibrations.
- Choosing a selection results in a full page refresh.
- Opens in a new window.