










Your cart
Your cart is empty
News


What is Low-Key Lighting & High-Key Lighting in Film
Oct 08, 2024
Introduction
Lighting plays a crucial role in shaping the mood, tone, and overall aesthetics of a film. Two popular lighting techniques used in filmmaking are low-key and high-key lighting. Understanding these lighting styles can help filmmakers create the desired atmosphere and impact, making scenes more visually engaging and emotionally resonant. In this blog, we'll explore what low-key and high-key lighting are, how they differ, and when to use each to elevate your storytelling.
Low-Key Lighting: Creating Drama and Mystery
What is Low-Key Lighting?
Low-key lighting is a technique that uses a limited light source to create strong contrasts between light and shadow. This results in dark, shadowy areas with just a few highlights, giving a dramatic and mysterious feel to the scene. It's characterized by its high contrast and deep shadows, making it ideal for creating tension, suspense, or a sense of danger.
How to Achieve Low-Key Lighting
- Use a Single Light Source: Typically, a single key light is used to illuminate the subject. This light is often placed to the side or at an angle to create sharp contrasts.
- Minimize Fill Light: In low-key lighting, fill lights are either minimized or eliminated to maintain the shadows' depth.
- Adjust the Background: Keeping the background dark enhances the contrast and emphasizes the subject, drawing attention to specific details.
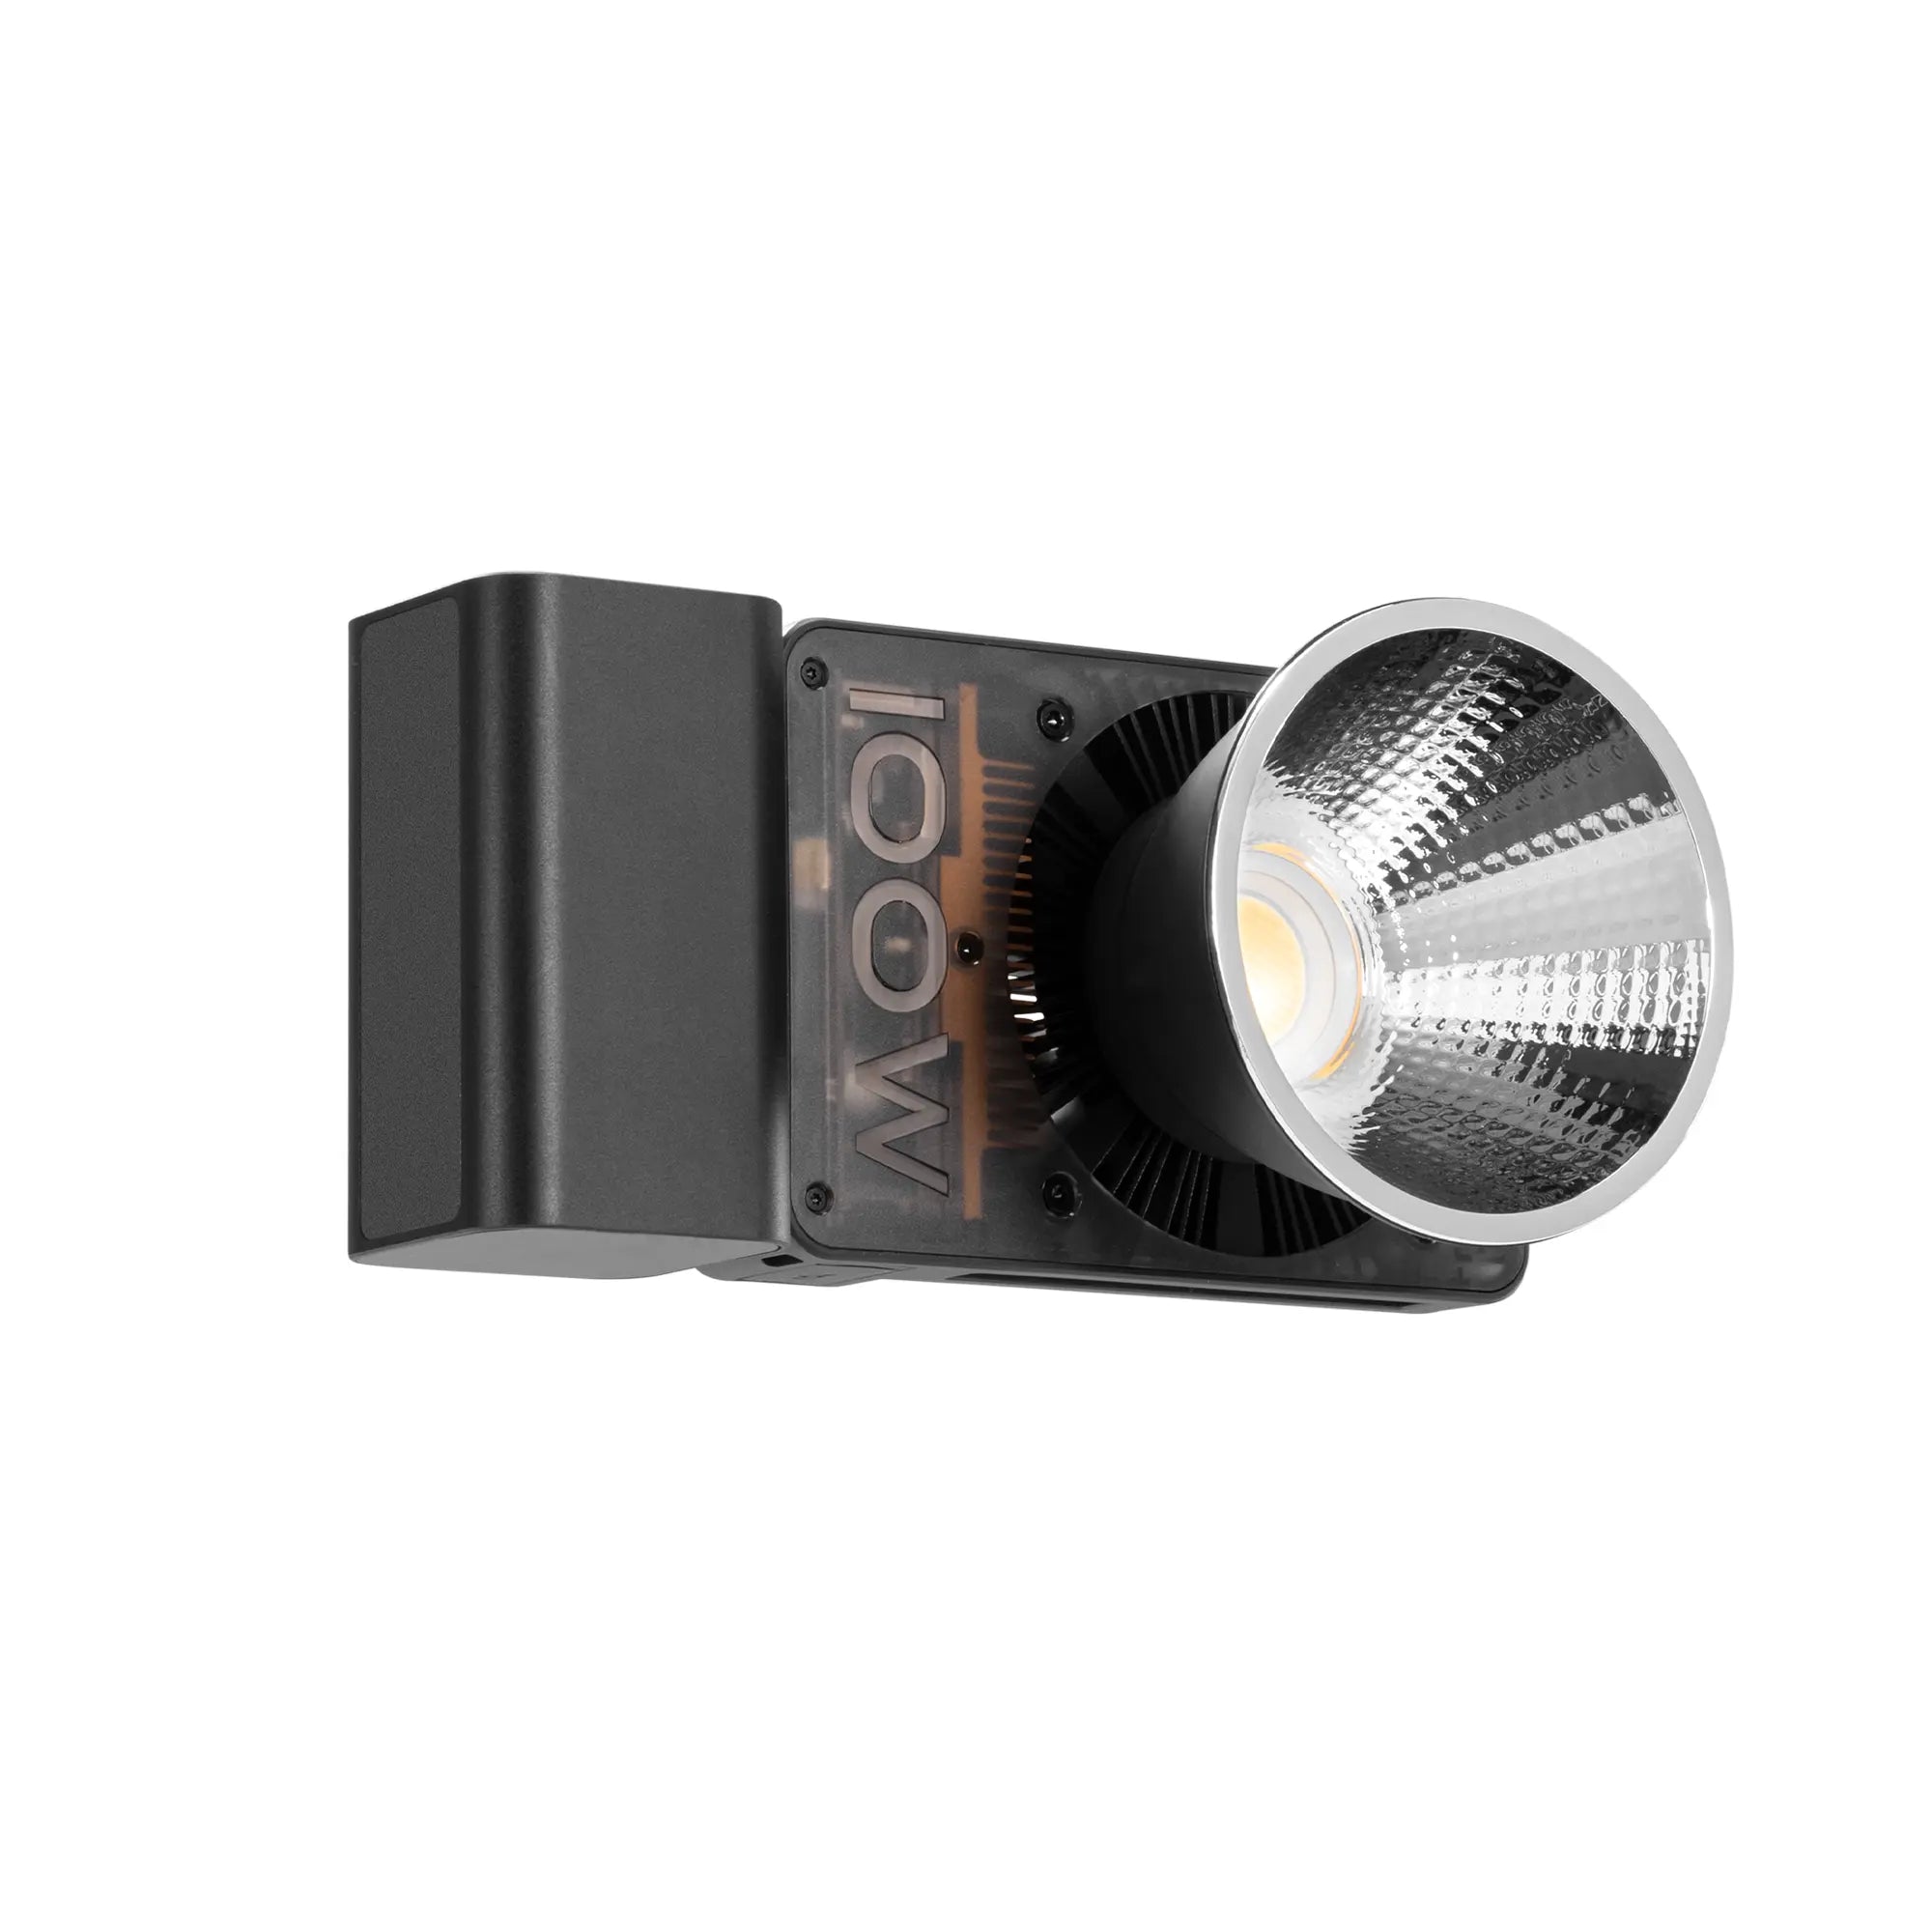
The ZHIYUN CINEPEER C100 is an excellent tool for achieving low-key lighting. With its powerful 100W light output and full-color RGB capabilities, it allows filmmakers to create deep shadows and rich lighting effects effortlessly. The ZHIYUN C100’s adjustable color temperature (ranging from 2700K to 6500K) and its high CRI value ensure accurate color reproduction, making it ideal for scenes that demand intense contrast and atmosphere.
When to Use Low-Key Lighting
- Drama and Suspense: Perfect for scenes with tension, suspense, or conflict, commonly seen in horror, thriller, and noir films.
- Character Depth: This lighting style adds depth and dimension, making it great for revealing a character's darker side or inner turmoil.
- Moody Atmospheres: Low-key lighting works well for moments that require an intimate, serious, or mysterious mood.
High-Key Lighting: Brightness and Clarity
What is High-Key Lighting?
High-key lighting is a technique that uses multiple light sources to eliminate shadows and create an even, well-lit scene. This style is characterized by its low contrast, bright highlights, and absence of shadows, making it perfect for scenes that need to convey a cheerful, light-hearted, or clean atmosphere.
How to Achieve High-Key Lighting
- Use Multiple Light Sources: A combination of key lights, fill lights, and backlights ensures even illumination across the scene.
- Soft Light: Soft, diffused light helps reduce shadows and creates a uniform brightness.
- Bright Background: A brightly lit or white background enhances the effect of high-key lighting, making the entire frame look clean and clear.
For achieving an effective high-key lighting setup, the ZHIYUN MOLUS X60 stands out as an ideal option. With its stable 60W output and easy-to-use dual-dial design for quick adjustments, this light offers the flexibility needed for creating evenly lit scenes. Its grip battery and PD charging capabilities ensure that you maintain consistent, bright lighting even during extended shoots, making it exceptionally suitable for high-key lighting in various film and commercial settings.
When to Use High-Key Lighting
- Comedies and Romances: Ideal for films that require a positive, uplifting, or light-hearted tone, such as romantic comedies and family movies.
- Advertising and Commercials: High-key lighting is widely used in commercials and product photography to convey a sense of purity, freshness, and approachability.
- Musicals and Sitcoms: This lighting style is effective in creating a lively and engaging atmosphere, suitable for feel-good content.
Low-Key vs. High-Key Lighting: Key Differences
Choosing Between Low-Key and High-Key Lighting
Selecting the right lighting technique depends on the mood and message you want to convey:
Low-Key Lighting:Ideal for scenes with tension, mystery, or intense emotions. It’s perfect when you want to add depth, contrast, and an element of surprise.
High-Key Lighting: Best suited for moments that require clarity, joy, or lightness. It’s the go-to choice for making scenes feel warm, inviting, and approachable.
Tips for Filmmakers: Blending Both Techniques
Experiment with Both Styles:Don’t feel restricted to just one type of lighting. Combining low-key and high-key techniques within different scenes of the same film can create dynamic contrasts and add visual interest.
Consider the Genre:Match the lighting style to your genre. While thrillers often lean towards low-key lighting, romantic comedies thrive on high-key lighting.
Use Lighting to Enhance Storytelling: Lighting should serve your narrative. Think about how each technique can highlight a character’s emotions, reveal important plot points, or set the overall tone.
Conclusion
Both low-key and high-key lighting are powerful tools that allow filmmakers to create unique visual experiences. Understanding how to use these techniques can significantly enhance your storytelling, helping you convey emotions, mood, and atmosphere more effectively. Whether you want to evoke mystery with shadows or brightness with soft light, mastering these lighting styles will add depth and professionalism to your film projects.
FAQs:
Q: What is the main difference between low-key lighting and high-key lighting?
A: Low-key lighting emphasizes shadows and contrast, creating a dramatic, intense mood, while high-key lighting focuses on even, bright illumination to produce a cheerful, clear ambiance.
Q: What type of scenes are best suited for high-key lighting?
A: High-key lighting works best for scenes that need a bright, positive, or light-hearted atmosphere, such as in comedies, romantic scenes, and commercials.
Q: What kind of lighting equipment is ideal for high-key lighting?
A: Bright, soft lights, such as LED panels, softboxes, and ring lights, are ideal for creating the even, shadow-free illumination required for high-key lighting.
Q: Can low-key lighting be used in daylight settings?
A: Yes, low-key lighting can be achieved in daylight by controlling the light using flags, black drapes, or placing the subject in shaded areas to maintain contrast.


The Art of Short Video: Essential Tips for Beginners
Oct 08, 2024
Creating short videos has become an essential skill in the era of social media and digital content. Whether you're looking to become the next viral sensation on TikTok or simply share moments with friends, learning the basics of video shooting is crucial. This guide will introduce you to key techniques that will help you shoot stable, engaging, and well-lit videos, even if you're a beginner. Let's dive into the essential tips to get you started on your short video journey!
Stability is Key
The foundation of any good video is stability. A shaky camera not only distracts viewers but can also make them feel dizzy. If you're shooting with a smartphone and don't have access to a stabilizer, worry not! You can stabilize your footage by simply using your body as a tripod. Hold your phone with both hands and keep your elbows close to your body. This technique helps reduce small shakes and movements.
For those wanting higher-quality, professional-looking videos, investing in a gimbal or a tripod is a great idea. The ZHIYUN Crane 4, for instance, offers impressive stability while being lightweight and capable of handling heavier cameras. Its upgraded Bluetooth shutter control and long battery life ensure seamless shooting, giving you smooth, cinematic footage even on the move.
Learn the Art of Composition
Just like photography, video shooting relies heavily on good composition. The "Rule of Thirds" is a common guideline that can help you create visually balanced shots. Most smartphones have a grid feature that can be activated in the camera settings. By aligning your subject along the grid lines or placing them at the intersection points, you can create a dynamic and aesthetically pleasing composition.
Beyond the Rule of Thirds, experiment with other composition techniques like diagonal lines or triangular framing, often seen in cinematic productions. As you become more experienced, you’ll start recognizing how these techniques can enhance the storytelling in your videos.
Harness the Power of Light
Lighting plays a significant role in the mood and quality of your videos. When shooting outdoors, aim for even lighting by positioning your subject where sunlight is diffused. Golden hour—right after sunrise or just before sunset—is the best time to shoot, as the natural light is soft and flattering.
For indoor shoots, tools like the ZHIYUN CINEPEER CF100 can elevate your lighting game. With its rich RGB lighting effects and adjustable brightness, the CF100 allows you to easily manipulate indoor lighting to match your creative vision. Whether you're looking for a soft glow or a more dramatic effect, this portable light stick ·offers the flexibility to create anything from subtle highlights to vibrant color transitions. Experiment with different light angles—backlighting can add a dramatic halo, while side lighting can bring out more texture and depth in your subject.
Experiment with Different Angles and Shots
To keep your videos visually engaging, avoid shooting everything from a single angle. Instead, experiment with various shots: close-ups, medium shots, and wide shots. For example, when filming a person, a close-up can capture emotions, while a wide shot sets the scene. Switching between different shot types keeps your video dynamic and helps tell a more comprehensive story.
Additionally, don’t hesitate to try low-angle or high-angle shots to create different perspectives. These angles can make your content stand out and add visual interest that hooks viewers in.
Control Exposure and Focus Manually
Many smartphones have an automatic focus and exposure adjustment feature, but it’s worth learning how to control these manually. This is especially useful when shooting in tricky lighting conditions, like indoors with bright windows. Locking your exposure will prevent the video from shifting between dark and bright scenes, which can be distracting.
Manual focus is equally essential. By tapping on the area of the screen where you want your camera to focus, you can ensure the subject stays sharp throughout the video. Practice these techniques, and soon you'll be in full control of how your video looks!
Conclusion
With the right techniques and a bit of practice, creating professional-looking short videos is within anyone's reach. Remember, stability, composition, lighting, and shot variation are the keys to captivating videos. As you continue to experiment and hone your skills, you'll see improvements in your content, attracting more viewers and making your videos stand out. Now, grab your phone and start shooting—your viral moment could be just one video away!
FAQs:
Q: How can new creators make their videos look more professional?A: Using tools like gimbals or stabilizers, can drastically improve video stability. Practicing with manual settings like exposure and focus also helps ensure better control over the visual quality, resulting in more polished videos.
Q: What should beginners focus on to improve storytelling in their videos?A: Beginners should focus on shot variation—combining close-ups, medium shots, and wide shots. This creates a more engaging narrative and helps keep viewers interested throughout the video.
Q: How can beginners use lighting to create mood in their videos?A: Understanding basic lighting principles is key. For example, shooting during golden hour offers soft, flattering light. For indoor shoots, using a tool like the ZHIYUN CINEPEER CF100 allows for adjustable, rich lighting effects, helping to set the right mood and atmosphere.


Mastering Night Portraits: How to Light Your Subject for a Cinematic Ambiance
Sep 24, 2024
Shooting portraits at night can be both challenging and rewarding. The darkness offers a blank canvas for photographers to sculpt their subjects with light, creating a sense of mood and atmosphere. Whether you're aiming for a warm, intimate vibe or a mysterious, edgy look, lighting is the key to unlocking the ambiance of your night-time shots. In this blog, we'll explore the techniques and tools you can use to transform your night portraits into cinematic masterpieces by using creative lighting setups.
Understand the Power of Color Temperature
Different light sources emit varying color temperatures, which can dramatically alter the mood of your portraits. Warm tones (around 2700K-3200K) can create a cozy, romantic atmosphere, reminiscent of candlelight. On the other hand, cooler tones (5000K-6000K) can evoke a sense of mystery or urban detachment, perfect for portraits that feel more modern or introspective. For versatile control over these effects, ZHIYUN MOLUS B-Series is an excellent photography light, offering a wide range of color temperatures from 2700K to 6500K, ensuring cinematic results. For a night shoot, using colored gels on your lights can also add a surreal, neon effect, transporting your subject into a dreamy or futuristic world. Don’t be afraid to experiment—this is where the mood of your portrait takes shape.
Key Light and Fill Light: Creating Balance
At night, your primary source of light—your key light—should be placed to one side of your subject to create depth. This light forms the backbone of your portrait, highlighting key features such as the face or body. However, to avoid harsh shadows, a fill light placed on the opposite side will help soften the scene, providing balance. This two-light setup gives you control over the contrast and prevents your subject from being swallowed by the darkness.
Embrace Practical Lights and Ambient Lighting
Urban settings, in particular, offer a wealth of ambient light sources like street lamps, neon signs, and car headlights. Incorporating these "practical lights" into your portraits not only adds visual interest but also grounds your subject in the environment, giving your shots a natural, spontaneous feel. For added flexibility, ZHIYUN CINEPEER CM15 is a compact yet powerful option that fits perfectly into night shoots, offering vibrant RGB colors and 18 dynamic lighting effects. You can easily use it to complement or enhance the ambient lights, allowing for more creative lighting possibilities in your scene.
Use Reflectors and Diffusers for Softer Effects
When you're out shooting at night, you'll often need to control the light to prevent it from being too harsh. Using a diffuser can soften the output, spreading the light more evenly across your subject. Reflectors can also be incredibly useful, bouncing light back onto areas that may otherwise fall into shadow. These tools help create a more natural, even look, ensuring your subject is well-lit without looking flat.
Playing with Shadows and Light Ratios
A significant part of shooting at night is how you handle contrast, especially when it comes to shadows. Light ratios—the difference between the bright and dark areas in your image—play a big role in setting the mood. A high light ratio, with strong contrasts between light and dark, can give your portrait a dramatic, film-noir look. A lower ratio, with softer transitions between light and shadow, can evoke a gentler, more ethereal feeling. To master this, try moving your key light closer or further from your subject, or adjusting its angle until you achieve the desired look.
Conclusion
Lighting in night portrait photography is an art form that allows you to tell a story, evoke emotions, and craft unforgettable images. By understanding color temperature, balancing key and fill lights, utilizing ambient light, and mastering light ratios, you can create stunning, cinematic portraits. With a little experimentation and the right tools, you'll be able to transform any night shoot into a visual masterpiece that captivates your audience.
FAQs:
Q: How to make my night portraits look more cinematic?
A: To achieve a cinematic look, focus on using a combination of warm and cool lighting, play with high contrast shadows, and incorporate practical lighting from the environment like street lamps or neon signs.
Q: What is the best light setup for night portraits?
A: A two-light setup using a key light for the main subject and a fill light to reduce harsh shadows is an effective approach. Use diffusers and reflectors to balance the lighting for softer, more natural results.
Q: Should people use flash when shooting portraits at night?
A: Flash can be useful, but it should be diffused or bounced off a surface to avoid harsh lighting. Alternatively, continuous lights, like LED panels, offer more control over the intensity and color.
Q: How to prevent the night portraits from looking too dark?
A: Use a higher ISO setting and open up your aperture to let in more light. Additionally, utilize external lights, like an LED panel, to brighten your subject without sacrificing image quality.
Q: How to create a moody, atmospheric effect in night portraits?
A: Experiment with backlighting your subject and using fog or smoke to scatter light. Combine this with colored gels or ambient light sources to add drama and texture to the scene.


Lighting Like a Pro: Maximizing the 3-Point System
Sep 23, 2024
Lighting is a key element in filmmaking, shaping mood and atmosphere. Among various lighting setups, the three-point lighting system is the most widely used due to its simplicity and versatility. It consists of the key light, fill light, and backlight, working together to create depth and contrast. In this guide, we’ll explore how to maximize the three-point system to give your videos a professional touch.
What is Three-Point Lighting?
Three-point lighting relies on three main light sources:
- Key Light: The strongest light, positioned at a 45-degree angle from the subject. It illuminates the subject and creates shadows.
- Fill Light: Positioned opposite the key light, it softens the shadows cast by the key light. It’s typically half as bright and more diffused.
- Backlight: Positioned behind the subject, it separates them from the background, adding depth and a subtle glow around the subject’s outline.
Perfecting Light Placement
The success of three-point lighting depends on correct positioning. The key light should highlight the subject’s features, while the fill light softens shadows without eliminating them completely. The backlight adds dimension by creating separation from the background. Experiment with angles and light intensity to achieve the desired mood.
For filmmakers looking to enhance their lighting setup, products like the ZHIYUN CINEPEER C100 are invaluable. The CINEPEER C100’s full-color RGB technology, offering 36,000 color options, allows for precise lighting customization. With its high CRI and TLCI ratings (≥98 and ≥95 respectively), the ZHIYUN C100 ensures vibrant, true-to-life color reproduction, making it ideal as your main or key light. Whether you need warm tones or cool hues, its adjustable color temperature (2700K to 6500K) makes it perfect for all lighting scenarios, from dramatic film scenes to commercial shoots. The compact design and adaptive charging technology provide flexibility and ease of use, ensuring that even during long shoots, your lighting remains consistent and professional.
Mastering Shadow Control
Shadows help create mood and texture. A stronger key light will cast deeper shadows, while adjusting the fill light can soften them. For a more dramatic look, use minimal fill light to increase contrast. Alternatively, for a balanced, neutral scene, bring the fill light closer in intensity to the key light.
Adjusting Color Temperature
Color temperature is crucial to achieving the right look. Warm light (3200K) creates a cozy, natural feel, while cooler light (5600K) adds a modern touch. When filming people, be mindful of how different light temperatures affect skin tones. Mixing warm and cool lights can add visual depth and interest.
For smaller, more intimate setups, or when shooting in tight spaces, the ZHIYUN CINEPEER CX100 is an excellent option. With its ultra-lightweight, compact design and powerful 100W light, the CINEPEER CX100 delivers professional-grade lighting in the palm of your hand. Its adjustable color temperature (2700K-6500K) and high CRI ensure true-to-life color rendering, while the intuitive dual-dial design allows for precise control over brightness and temperature. Perfect for handheld lighting outdoors or in constrained spaces, the ZHIYUN CX100 also supports versatile power solutions, including a built-in battery and PD/DC power supply, making it a reliable tool for any filmmaker on the go.
Modifying Your Light
To further improve lighting, use softboxes or reflectors to diffuse and bounce light. Softboxes reduce harsh shadows, creating a softer, more flattering light. Reflectors can substitute for a fill light, bouncing key light back onto the subject. Both tools help create even lighting in interviews or product shoots.
Conclusion
Three-point lighting is an essential technique for filmmakers, providing flexibility and control over your scene’s look. With proper light placement and adjustments in shadow, color temperature, and light modifiers, you can craft stunning visuals. Tools like the ZHIYUN CINEPEER C100 and CX100 elevate your setup, offering professional features in compact, portable designs.
Master the three-point system, and your videos will always shine with a cinematic, polished look.
FAQs:
Q: What is the three-point lighting system?
A: The three-point lighting system is a technique that uses three lights—key light, fill light, and backlight—to illuminate a subject and create depth in the shot.
Q: How do you position the key light in a three-point setup?
A: The key light is typically positioned at a 45-degree angle from the subject’s face, either to the left or right. It’s often placed slightly above the subject to mimic natural light falling from above. This light creates the primary shadows and highlights, defining the subject’s features.
Q: Is it necessary to use a backlight in all shots?
A: While not mandatory, using a backlight can enhance the visual quality of most shots, especially in portrait or interview setups, by creating separation from the background.
Q: What is the best color temperature for video lighting?
A: The best color temperature depends on the look you want to achieve. A warm color temperature (around 3200K) gives a natural, cozy feel often used for indoor settings. A cooler temperature (around 5600K) mimics daylight and is commonly used in outdoor or brightly lit environments. Mixing color temperatures can create contrast and enhance storytelling.
Q: What types of lighting modifiers can be used with the three-point system?
A: Common modifiers include softboxes, grids, and reflectors, which help diffuse or focus light, providing more control over shadows and light spread.


4 Essential Tips for Shooting Short Videos
Sep 19, 2024
In the fast-paced world of video content, where attention spans are fleeting, creating high-quality videos that captivate your audience is key. Whether you're a budding content creator or a seasoned videographer, having the right shooting techniques can elevate your videos and set you apart from the millions of others. From camera angles to equipment, mastering the basics is crucial to making your content shine. In this guide, we’ll explore essential video shooting techniques that will help you create content that not only catches the eye but keeps your audience engaged.
Choose the Right Equipment
While you don’t need professional gear to shoot videos, the quality of your device can significantly impact the final product. Smartphones are the most common tool, especially with advancements in 4K resolution and built-in stabilization systems that make your videos smooth and crisp. If you're looking to take your production up a notch, consider investing in a DSLR or mirrorless camera, which allows for finer control over depth of field, lighting, and focus. Don’t forget about accessories like tripods, stabilizers, and even drones if you want to experiment with aerial shots for a unique perspective.
Master Your Camera Angles
The angles you choose to shoot from can drastically change the message and impact of your video. For instance:
- Low Angle (Upward Shot): This makes the subject appear powerful and dominant.
- High Angle (Downward Shot): Creates a sense of vulnerability or insignificance.
- Tracking Shots: Following your subject as they move can highlight interactions with their environment.
- Close-ups: Perfect for showing expressions, emotions, or detailed shots of products or food.
Experimenting with different angles will not only enhance your storytelling but will also keep your viewers engaged by offering fresh perspectives.
Stabilize Your Shots
No one wants to watch shaky footage. To avoid this, always use a tripod or a smartphone stabilizer to keep your shots steady. For creators on the go, handheld gimbals can provide smooth camera movements, even while walking or running. If you're using a camera, ZHIYUN Crane 4 camera stabilizer is a great choice – lightweight yet stable, it handles heavy payloads with ease and offers upgraded Bluetooth shutter control for seamless shooting. With a long battery life, it’s ideal for high-intensity shoots.
If you're filming with a smartphone, consider the ZHIYUN Smooth 5S mobile stabilizer. It delivers unbreakable stabilization and features dual magnetic lights for optimal lighting. This stabilizer is an all-in-one solution for creators looking to produce professional-level videos with their phones.
Create a Flow with Transitions
Smooth transitions can make your videos more dynamic and professional. You don’t need complex editing software to achieve this – even basic in-app tools provide plenty of options to get creative. Try transitioning between different scenes using camera movements like pans or tilts to create a seamless flow. These small details can significantly impact the overall feel of your video and keep your audience engaged from one clip to the next.
Conclusion
Creating engaging short videos is as much about creativity as it is about technique. Whether you’re working with a smartphone or a high-end camera, mastering the essentials like stabilization and transitions will enhance your videos' overall quality. By paying attention to camera angles and experimenting with your shooting style, you can capture your audience’s attention and keep them watching. So grab your camera, explore different techniques, and start shooting videos that will help you stand out!


How Color Tones Shape Your Photography
Sep 19, 2024
Ever taken a photo that just didn’t quite capture the vibe you were going for? The secret might lie in the color tone. Whether you're aiming for warmth, coolness, or something more playful, the right color tone can elevate your images from good to unforgettable. In this blog, we’ll explore how different tones—warm, cool, and even unique hues like green and red—affect the mood of your photos and how to use them effectively. By the end of this guide, you’ll be ready to add new layers of depth and emotion to your shots simply by adjusting your color palette!
Perfecting the Tone with Lighting
Lighting is a pivotal element in achieving the right color tone for your photos. To master this, consider using advanced lighting tools like the ZHIYUN CINEPEER C100 and ZHIYUN CINEPEER CF100. The ZHIYUN CINEPEER C100 pixel light is equipped with RGBWW 5-in-1 color mixing technology, offering 36,000 color options. This allows you to fine-tune your lighting to match your creative vision, from warm, cozy hues to cool, cinematic shades. With its powerful 100W output, it brightens every scene while enriching color depth.
On the other hand, the ZHIYUN CINEPEER CF100 RGB Stick Light provides a versatile range of effects with six built-in lighting moods and seven effects. It enables precise control over each LED's brightness and color, perfect for creating unique lighting scenarios like dynamic color transitions or lightsaber glows. By leveraging these tools, you can enhance your photos with customized lighting that perfectly aligns with your chosen color tones.
Warm Tones: Capturing Comfort and Serenity
Warm tones, such as yellows and oranges, are often used to evoke feelings of warmth, safety, and nostalgia. These colors are ideal for golden hour shots, autumn landscapes, or family gatherings where you want to highlight a sense of comfort and care. When you want to give your image a soft, friendly feel, adjust your white balance to a higher Kelvin (K) setting or use the “Flash” or “Daylight” settings on your camera. This technique helps amplify the warmth already present in natural light.
For example, a sunset shot with warm tones can instantly transport the viewer to a peaceful moment. This simple adjustment can bring a cozy, almost cinematic feel to your photos.
Cool Tones: Cinematic and Edgy
On the opposite end of the spectrum, cool tones like blues are often associated with feelings of calm, distance, or even tension. They’re perfect for creating a stylish, moody look, often seen in Hollywood films. To achieve this tone, try lowering the Kelvin setting on your camera (around 2500K) or choose the “Tungsten” white balance preset.
Cool tones work wonderfully in urban photography, nighttime shots, or rainy day scenes, where you want to convey isolation or intensity. Blue tones can give your photos a high-end, editorial quality, making them look more polished and sophisticated.
Green Tones: Playful or Disturbing
Green is a unique color in photography that can evoke very different emotions depending on how it’s used. On one hand, it can feel playful and energetic—think of the vibrant greens in LOMO cameras. On the other hand, green can also be eerie or unsettling, often used in horror or thriller movies to create tension.
For more control over green tones, you can experiment in post-production by adding filters through software like Adobe Lightroom. This can be particularly helpful when you want a more experimental look or something a little offbeat.
5. Red Tones: Bold and Dramatic
Red tones in photography are all about drama and energy. They often mimic light leaks from film cameras, adding a vintage, edgy feel to your photos. Red can give your photos a bold pop that instantly grabs attention. It’s a great choice for portrait photography or street photography where you want to create a sense of urgency or passion.
To introduce red tones, use Photoshop or Lightroom to tweak your color balance after taking the photo. You can add red filters or adjust the saturation to make the color stand out, giving your image a bold, artsy flair.
Conclusion
Color tones have a powerful effect on the mood of your photos, helping you tell a story and evoke emotions through visual cues. Whether you're aiming for warmth, cool sophistication, playful quirkiness, or bold intensity, mastering color tones will bring your photography to the next level. So next time you’re framing a shot, think about the tone you want to convey and adjust your settings accordingly—your photos will thank you for it!
If you're interested in learning more, be sure to check out ZHIYUN photography lights for all the details.
FAQs:
Q: How do warm and cool tones impact the mood of a photograph?
A: Warm tones, like yellows and oranges, evoke feelings of comfort, safety, or nostalgia, ideal for cozy, personal images. Cool tones, such as blues, create a sense of calm, isolation, or tension, often used in urban or cinematic photography for a sleek, moody effect.
Q: What camera settings should I use to achieve warm tones in outdoor shots?
A: For warm tones, adjust your white balance to a higher Kelvin setting (around 5,000K–7,000K). Using presets like “Daylight” or “Flash” in golden hour or autumn scenes can enhance warmth, adding a soft, welcoming atmosphere to your images.
Q: How can green tones be effectively used in photography?
A: Green tones can add playfulness or eeriness depending on context. Use them carefully with complementary colors like oranges or neutrals. To avoid overwhelming the shot, control green saturation in post-processing and balance lighting to keep it subtle yet impactful.


Tips for Stunning Portrait Photography with an iPhone
Sep 19, 2024
In today's world, where almost everyone has a smartphone, capturing stunning portraits no longer requires a high-end camera. The iPhone, with its powerful features, allows you to take professional-quality portraits with just a few taps. However, getting that perfect shot involves more than just pointing and clicking. In this guide, we'll explore some essential tips and tricks to help you make the most of your iPhone's capabilities and capture portraits that truly stand out.
Master the Portrait Mode
One of the iPhone's most powerful features for portrait photography is its Portrait Mode. This mode uses depth-effect technology to blur the background and keep the subject in sharp focus, mimicking the shallow depth of field typically achieved with professional cameras. To use it effectively, ensure that your subject is well-lit and has a contrasting background. Experiment with the different lighting effects available in Portrait Mode to find the one that best suits your subject.
Refine Your Focus Post-Shot
With iOS 17 and later versions, you can adjust the focus after taking a shot in Portrait Mode. This feature allows you to shift the focus to different parts of the image, giving you more creative control over the final result. Simply tap on the area you want to be the focal point, and the image will adjust accordingly. While this can be a powerful tool, remember that the initial focus during the shot should still be as accurate as possible to achieve the best results.
Frame Your Shot with Care: Fill the Frame
A well-composed portrait can make all the difference. When framing your shot, consider filling the frame with your subject. This technique not only draws attention to the subject but also adds a sense of intimacy to the portrait. Move closer to your subject or use the iPhone's telephoto lens (if available) to get a tighter shot. This approach works particularly well when you want to emphasize facial features or capture the emotion in your subject's eyes.
Mind the Headroom
When composing your portrait, be mindful of the space above your subject's head. Too much empty space can make the photo feel unbalanced and less engaging. Ideally, you should leave just a small amount of space above the head to create a well-proportioned composition. This subtle adjustment can significantly enhance the overall aesthetic of your portrait.
Capture Movement: Make It Dynamic
Static poses can sometimes feel stiff, especially if your subject isn’t comfortable in front of the camera. Instead, let your subject move naturally—walk, spin, or interact with their surroundings—and capture these candid moments. Using your iPhone’s burst mode, you can snap multiple shots in quick succession, giving you a range of options to choose from later.
To keep your photos sharp and clear even with movement, consider using a phone stabilizer like ZHIYUN Smooth 5S or Smooth 5S AI mobile stabilizer. The Smooth 5S, for example, offers exceptional anti-shake technology, ensuring that your footage remains steady without compromising on quality. It also features built-in and magnetic fill lights, providing excellent lighting to highlight your subject no matter where you are.
If you want to take your shots to the next level, the Smooth 5S AI includes an advanced magnetic AI tracker that follows your subject automatically, making it easier to capture dynamic scenes without worrying about framing. Its intelligent gesture control and robust stabilization make it an ideal tool for creating smooth, cinematic footage on the go.
Using these tools not only helps reduce the chances of blurry, unusable photos but also allows you to focus on capturing those spontaneous, dynamic moments that make your portraits stand out.
Conclusion
Your iPhone is a powerful tool for capturing stunning portraits, but getting the best results requires more than just using the default settings. By mastering features like Portrait Mode, refining your focus, and paying attention to composition, you can elevate your photography to the next level. So, the next time you're out with your iPhone, try these tips and watch your portraits go from good to great!
FAQs:
Q: How can an iPhone's Portrait Mode enhance the quality of portrait photos?
A: Portrait Mode on an iPhone simulates a shallow depth of field, blurring the background and keeping the subject in sharp focus. This creates a professional-looking photo by drawing attention to the subject while minimizing distractions from the background.
Q: Why should someone consider using burst mode for portrait photography?
A: Burst mode allows the iPhone to take multiple photos in quick succession, increasing the chances of capturing the perfect moment, especially when the subject is moving. It’s an effective way to select the best shot from a series.
Q: What role does lighting play in iPhone portrait photography?
A: Lighting is crucial in portrait photography, as it affects the mood and clarity of the photo. Tools like the built-in and magnetic fill lights on the Smooth 5S can enhance lighting conditions, ensuring that the subject is well-lit and the details are sharp.


Simple Techniques for Pro-Quality Landscape Shots with Your Smartphone
Sep 19, 2024
In an age where everyone has a powerful camera in their pocket, capturing breathtaking landscapes is no longer limited to those with high-end DSLRs. Whether you're standing before a majestic mountain range or watching the sun dip below the horizon, your smartphone is more than capable of freezing those awe-inspiring moments in time. But how do you ensure your landscape photos are as stunning as the scenes you're witnessing? With the right techniques and a few simple tools, your smartphone can become a powerful device for creating professional-quality landscape photos.
Leverage the Rule of Thirds
Composition is key to creating visually appealing landscape photographs. The Rule of Thirds is a fundamental principle that can dramatically enhance your shots. By dividing your frame into a 3x3 grid, you can position the most important elements of your scene along the grid lines or at the intersections, creating balance and drawing the viewer’s eye to the focal points. Most smartphones have a grid option in the camera settings, which makes it easier to apply this rule. By mastering the Rule of Thirds, you’ll be able to capture landscapes that are not only beautiful but also well-composed and engaging.
Utilize HDR Mode for Dynamic Range
High Dynamic Range (HDR) mode is a powerful feature available on most smartphones that can enhance the detail in your landscape photos. HDR works by taking multiple shots at different exposures and blending them together to create a single image with balanced lighting. This is particularly useful in landscape photography where you often have a wide range of light levels, from bright skies to shadowy terrain. By enabling HDR mode, you can capture both the bright and dark areas of your scene in vivid detail, resulting in a more balanced and lifelike photo.
Stabilize Your Shots for Clarity
While capturing stunning landscapes in photos is exciting, you might also want to record the beauty of your surroundings in video form. This is where a phone stabilizer becomes essential. ZHIYUN Smooth 5S mobile stabilizer offers unmatched stabilization, ensuring that dynamic scenes like galloping horses on the plains, birds soaring through the sky, and flowing rivers are captured with cinematic smoothness. Its built-in fill light and additional magnetic lights keep your videos well-lit even in cloudy days. Plus, with AI shooting templates, you can easily create professional-looking videos without needing extensive editing skills. For those seeking even more advanced features, ZHIYUN Smooth 5S AI takes it a step further. With its magnetic AI tracker that supports custom framing tracking, you can effortlessly keep your subject in frame.
Embrace the Power of RAW
If you're serious about landscape photography, consider shooting in RAW format. Unlike JPEG, which compresses image data, RAW files preserve all the details captured by your smartphone's sensor. This gives you much more flexibility in post-processing, allowing you to fine-tune the exposure, color balance, and sharpness without losing quality. Many smartphones now support RAW capture, either natively or through third-party apps. By shooting in RAW, you can bring out the full potential of your landscape photos, making adjustments that might not be possible with standard JPEG files.
Maximize Your Smartphone's Lens Capabilities
Modern smartphones come equipped with multiple lenses, each offering unique advantages for landscape photography. The ultra-wide lens is perfect for capturing expansive vistas, allowing you to fit more of the scene into your frame. Telephoto lenses, on the other hand, can bring distant elements closer, adding a sense of depth and scale to your images. When using these lenses, it’s important to avoid digital zoom, which can degrade image quality. Instead, rely on your phone’s optical zoom or simply move closer to your subject to maintain sharpness and detail.
Conclusion:
Landscape photography with a smartphone has never been more accessible or more rewarding. By applying these techniques, you can elevate your photos from simple snapshots to stunning works of art. Whether you’re a seasoned photographer or just starting out, your smartphone is a powerful tool that, with the right approach, can help you capture the beauty of the world around you. So next time you find yourself in front of a breathtaking landscape, remember these tips, and let your creativity shine.
FAQ:
Q: How can the Rule of Thirds improve landscape photography?
A: The Rule of Thirds is a composition technique that helps in creating balanced and engaging images by positioning key elements along grid lines or intersections, enhancing the overall visual appeal of landscape photos.
Q: What is the benefit of using HDR mode in landscape photography?
A: HDR mode captures multiple exposures and combines them into a single image, ensuring balanced lighting across different areas of the scene, which is particularly useful for landscapes with varying light levels.
Q: What are the advantages of shooting in RAW format for landscape photography?
A: Shooting in RAW format preserves all the details captured by the smartphone’s sensor, providing greater flexibility in post-processing for adjusting exposure, color, and sharpness without losing quality.
Q: What are the common mistakes to avoid in smartphone landscape photography?
A: Common mistakes include relying too much on digital zoom, ignoring the composition rules, and failing to clean the lens, which can all impact the quality of the photos.


Rocking the Shots: A Guide to Capturing Clear and Smooth Footage at Live Concerts
Sep 19, 2024
Live concerts are electrifying experiences that captivate both the audience and performers. Capturing the essence of these moments through clear and smooth footage can be challenging due to the dynamic and often unpredictable environment. Whether you're a professional videographer or an enthusiastic concert-goer, this guide will provide you with essential tips and techniques to ensure your concert footage rocks just as hard as the performance.
Positioning Yourself for the Best Shots
Your position in the venue can greatly impact the quality of your footage:
Front and Center: Being close to the stage provides clear views of the performers and avoids crowd obstructions.
Side Angles: Shooting from the sides can offer unique perspectives and capture the depth of the stage setup.
Elevated Positions:If possible, find an elevated spot to avoid heads and hands in your shots and get a clear view of the stage.
Gear Up for the Action
Camera Gear:
DSLR or Mirrorless Camera: These types of cameras offer greater control over settings and generally perform better in low-light conditions.
Concert photography Lens:
A fast lens with a wide aperture (f/2.8 or lower) is ideal for low-light environments. A zoom lens (e.g., 24-70mm) can give you versatility, while a prime lens (e.g., 50mm) can offer superior image quality.
Tripod/Monopod:
For videography, a tripod or monopod can help stabilize your shots, especially during long performances.
External Microphone:
For better audio quality in videos, use an external microphone to capture clearer sound.
Accessories:
Extra Batteries and Memory Cards: Concerts can be long, so it's essential to have extra batteries and memory cards on hand.
Lens Cleaning Kit:
Keep your lenses clean to prevent any dust or smudges from ruining your shots.
Stabilization Solutions:
To avoid shaky footage, invest in a gimbal or a camera stabilizer. The ZHIYUN Smooth 5S AI is a great choice for mobile filmmakers. It is crafted to mitigate the inevitable shakes and tremors of handheld filming. This capability proves invaluable in concert environments, where constant movement—both by performers and audiences—can challenge steady filming. With Smooth 5S AI phone stabilizer, effortlessly capture smooth pans and tracking shots that faithfully convey the concert's vibrant atmosphere, free from the disruptions of camera instability.
Composing Your Shots: Techniques for Dynamic Footage
Good composition is key to captivating concert footage:
Rule of Thirds: Divide your frame into thirds and place your subject along these lines for balanced and engaging shots.
Close-Ups: Focus on the performers' expressions and instruments for emotional and impactful shots.
Wide Shots: Capture the entire stage and audience to convey the atmosphere and scale of the event.
Movement: Use planning and tilting to follow the action on stage, but keep movements smooth and deliberate.
4. Dealing with Low Light and Flashing Lights
Concerts often have low light and flashing lights, which can pose challenges. Choose equipment that performs well in low light, such as a camera with high ISO capabilities and a wide aperture lens. Adjust your shutter speed and use manual settings to control exposure during flashing lights.
Additionally, using available light can significantly improve your shots. Fill lights, often built into or attached to stabilizers and gimbals, provide essential illumination in dim environments. They help capture clear and vibrant selfies by casting soft, balanced light and avoiding harsh shadows. The ZHIYUN MOLUS X60 photography light is a great tool for this, offering a powerful 60W output without stroboscopic effects, and its compact size makes it easy to carry. However, use fill lights considerately to avoid disrupting others' enjoyment of the concert.
Conclusion:
Photographing and filming live concerts is an exhilarating blend of creativity, technical skill, and passion. Whether you're aiming for Instagram-worthy photos or creating a documentary-style video, these tips will help you capture the essence of live music with clarity and smoothness. So, grab your gear, soak up the atmosphere, and let your camera tell the story of the next unforgettable concert experience. Remember, the best shots often capture not just the music, but the emotions and energy that make live concerts truly unforgettable.
FAQ:
Q: What are some essential pieces of equipment for concert photography and videography?
A: Essential equipment includes a DSLR or mirrorless camera, a fast lens with a wide aperture, a zoom or prime lens, a tripod or monopod, an external microphone, extra batteries, memory cards, a lens cleaning kit, and stabilization solutions such as a gimbal.
Q: What are some techniques for capturing clear and smooth video footage at concerts?
A: Use a gimbal for stability, keep your movements slow and deliberate, and focus on smooth transitions between subjects and angles to maintain the concert's energy and enhance the viewer's experience.
Q: How can fill lights be used effectively during live concerts for photography?
A: Fill lights can provide essential illumination in low-light environments, such as nighttime concerts. Use them considerately by choosing moments wisely, angling the light to avoid disturbing others, and keeping selfie sessions brief.
Q: What are key photography tips for capturing memorable moments at concerts?
A: Master your camera settings by understanding manual mode and adjusting ISO, aperture, and shutter speed to adapt to changing lighting conditions. Use available light creatively and ensure your lenses are clean to prevent any dust or smudges from ruining your shots.


Understanding Diffused Light: A Filmmaker’s Essential Tool
Sep 17, 2024
We’ll cover:
What is Diffused Light?
Benefits of Diffused Lighting
How to Implement Diffused Lighting
Light is one of the most important elements in creating compelling cinematic visuals. As a filmmaker, understanding the various types of lighting is key to crafting atmospheres that enhance storytelling. One lighting technique that is indispensable, yet often overlooked, is the use of diffused light. By diffusing light sources, you can achieve a soft, balanced look that is flattering for both people and scenes. This blog will explore the fundamentals of diffused light and how you can leverage it to elevate the production value of your films.
What is Diffused Light?
Diffused light refers to the quality of light when its source is softened or scattered. The goal is to eliminate hard, clearly defined shadows by spreading out and muting the light source. This results in more broadly illuminated and aesthetically pleasing shots with subtler transitions between lit and unlit areas. There are a few main ways light can be diffused in filmmaking:
Diffusion Gels:Sheets placed over a light source that scatter and soften the light passing through. Different densities create varying levels of diffusion.
Softboxes: Fabric enclosures that surround lighting fixtures, dispersing light evenly with no hotspot, perfect for achieving a softbox for lighting effect.
Umbrellas: Works similarly to softboxes in bouncing light onto the subject or scene from multiple angles.
Bouncing Off Reflectors: Placing a semi-glossy reflector next to or behind the light source redirects some of its energy in a softer fashion.
For filmmakers looking to take their lighting to the next level, products like the ZHIYUN CINEPEER CF100 and ZHIYUN MOLUS X100 COB lights offer advanced lighting solutions. The ZHIYUN CF100's ability to switch between HSI and RGB modes, combined with its built-in diffusion options, makes it an excellent tool for achieving diffused lighting with vibrant color effects. On the other hand, the ZHIYUN MOLUS X100’s lightweight design and powerful 100W output, paired with its ZY Mount Ecosystem, provide versatile shaping solutions that can be easily adapted to various diffusion techniques.
The Benefits of Diffused Lighting
Diffused light offers several practical advantages for filmmakers. Since shadows are softened, more detail is retained in dimly lit and transitional areas of a shot. This lets exposures be increased without blowing highlights.
Additionally, diffuse lighting helps minimize facial imperfections and wrinkles on-camera. It is considered more flattering for both people and products being filmed. The lack of defined shadows also lends itself to a more cinematic and moodier atmosphere.
How to Implement Diffused Lighting
Some tips on utilizing diffused light effectively in your films:
Use larger light sources close to subjects for wraparound coverage and minimal shadows. Softboxes, umbrellas, and bouncing techniques work well.
Balance diffused key and fill lighting to maintain dimension while softening shadow contrast. Reflectors on-camera are ideal small fill lights.
Add subtle hair/rim lights behind subjects for quality separation without harsh edges. Diffuse as desired.
For outdoors, flags can be used to block direct sunlight and allow open shade to naturally diffuse light.
Bouncing into large muslin diffusers held overhead during interviews provides soft, consistent illumination.
Consider mounting LED panels or lights inside softboxes on camera rigs for flexible yet soft on-camera lighting. The ZHIYUN MOLUS X100’s ZY Mount system allows for easy attachment of softboxes, ensuring a consistent, diffused light source.
Pair diffused light with warmth-enhancing gels and practical lighting sources to augment realism. The ZHIYUN CINEPEER CF100is particularly well-suited for this, with its rich lighting effects that can add warmth and depth to your scenes.
Mastering the subtle dynamics of soft, diffused lighting takes practice but can significantly elevate the polish and cinematic appeal of your films. While the temptation may be to always bypass diffusion for its intensity, remember that quality over quantity often produces the best results.
FAQ:
Q: What are some common scenarios where diffused lighting works best?
A: Diffused lighting is ideal for portraits, interviews, product photography, and general beauty work where you want to flatter skin tones and textures. It also works well for establishing scenic shots and creating moody atmospheres.
Q: What are some dos and don'ts of mixing diffused with other types of lighting?
A: Do balance diffusion with harder edge lights to keep dimension. Don't overmix sources as it muddies the image. Do gel diffusion to match lighting temperatures. Don't undiffuse key on dark skin tones.
Q: How can diffused light be used creatively beyond just portraits and interviews?
A: Experiments lighting dramatic sequences, architectural details, abstract macro shots, still life setups, and create moody establishing shots for outdoor scenes with diffused lighting placed strategically.
Q: How do you select the right color temperature for diffused light matching content?
A: Match to time of day,white balance, and overall scene palette for coherence but also consider how softer light affects color perception when setting temperature. Warm-balanced lighting works well for diffusion.


Light Up Your Shots: Essential Lighting Tips for Video and Photography
Sep 17, 2024
Lighting is the secret sauce behind every stunning photograph or captivating video. It doesn’t matter how amazing your camera is—without proper lighting, your visuals will fall flat. Whether you’re a YouTuber, photographer, or content creator, mastering lighting techniques can elevate your work from ordinary to extraordinary. In this blog, we’ll explore key lighting setups, tips for using lighting equipment like softboxes and reflectors, and some budget-friendly DIY hacks to get the best out of your shooting environment.
Understanding the Basics
The Three-Point Lighting Setup The three-point lighting setup is a tried-and-true method used by filmmakers, photographers, and vloggers alike. It consists of three light sources: the key light, fill light, and backlight. This combination provides balanced illumination, reducing shadows and adding depth to the subject.
Key Light: This is your main light source and is responsible for most of the lighting in the scene. Typically positioned at a 45-degree angle from the subject, the key light creates shadows that give the subject dimension. Softboxes or even natural window light work well here.
Fill Light: Acting as the secondary light, the fill light softens the harsh shadows created by the key light. You can use an LED lamp, a softbox, or even a DIY solution like a reflective surface to achieve this effect.
Backlight: This light separates the subject from the background, adding a three-dimensional feel to the video. You don't need an expensive setup—a simple lamp placed behind the subject can do the trick.
The Power of Softboxes
The softbox is a photographer’s best friend. They create soft, diffused light that eliminates harsh shadows and gives your subject a natural, even glow. When you’re shooting portraits or filming for YouTube, place a softbox at a 45-degree angle from your subject for flattering, balanced lighting. ZHIYUN’s 90cm parabolic softbox, with excellent design and materials, is easy to setup and provides perfectly defused light.
Lights for Close-Ups
If you’re doing product photography, makeup tutorials, or any content that requires crisp close-ups, a photography light is an excellent tool. It creates even lighting around the subject, reducing shadows and giving a nice catchlight effect in the eyes.
For content creators focused on precision and versatility, a good photography light is essential. ZHIYUN CINEPEER CM15 light an ideal companion for both studio and location shoots, offering professional-grade output in a compact size. Its RGB lighting features and 18 dynamic effects make it perfect for creative experiments, allowing you to adjust brightness, color temperature, and color mix with ease. Whether you're shooting interviews, product photography, or short films, this little powerhouse can help you achieve professional-quality lighting without bulky equipment.
ZHIYUN MOLUS B-Series light is also a good choice. It offers adjustable brightness and color temperature, allowing you to fine-tune your lighting to match the mood or ambient light. With wireless control via an app, you can adjust the lighting settings from anywhere on set, giving you full creative freedom.
Using Reflectors for Balanced Light
A reflector is an essential tool for bouncing light back onto your subject, filling in shadows and creating balance in your lighting setup. You can use professional reflectors or DIY options like aluminum foil, a white sheet, or even a poster board.
Reflectors are perfect for outdoor shoots when you need to redirect natural sunlight or indoor shoots when you want to balance the intensity of your light source. Place the reflector on the opposite side of your key light to gently illuminate any dark areas.
Conclusion:
Mastering lighting is key to creating professional-looking videos and photos. Whether you're working with professional lighting equipment like softboxes and photography lights or using DIY solutions, understanding how to control light is crucial. The more you experiment with different setups, the more control you'll have over the mood, clarity, and overall quality of your content. So grab your lights, get creative, and watch your work shine!
FAQs:
Q: How can photographers use reflectors effectively in outdoor shoots?
A: By bouncing sunlight back onto the subject, reflectors fill in shadows and balance the overall lighting. Different surfaces—white, silver, or gold—can modify the reflected light’s color and intensity to suit the creative vision of the shot.
Q: What is the three-point lighting setup?
A: It consists of a key light, fill light, and backlight, which work together to highlight the subject, fill in shadows, and separate the subject from the background, giving the shot depth and dimension.
Q: How can one control the color temperature of lighting on set?
A: Color temperature can be controlled using adjustable lights like the ZHIYUN MOLUS B-Series. It provides quick access to five levels of brightness from 20-100% and five common color temperatures. This enables photographers and videographers to match ambient lighting or create specific moods.
Q: What is the difference between soft lighting and hard lighting in photography?
A: Soft lighting creates gentle shadows and even lighting across the subject, often achieved with softboxes or diffusers. Hard lighting produces sharp, defined shadows and is usually the result of direct lighting from a single, undiffused light source. It’s often used for dramatic or high-contrast shots.


Shooting at New Angles: Master Dynamic Low Shots with a Gimbal Stabilizer
Aug 27, 2024
We’ll cover:
The Impact of a Low Camera Angle Shot
Getting Low(er) with a Gimbal Stabilizer
Tips for Low-Angle Shots on a Gimbal
Low-angle shots are a powerful cinematic technique that can imbue your video scenes with drama and intensity. However, shooting consistently smooth and steady low shots hands-free can be challenging without the right equipment. A quality gimbal camera stabilizer is key for filmmakers looking to expand their visual storytelling toolbox and shoot more ambitious low-angle sequences.
In this blog, we'll explore the creative and technical applications of low-angle shots along with techniques for nailing them using a gimbal. By the end, you'll have a solid understanding of how to craft compelling scenes and shots from unorthodox angles below eye level.
The Impact of a Low Camera Angle Shot
The placement of the camera in relation to the subject has a significant influence on the viewer's perspective and the overall mood or tone conveyed. In general, low camera angles make subjects appear more powerful, imposing or ominous by literally looking up at them. This perspective puts the viewer in a position of vulnerability and grants the subject an implicit sense of authority over the frame.
For instance, low-angle shots are commonly used in movies to establish a sense of heightened threat or intimidation when pointing the lens upward at an antagonist. The same technique works well for scenes where you want your audience to feel small, overwhelmed or remotely controlled/observed. Beyond film and videos, many portrait photographers will also shoot from a low vantage point to make models seem more alluring or subjects appear elevated in status.
Getting Low(er) with a Gimbal StabilizerSome popular gimbals like the ZHIYUN WEEBILL 3E camera gimbal stabilizer features movable arms and can achieve a maximum downward tilt angle of 120 degrees. The ZHIYUN cinepeer weebill 3e’s three-axis gimbal stabilization isolates camera movement whether you're shooting horizontally, vertically or anywhere in between. This makes gimbals the go-to tool for achieving sophisticated panning and tilting low shots smoothly without a shaking jello effect.
Once balanced on the gimbal, you'll have the freedom and balance necessary to maneuver freely around low-lying subjects or entire scenes hands-free. This opens creative opportunities to capture compelling close-ups, establish establishing/contextual wide shots or frame dynamic footage on the fly from down under. Advanced motors also allow controlled dolly/slide shots from distinct low camera angles.
Tips for Low-Angle Shots on a GimbalHere are some best practices to help you execute impactful low-angle shots on a gimbal stabilizer:
Practice balancing your camera rig until rock steady at different tilt angles before heading on location. Test all controls, especially those at unnatural angles.
Experiment with different focal lengths - wider primes work great for context establishing shots, 50-85mm range best for close-ups and details.
Be mindful of your framing when tilted down - keep essential headroom or lead space appropriate for chosen shot scale.
For intimate close-up sequences, try framing upward at faces from directly between subjects' legs.
Frame contextually appropriate background scenes behind and around your subject for dimension when shooting establishing angles.
Lights and reflectors are crucial when framing faces from below - position to maintain flattering illumination on key features.
Consider natural light sources as part of the scene composition when shooting exterior locations during golden/blue hours.
For impact, pair low-angle footage in videos or films with an appropriately ominous or intense soundtrack.
In addition to a stabilizer, lighting is also crucial. The ZHIYUN CINEPEER CF100 is a portable 100W LED light stick that delivers up to 2610Lux output and features 6 lighting moods and 7 lighting effects. It also supports both HSI and RGB color modes for versatile scene creation and creative expression.
Wrapping UpWith practice, low-angle shots go from difficult to execute smoothly to an expressive technique in your directorial toolkit. A motorized gimbal provides filmmakers the steady control needed to capture unique perspectives from down low. Follow these tips to master dynamic low-shots that grip viewers emotionally and advance compelling visual storytelling.
FAQ:
Q: What is a low-angle shot and what effects does it create?
A: A low-angle shot is one captured from a camera position below eye level of the subject. It makes subjects appear more powerful or imposing by literally looking up at them, putting the viewer in a vulnerable position.
Q: What types of scenes benefit most from using low-angle shots?
A: Scenes that aim to establish a sense of threat, intimidation or dominance over characters. It also works well for expressing a sense of being overwhelmed or remotely observed.
Q: What focal lengths work best for different types of low-angle shots?
A: Wider lenses (12-24mm) for establishing shots, normal lenses (50-85mm) capture close-ups, and telephoto lenses compress background for portraits.
Q: What natural light conditions are ideal for low-angle filming outdoors?
A: Golden hour/blue hour when the sun is lower and lights the subject attractively from below.
- Choosing a selection results in a full page refresh.
- Opens in a new window.